Advertisement
Quick Links
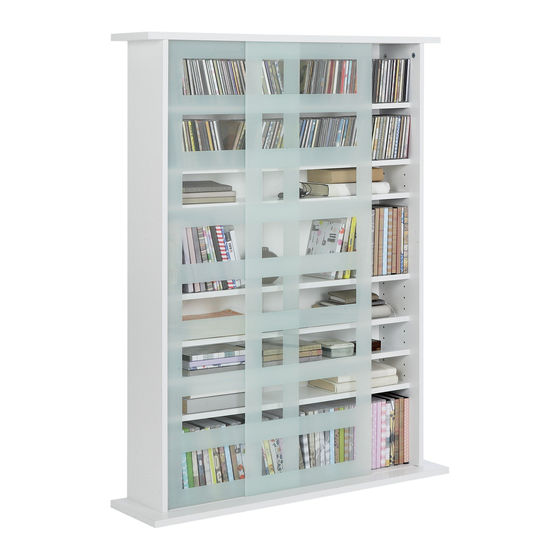
Frosted Glass Sliding Door Media Unit
Assembly Instructions -
875/5694
Please keep for future reference
Dimensions
Width - 92cm
Depth - 24cm
Height -123.4cm
Important –
Please read these instructions fully before starting assembly
If you need help or have damaged or missing parts, call the Customer Helpline:
08456 400800
Issue 1 - 9/07/08
Advertisement

Subscribe to Our Youtube Channel
Related Manuals for Argos 875/5694


Summary of Contents for Argos 875/5694
- Page 1 Frosted Glass Sliding Door Media Unit Assembly Instructions - 875/5694 Please keep for future reference Dimensions Width - 92cm Depth - 24cm Height -123.4cm Important – Please read these instructions fully before starting assembly If you need help or have damaged or missing parts, call the Customer Helpline:...
- Page 2 Safety and Care Advice Important – Please read these instructions fully before starting assembly • Check you have all the • Do not stand or put weight on • We do not components and tools listed on the product, this could cause recommend the pages 2 and 3.
- Page 3 Components - Panels If you have damaged or missing components, call the Customer Helpline: 08456 400800 Please check you have all the panels listed below Base (19.7x92.1cm) (24x92.1cm) Back Panel (81.6x122.8cm) Left side panels Right side panels (18.5x119.7cm) (18.5x119.7cm) Fixed Shelf Adjustable Shelves x 6 Sliding Doors x 2 (13.2x79.1cm)
- Page 4 Components - Fittings Please check you have all the fittings listed below Note: The quantities below are the correct amount to complete the assembly. In some cases more fittings may be supplied than are required. Cam Bolt x 4 Cam Lock x 4 38mm Large screws x 6 12mm Screw x 4 Dowel x 8...
- Page 5 Assembly Instructions Step 1 Attaching side panel Insert the cam bolts into the panel & Step 2 Fixed Shelf Assembly Place cam locks into fixed shelf Foiled edges facing front Ensure arrow on the cam locks face towards the side panel to be attached.
- Page 6 Assembly Instructions Step 3 Attaching top panel Screw 2 x cam bolts into the top Step 4 Attaching the Top Place cam locks into side panels Ensure arrow on the cam locks face towards the to be attached. Attach top using dowels Foiled edges facing front and a dab of glue...
- Page 7 Assembly Instructions Step 5 Base Assembly Attach the base the unit using large screws Foiled edges facing front Step 6 Fixing back panel Attach the backboard using pins screws Ensure the backboard is the right way up so the screws attach to the fixed shelf...
- Page 8 Assembly Instructions Step 7 Attach the shelf supports to the unit in the desired location, depending on the media to be stored. Then install the adjustable shelves Step 8 Glass door assembly Attach the sliding doors to the unit in the corresponding grooves, ensure the finger grip is facing towards the sides...
- Page 9 Assembly Instructions Step 9 Finishing the unit NOTE: It would be useful to ask someone to help Nylon strap you at this stage. Screw It is strongly recommended that the unit is attached to the Wall wall using Wall Strap Drill a hole in the wall at an appropriate position and insert a suitable...
- Page 11 875/5694...
- Page 12 Sliding Glass Door Media Storage Unit Assembly Instructions - 875/5694 Please keep for future reference Dimensions Width - 92cm Depth - 24cm Height -123.4cm Important – Please read these instructions fully before starting assembly If you need help or have damaged or missing parts, call the Customer Helpline: 08456 400800...
- Page 13 Take to your local authority waste disposal centre. Keep these instruction for future Reference • This unit contains toughened • Argos Ltd. MK9 2NW. • If a glass component glass with 5mm nominal thick- is chipped or broken, ness.
- Page 14 If you have damaged or missing components, Components - Panels call the Customer Helpline: 08456 400800 Please check you have all the panels listed below Base (19.7x92cm) (24x92cm) Adjustable shelf x 6 (14x79cm) Fixed shelf (14x79cm) Left side Right side (119.8x18.5cm) (119.8x18.5cm) Back...
- Page 15 Components - Fittings Please check you have all the fttings listed below Note: The quantities below are the correct amount to complete the assembly. In some cases more fttings may be supplied than are required. Cam bolt x 8 Cam lock x 8 45mm Screw x 4 Shelf support X 24 15mm Screw x 28...
- Page 16 Assembly Instructions Step 1 Attaching Side panel Screw the Cam bolt and insert Dowel into the panel & Step 2 Fixed shelf Assembly Place Cam lock into Fixed shelf Ensure arrow on the Cam lock face towards the side panel to be attached.
- Page 17 Assembly Instructions Step 3 Attaching Top panel Screw the Cam bolt into the top Step 4 Attaching the Top Place Cam lock into side panels Foiled edges facing Ensure arrow on the Cam front lock face towards the to be attached. Do not force, if the top does not fit easily check arrows on Cam lock...
- Page 18 Assembly Instructions Step 5 Base Assembly Attach the Base the unit using Screw Foiled edges facing front Step 6 Fixing Back panel Turn the unit up side down carefully. Attach the Back with Screw Attach the Wall strap using Screw into the Back 7 .
- Page 19 Assembly Instructions Step 7 Attach the Shelf support to the unit in the desired location, depending on the media to be stored. Step 8 Then install the Adjustable shelf...
- Page 20 Assembly Instructions Step 9 Glass door assembly Attach the Glass door to the unit in the corresponding grooves, ensure the finger grip is facing towards the sides of the unit, as per the picture. One door needs to slide behind the other.
- Page 21 Assembly Instructions Step 10 Fixing to wall NOTE: It would be useful to ask someone to help you at this stage. It is strongly Wall recommended that the unit is attached to the wall using Wall strap Drill a hole in the wall at Screw+Plug an appropriate position and insert Wall plug...
-
Page 22: A Guide To - Wall Mounting & Fixings
A Guide to - Wall Mounting & Fixings Important: When drilling into walls always Important note: check that there are no hidden wires or pipes etc. If plastic wall plugs Make sure that the screws and wall plugs being used are supplied with your are suitable for supporting your unit.
Need help?
Do you have a question about the 875/5694 and is the answer not in the manual?
Questions and answers