Advertisement
Quick Links
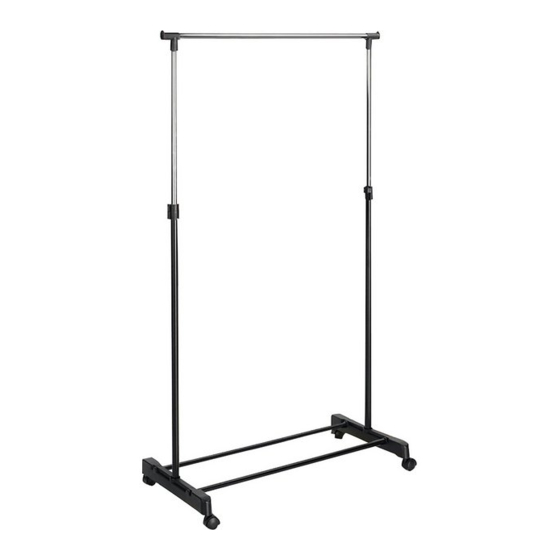
Chrome Tidy Rail
Assembly Instructions
Dimensions
Width - 84.5cm
Depth - 42.5cm
Height - 99.5/167cm
Important
- Please read these instructions fully before starting assembly
If you need help or have damaged or missing parts, call the Customer Helpline: 08456 400800
-
Please keep for future reference
8757049
Advertisement

Subscribe to Our Youtube Channel
Related Manuals for Argos 8757049


Summary of Contents for Argos 8757049
- Page 1 Chrome Tidy Rail Assembly Instructions Please keep for future reference 8757049 Dimensions Width - 84.5cm Depth - 42.5cm Height - 99.5/167cm Important - Please read these instructions fully before starting assembly If you need help or have damaged or missing parts, call the Customer Helpline: 08456 400800...
-
Page 2: Care And Maintenance
Safety and care advice Important - Please read these instructions fully before starting assembly • Check you have all the • Assemble on a soft level surface • We do not components and tools listed on to avoid damaging the unit or your recommend the use pages 2 and 3. -
Page 3: Components - Parts
Components - Parts Please check you have all the panels listed below Rail x 1 (84cm) Bottom Tube x 2 (78cm) Lower Side Support x 2 (86cm) (78cm) Upper Side Support x 2 Foot x 2 (42cm) Castor x 4... - Page 4 Components - Fittings If you have damaged or missing components, call the Customer Helpline: 08456 400800 Please check you have all the fittings listed below Note: The quantities below are the correct amount to complete the assembly. In some cases more fittings may be supplied than are required.
- Page 5 Assembly Instructions Step 1 Fitting the Feet NOTE: It would be useful to ask someone to help you at this stage. Insert Bottom Tubes into Feet Insert Lower Side Supports into Feet...
- Page 6 Assembly Instructions Step 2 Fitting the Rail NOTE: It would be useful to ask someone to help you at this stage. Insert Rail into Connectors Insert Upper Side Supports into Connectors . Insert Castors into Feet...
- Page 7 Assembly Instructions Step 3 Finishing the Unit NOTE: It would be useful to ask someone to help you at this stage. Insert Locks onto the Top of Lower Side Support Align the Screw on Lock into the hole on Lower Side Support Insert Upper Side Support into the Locks Set the height of the unit...
Need help?
Do you have a question about the 8757049 and is the answer not in the manual?
Questions and answers