Table of Contents
Advertisement
Quick Links
Advertisement
Table of Contents

Related Manuals for Russell Hobbs Turbo Lite Ultra RHHS2201


Summary of Contents for Russell Hobbs Turbo Lite Ultra RHHS2201
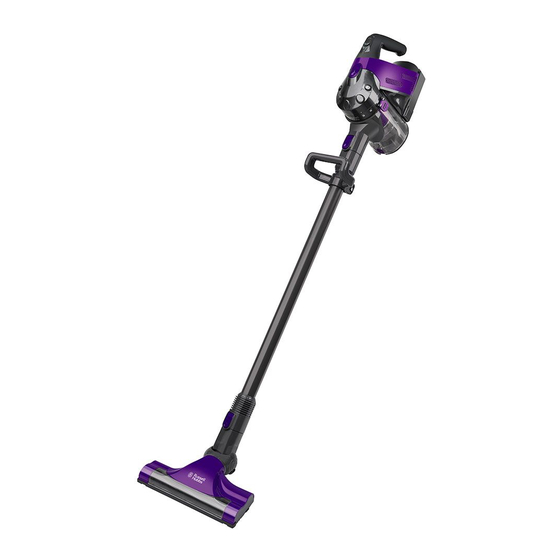
- Page 1 22.2V Turbo Lite Ultra 3 in 1 Cordless Handheld Stick Vacuum Model Number: RHHS2201 For Customer Services & Spare Parts please call 0345 209 7461 Opening times: Monday - Friday 8am – 8pm & Saturday 9am – 1pm Or visit us at www.productcare.co.uk PLEASE RETAIN FOR FUTURE REFERENCE...
-
Page 2: Table Of Contents
CONTENTS Page(s) Safety instructions Turbo Lite Ultra feature diagram Turbo Lite Ultra assembly Charging your Turbo Lite Ultra Using your Turbo Lite Ultra 11-13 Cleaning and care 14-15 Problem solving Guarantee and customer services Spare parts Disposal information Thank you for purchasing your Turbo Lite Ultra 22.2V 3 in 1 Cordless Cleaner. To get the best from your new cleaner, take a few moments to read these instructions and keep them in a safe place for future reference. -
Page 3: Safety Instructions
SAFETY INSTRUCTIONS IMPORTANT SAFETY INSTRUCTIONS READ CAREFULLY AND KEEP FOR FUTURE REFERENCE WARNING: • It is hazardous for anyone other than a competent person to carry out any service or repair operation that involves the removal of a cover which gives protection against exposure to electrical parts. - Page 4 SAFETY INSTRUCTIONS IMPORTANT SAFETY INSTRUCTIONS READ CAREFULLY AND KEEP FOR FUTURE REFERENCE WARNING: • Do not attempt to use the charger with any other product nor attempt to charge this product with another charger • Do not abuse the charger cord; never carry the charger or base by the cord or pull cord to disconnect from an outlet;...
- Page 5 SAFETY INSTRUCTIONS IMPORTANT SAFETY INSTRUCTIONS READ CAREFULLY AND KEEP FOR FUTURE REFERENCE WARNING: • Children should be supervised to ensure they don’t play with the appliance. • Use only as described and for the uses described in this manual • Do not use the charger if power cord or plug has been damaged.
- Page 6 SAFETY INSTRUCTIONS IMPORTANT SAFETY INSTRUCTIONS READ CAREFULLY AND KEEP FOR FUTURE REFERENCE • Do not attempt to empty dust container while unit is running, always turn off the appliance and unplug before emptying/replacing the dust container. • Turn off vacuum cleaner before clearing debris from floor brush assembly •...
-
Page 7: Turbo Lite Ultra Feature Diagram
TURBO LITE ULTRA FEATURE DIAGRAM Handheld Unit Extension Tube Nozzle Powered Floor Head Dust Container Connecting Joint Battery Pack 2 in 1 Crevice/Brush Tool Battery Release Button For Customer Services & Spare Parts please call 0345 209 7461 Opening times: Monday - Friday 8am – 8pm & Saturday 9am – 1pm Or visit us at www.productcare.co.uk... -
Page 8: Turbo Lite Ultra Assembly
TURBO LITE ULTRA ASSEMBLY Before using your cleaner Remove all packaging and lay out the separate components. Check the unit after unpacking for any visual damage such as: • Misaligned or damaged parts • Damage to the main body and separate components •... - Page 9 TURBO LITE ULTRA ASSEMBLY Attaching the Powered Floor Head The powered floor head can be used with or without the extension tube. 1. To use without the extension tube, line up the pins and push the floor head directly onto the nozzle of the handheld unit until it clicks. 2.
-
Page 10: Charging Your Turbo Lite Ultra
CHARGING YOUR TURBO LITE ULTRA Before using for the first time you will need to charge the cleaner. 1. Before charging ensure the cleaner is switched off. 2. Plug the charging cable into the adaptor socket on the side of the handheld unit. -
Page 11: Using Your Turbo Lite Ultra
USING YOUR TURBO LITE ULTRA Once assembled and charged: 1. Unplug the charger and place the floor head on the floor. 2. Slide the power switch on the top of the unit to start the power. 3. Move the cleaner floor head in a forwards and backwards motion over the areas you would like to clean. - Page 12 USING YOUR TURBO LITE ULTRA – 2 IN 1 BRUSH AND CREVICE TOOL Attaching the tools Brush Tool Is it important to align the connecting joint and handheld unit, as misalignment may cause damage. The brush tool can be used for dusting and cleaning delicate surfaces. To use the brush tool, first attach the connecting joint to the handheld unit.
- Page 13 USING YOUR TURBO LITE ULTRA Make sure to empty the dust container before the ‘MAX’ fill line is reached. Press the release button on the top of the vacuum cleaner (1), and lift the dust container clear of the base. Whilst holding over a bin or inside a bin bag, press down the button on the dust container below the nozzle to open the bottom and release the dust (2).
-
Page 14: Cleaning And Care
CLEANING AND CARE: CLEANING THE FILTER Turn off and unplug the cleaner. Remove the dust container as per instructions on page 13. Remove the filter assembly by unclipping the filter release clips on both sides of the dust container. (1) Twist the lid of the dust container assembly to the UNLOCK position and remove (2). - Page 15 CLEANING AND CARE: CLEANING THE FLOOR HEAD Remove the brush head from the unit. Using a flat head screwdriver or a small coin, rotate the lock on the brush cover in an anti-clockwise direction (1) Remove the brush cover and place to one side. Slip the belt over the brush bar, remove the brush bar and pull away any tangled hair or debris.
- Page 16 CLEANING AND CARE Before you clean the appliance, make sure the power is switched off and that the unit is not on the charging stand. To clean the exterior of the device, use a damp, soft cloth and mild detergent. NEVER IMMERSE THE CLEANER IN WATER.
-
Page 17: Problem Solving
PROBLEM SOLVING PROBLEM POSSIBLE PROBLEM POSSIBLE SOLUTION The cleaner hasn’t had Make sure you have plugged in the cleaner to charge for 5 enough charge hours. The light will flash when charging. Make sure there is no signs of damage to the charging The cleaner won’t Charging cable is cable. -
Page 18: Guarantee And Customer Services
GUARANTEE AND CUSTOMER SERVICES At Russell Hobbs, we take all our customer feedback seriously. Feel free to contact our Product Care Team, on 0345 209 7461 Monday – Friday: 8am-8pm & Saturday: 9am – 1pm, who will be more than happy to assist you. -
Page 19: Spare Parts
SPARE PARTS To check the availability of the following spare parts, simply contact our friendly Customer Services team using the details provided at the bottom of this page. HEPA Filter Charging cable Extension tube Powered floor head Crevice/Brush tool Connecting joint Replacement battery For Customer Services &... - Page 20 Made by G2S Ltd under license from Spectrum Brands (UK) Limited. G2S Limited, Wigan, WN2 4AY. Russell Hobbs is the registered trademark of Spectrum Brands (UK) Ltd. This symbol is known as the 'Crossed-out wheelie bin Symbol'. When this symbol is marked on a product/batteries, it means that the product/batteries should not be disposed of with your general household waste.
Need help?
Do you have a question about the Turbo Lite Ultra RHHS2201 and is the answer not in the manual?
Questions and answers