Table of Contents
Advertisement
Quick Links
Advertisement
Table of Contents

Summary of Contents for Russell Hobbs RHCHS1001-C
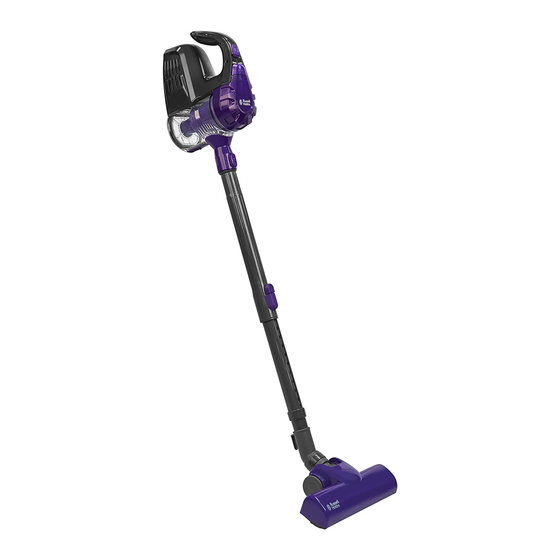
- Page 1 Turbo Lite Corded Handheld Stick Vacuum Model Number: RHCHS1001-C For Customer Services & Spare Parts please call 0345 209 7461 Opening times: Monday - Friday 8am – 8pm & Saturday 9am – 1pm Or visit us at www.productcare.co.uk PLEASE RETAIN...
-
Page 2: Table Of Contents
Contents Page Safety instructions …………………………….……….. Energy Performance Label ………………………………..….. Feature diagram ………………………………..….. Unpacking your vacuum cleaner ……………………………….…….. Assembling your vacuum cleaner ……………………………………… How to empty the dust container ……………………………………… How to clean the filter ……………………………………… How to change the fuse ………………………………………... -
Page 3: Safety Instructions
Safety instructions IMPORTANT SAFETY INSTRUCTIONS READ CAREFULLY AND KEEP FOR FUTURE REFERENCE WARNING: • It is hazardous for anyone other than a competent person to carry out any service or repair operation that involves the removal of a cover which gives protection against exposure to electrical parts. - Page 4 Safety instructions • DO NOT direct at people, animals, electrical outlets, or equipment containing electrical components. • Unplug from outlet when not in use. Do not leave the cleaner unattended while plugged in. • DO NOT use with damaged cord or plug. •...
- Page 5 Safety instructions • This cleaner is intended for internal household use only, do not use outside or for anything other than its’ intended purpose. • DO NOT use this vacuum to pick up water or any other liquids, combustible substances or hot/burning objects. •...
-
Page 6: Energy Performance Label
Energy Performance Label... -
Page 7: Feature Diagram
Feature diagram 5. Power switch 1. Floor head 6. Dust tank 2. Extension tube 7. Nozzle 3. Extension tube release 8. 2 in 1 crevice and brush tool button 9. Connecting joint tool 4. Dust container release button... -
Page 8: Unpacking Your Vacuum Cleaner
Unpacking your vacuum cleaner Before using your vacuum cleaner Remove all packaging and lay out the separate components. Check the unit after unpacking for any visual damage such as: • Misaligned or damaged parts • Damage to the main body and separate components •... -
Page 9: Assembling Your Vacuum Cleaner
Assembling your vacuum cleaner 1. To attached the extension tube, insert the connecting joint tool into the nozzle of the main vacuum cleaner. Then push the end of the extension tube into the connecting joint until securely in place. 2. Slot the cleaning head on to the end of the extension tube. 3. - Page 10 Assembling your vacuum cleaner Attaching the tools 2 in 1 crevice and brush Tool The 2 in 1 crevice and brush tool can be used for cleaning hard to reach areas, dusting and cleaning delicate surfaces. To use the 2 in 1 crevice and brush tool, first attach the connecting joint tool into the nozzle of the vacuum.
-
Page 11: How To Empty The Dust Container
How to empty the dust container Make sure to empty the dust container before the ‘MAX’ fill line is reached. Press the release button on the top of the vacuum cleaner (1), and lift the dust container clear of the base. Whilst holding over a bin or inside a bin bag, press down the button on the side of the dust container below the nozzle to open the bottom and release the dust (2). -
Page 12: How To Clean The Filter
How to remove and clean the filter Turn off and unplug the cleaner. Remove the dust container as per instructions on page 11. Remove the filter assembly by unclipping the dust container lid which is located at the back of the container. Lift the lid off and twist the cyclonic filter anti clockwise to remove from the dust... -
Page 13: How To Change The Fuse
3. Replace the fuse and replace fuse holder, pushing down until locked into place. Important: Only ever use 13 amp fuses. Product Fiche Supplier Trade Mark Russell Hobbs Model Number RHCHS1001-C Indicative annual energy consumption (kWh per year), based on 50 cleaning tasks. Actual 18.7... -
Page 14: Troubleshooting
Troubleshooting... -
Page 15: Connection To The Mains Supply
Connection to the mains supply WARNING: This appliance is designed to operate from a mains supply of AC230V - 240V ~ 50/60HZ. Check that the voltage marked on the product corresponds with your supply voltage. This product is fitted with a 13A plug complying with BS1363. If this plug is unsuitable or needs to be replaced, please note the following: Important: The wires in the mains lead are coloured in accordance with the following code:... -
Page 16: Notes
Notes... - Page 17 Notes...
-
Page 18: Guarantee & Customer Services
GUARANTEE AND CUSTOMER SERVICES At Russell Hobbs, we take all our customer feedback seriously. Feel free to contact our Product Care Team, on 0345 209 7461 Monday – Friday: 8am-8pm & Saturday: 9am – 1pm, who will be more than happy to assist you. -
Page 19: Spare Parts
SPARE PARTS To check the availability of the following spare parts, simply contact our friendly Customer Services team using the details provided at the bottom of this page. HEPA Filter 2 in 1 Crevice / Brush Tool Extension Tube Floor Head Connecting Joint Tool For Customer Services &... - Page 20 Made by G2S Ltd under license. G2S Limited, Wigan, WN2 4AY Produced for Amazon EU SARL, UK Branch, London, EC1A 2FD Russell Hobbs is the registered trademark of Spectrum Brands (UK) Ltd. This symbol is known as the 'Crossed-out wheelie bin Symbol'.


Need help?
Do you have a question about the RHCHS1001-C and is the answer not in the manual?
Questions and answers