
Related Manuals for Traeger BBQ070


Summary of Contents for Traeger BBQ070
- Page 1 OWNER’S MANUAL BBQ070 RESIDENTIAL PELLET GRILL FOR OUTDOOR USE ONLY! WARNING! DO NOT STORE OR USE COMBUSTABLE MATERIALS NEAR THIS APPLIANCE! USE ONLY TRAEGER BRAND HARDWOOD BBQ PELLETS IN THE OPERATION OF THIS UNIT.
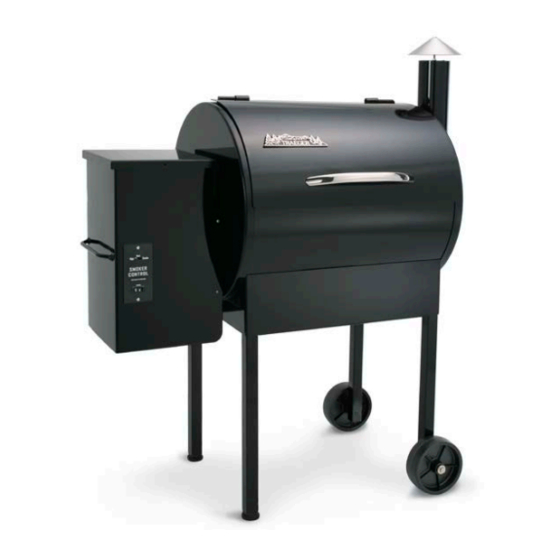
- Page 2 INTRODUCTION Congratulations on your purchase of this Traeger Wood Pellet Grill, Model BBQ070. With proper set-up, operation and maintenance, the Grill will provide you with delicious food and years of cooking enjoyment. NOTE: NUMBERS FOLLOWING PART NAMES REFER TO THE COMPONENT DIAGRAM FOUND NEAR THE END OF THIS MANUAL.
-
Page 3: Section One: Assembly Instructions
SECTION ONE: ASSEMBLY INSTRUCTIONS MOUNTING THE LEGS: 1) Carefully lay the Grill on its back on a non-abrasive surface. Note: The Hopper / Burner Assembly (31) will be mounted to the Grill, but is not shown in the diagram below for clarity. 2) Use the Black Bolts, Washers and Nuts (see Detail “A”) supplied in the Hardware Kit (145) to install the Legs (122) on the left end of the Grill and the Wheel Legs (127) on the right end as shown in the diagram below. - Page 4 ATTACHING THE CHROME DOOR HANDLE: 1) Insert the threaded studs on the Chrome Door Handle (164) through the slots in the Door (102). 2) Place a Zinc Flat Washer, then a Zinc Lock Washer on each threaded stud. Secure with Hex Nuts using the Wrench supplied. Do not over tighten. ATTACHING THE SMOKE STACK AND CHIMNEY CAP ASSEMBLY: 1) Align the holes in the Smoke Stack (136) with the holes in the Smoke Stack Gasket (144), which fits between right end of the Grill and the Smoke Stack (136).
- Page 5 Draft Inducer Fan. Look to see if the Hot Rod is getting hot. DO NOT TOUCH IT! Turn the Switch/Dial OFF. 4) Fill the Pellet Hopper with TRAEGER BBQ PELLETS. WARNING! USE ONLY TRAEGER BRAND BBQ PELLETS, which are specifically made to work in our Grills.
-
Page 6: Section Three: Subsequent Start-Up
Power Cord into an appropriate, grounded electrical outlet. 2) Open the Pellet Hopper and fill with TRAEGER BBQ PELLETS. WARNING! USE ONLY TRAEGER BRAND BBQ PELLETS, which are specifically made to work in our Grills. NEVER use heating fuel pellets in the Grill. -
Page 7: Section Four: Operating Tips
SMOKE setting can also be used to “hold” foods at approximately 180 to 200 degrees F. 2) Your TRAEGER PELLET GRILL should never be moved while it is hot. If you are transporting your Grill in a vehicle after cooking on it, make sure the fire is completely out and the Grill is COLD before placing it in any vehicle. -
Page 8: Section Six: Frequently Asked Questions
Pellet Hopper. Wood pellets, when wet, expand greatly and will jam your Auger. A TRAEGER GRILL COVER to protect the Grill is highly recommended! Covers are available from your Traeger Dealer, or log on to our Web Site –... - Page 9 While watching the fan blade, turn the Switch/Dial to ON. If the fan blade does not turn, turn the Switch/Dial to OFF. This indicates a defective Auger Drive Motor and it will need to be replaced. Contact your Traeger Dealer or the Traeger Parts Department (SECTION SEVEN) to place an order.
- Page 10 WHERE CAN I GET A NEW PART FOR MY GRILL? Check with your Traeger Dealer. They may have the part in stock or can order the part for you. Or you can contact the Traeger Parts Department (SECTION SEVEN) to place an order.
- Page 11 SECTION SEVEN: TRAEGER SUPPORT Parts are identified in the front of this manual on the COMPONENT DIAGRAM PAGE. To order parts: Call, E-mail or write to your Traeger Dealer or Traeger Pellet Grills. Please provide your name, phone number, address, Model and Serial Number of the Grill (located on a label inside the Hopper Lid), along with the part identification.
Need help?
Do you have a question about the BBQ070 and is the answer not in the manual?
Questions and answers