Advertisement
Advertisement
Table of Contents

Summary of Contents for Steamfast SF-707
- Page 1 SF-707 M I G H T Y S T E A M I R O N O W N E R ’ S G U I D E...
- Page 2 IMPORTANT SAFETY INSTRUCTIONS READ ALL INSTRUCTIONS BEFORE USING WARNING • To reduce risk of burns, electrocution, fire, or injury to persons: Do not tamper with or modify this product in any way. The manufacturer assumes no responsibility for damage or injury caused by failure to follow these instructions, improper use, or unauthorized product modification.
- Page 3 11. Unplug power cord before filling or emptying Water Tank. 12. Do not use unit where aerosol-based products are being used, or where oxygen is being administered. 13. Unit is only meant to be used with recommended SF-707 ENGLISH | 3...
- Page 4 accessories. Using other types of attachments may cause damage to unit or injury. 14. When filling Water Tank, only water should be used in unit - other cleaning agents could damage unit or cause injury. Distilled or de-mineralized water is highly recommended, in order to minimize potential build-up of mineral deposits.
- Page 5 If this equipment does cause harmful interference to radio or television reception, which can be determined by turning the equipment off and on, the user is encouraged to contact Steamfast Consumer Service at 1-800-711- 6617. FOR HOUSEHOLD USE ONLY...
-
Page 6: Product Information
Product Information 6 | ENGLISH... -
Page 7: Unit Features
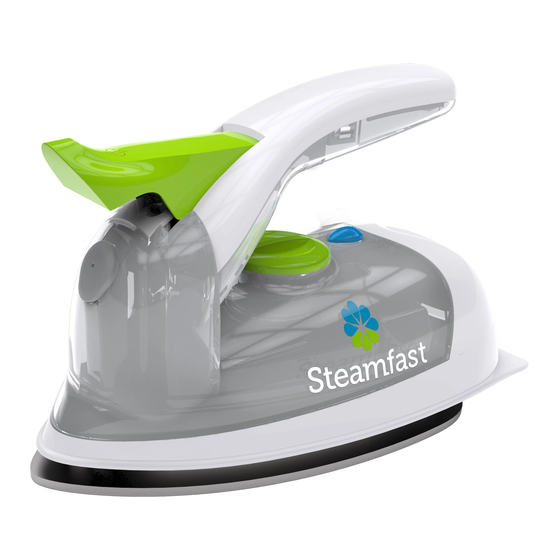
UNIT FEATURES Ironing Plate Main Body Heating Indicator Light Water Tank Cap Water Tank (internal) Steam Button Temperature Control Dial Handle Stands (2) Measuring Cup Dual Voltage SETTING VOLTAGE The Mighty Steam Iron features dual-voltage functionality, which allows it to function correctly in regions with either 100-127V or 220-240V electrical voltage standards. - Page 8 IMPORTANT: By default, the Voltage Selector is set to the 100- 127V setting. Be sure to select the correct voltage for your location before plugging power cord into an electrical outlet. To change the voltage setting: NOTE: These steps assume that Voltage Selector is still set to 100-127V default.
- Page 9 FILLING WATER TANK (FOR STEAM IRONING) 1. Turn off and unplug unit. 2. Place unit (Ironing Plate down) on a flat, heat-resistant surface. 3. Fill Measuring Cup with water up to (1.7 oz. / 50 ml.). NOTE: In order to extend the life of your unit and keep it functioning at it’s maximum potential, it is highly recommended that distilled or de-mineralized water be used in Water Tank.
-
Page 10: Operating Unit
OPERATING UNIT DRY IRONING IMPORTANT: Do not add water to the unit for dry ironing. 1. Plug power cord into a convenient electrical outlet. 2. Turn Temperature Control Dial clockwise so that Heating Light is pointed to desired temperature (FIGURE 3). Heating Indicator Light will illuminate. -
Page 11: Steam Ironing
STEAM IRONING 1. Plug power cord into a convenient electrical outlet. 2. Turn Temperature Control Dial clockwise to at least 320°F (160°C). Lower temperature settings may cause water to drip out of unit. Heating Indicator Light will illuminate. 3. When Heating Indicator Light turns off, unit is ready to Steam. 4. -
Page 12: Storage & Care
Storage & Care CLEANING & STORAGE 1. Turn Temperature Control Dial to Off position. Unplug power cord. 2. Prop unit upright on Stands and allow Ironing Plate to cool for 30 minutes. 3. Open Water Tank Cap and drain any remaining water into a sink or tub. - Page 13 8. Allow unit to steam out full contents of Water Tank. Unplug unit when finished. 5. Allow to cool for 5 minutes, then refill Water Tank with fresh distilled water. Repeat STEP 4 until vinegar odor dissipates. 6. Store unit as normal. ENGLISH | 13...
-
Page 14: Warranty Information
Owner’s Guide (the “Warranty Period”). In the event Buyer notifies Steamfast of a defect in the Product within the Warranty Period, Steamfast will replace the Product and/ or defective component parts, as applicable and necessary. Any... - Page 15 • Damage caused by accident, water, flood, fire or other acts of nature or external causes. Warranty limitations and exclusions • NO OTHER EXPRESS WARRANTY IS GIVEN BY STEAMFAST TO BUYER AND NO REPRESENTATIVE HAS THE AUTHORITY TO MAKE REPRESENTATIONS OTHER THAN THOSE PROVIDED HEREIN.
- Page 16 PERIOD IS PERMITTED BY LAW. • STEAMFAST’S REPLACEMENT OF THE PRODUCT IS THE EXCLUSIVE REMEDY. UNDER NO CIRCUMSTANCES SHALL STEAMFAST BE LIABLE TO BUYER OR ANY OTHER PERSON FOR ANY INCIDENTAL, SPECIAL, CONSEQUENTIAL, OR OTHER DAMAGES, EVEN IF STEAMFAST HAS BEEN ADVISED...
- Page 17 (“RA”) form. Include the Product model number and serial number, as well as Buyer’s name, address, city, state, zip code and phone number when contacting Steamfast for warranty service. Buyer may be required to provide the original sales receipt for purposes of verifying date of purchase.
- Page 18 Steamfast. For ease of recordkeeping, it is recommended that Buyer staple or attached the original sales receipt to this Owner’s Guide and record the Product serial number (located on the Product specifications decal) here: ________________________________________________ © 2018 Vornado Air, LLC • Andover, KS 67002 Specifications subject to change without notice.
- Page 19 Steamfast 415 East 13th Street, Andover, KS 67002 1-800-711-6617 steamfast.com consumerservice@steamfast.com T707-005 R-, V00...


Need help?
Do you have a question about the SF-707 and is the answer not in the manual?
Questions and answers