Table of Contents
Advertisement
Quick Links
Electric HVLP Paint Sprayer
User Manual
[Revision 2.0 August 2019]
READ THIS MANUAL CAREFULLY BEFORE USE – FAILURE TO DO SO MAY RESULT IN INJURY, PROPERTY DAMAGE AND
MAY VOID WARRANTY. • KEEP THIS MANUAL FOR FUTURE REFERENCE. • Products covered by this manual may vary in
appearance, assembly, inclusions, specifications, description and packaging.
Advertisement
Table of Contents

Related Manuals for Unimac PPTSPYUMCAH02


Summary of Contents for Unimac PPTSPYUMCAH02
- Page 1 Electric HVLP Paint Sprayer User Manual [Revision 2.0 August 2019] READ THIS MANUAL CAREFULLY BEFORE USE – FAILURE TO DO SO MAY RESULT IN INJURY, PROPERTY DAMAGE AND MAY VOID WARRANTY. • KEEP THIS MANUAL FOR FUTURE REFERENCE. • Products covered by this manual may vary in appearance, assembly, inclusions, specifications, description and packaging.
-
Page 2: Table Of Contents
Electric HVLP Paint Sprayer Table of Contents Parts List ............................... 1 Product Description ............................ 1 General Rules ............................... 1 Electrical Safety ..............................1 General Safety ..............................2 Transport and Preliminary Checks ....................... 2 Installation..............................3 Multi-Stage Centrifugal Blower........................... 3 Paint and Materials Used ........................... 3 Viscosity ................................ -
Page 3: Parts List
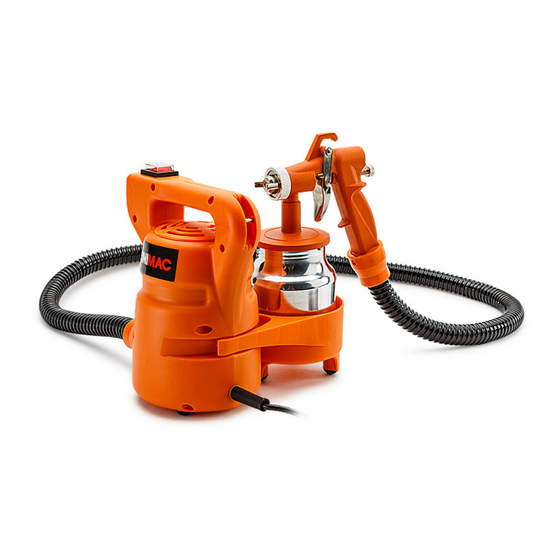
Electric HVLP Paint Sprayer Parts List Product Description The multi-stage centrifugal blower, combined with the “HVLP” spray gun, is the perfect system for precision painting. It is very easy to use and absolutely safe, since the maximum operating pressure is 0.15 bar. Reduced paint atomisation makes the work environment healthier, and saves paint. -
Page 4: General Safety
Electric HVLP Paint Sprayer General Safety • Use the handle to move the machine. Do not pull it by the power cord or by the supply hose. • Do not allow the machine to get wet or e exposed to humidity. •... -
Page 5: Installation
Electric HVLP Paint Sprayer Installation Multi-Stage Centrifugal Blower • Make sure that the power supply voltage is the same as the value indicated on the machine’s technical data plate. • Make sure that the switch (#4) is in position O. •... -
Page 6: Preparing The Object Or Surface To Be Treated
Electric HVLP Paint Sprayer The main viscosity values for the most commonly used products are: • Filler 10 to 20 No thinning • Wood dye 15 to 25 No thinning • 2-pack paint/Oil paint 20 to 35 See manufacturer’s instructions See the product manufacturer’s instructions for the type of thinner and the quantity, in %, to be added (this may vary from 5% to 50%). -
Page 7: Start-Up
Electric HVLP Paint Sprayer • To select the type of spray required (Fig. 6), loosen the adjustment ring (#84), adjust the position, orienting the nozzle (#83) to obtain: HH = horizontal spray, VV = vertical spray, CC = round spray (Fig. 6). The gasket includes four orientation notches that help position the butterfly nozzle (#83). -
Page 8: Paint Gun Operation And Use
Electric HVLP Paint Sprayer Paint Gun Operation and Use The spray can be adjusted very easily as follows (Fig. 3): • Close the adjustment screw (#71) completely (turn it to the right). • Keep pulling the trigger (#77) and slowly open the paint screw (#71) until the correct amount of paint is obtained. -
Page 9: Other Uses Of The Centrifugal Blower
Electric HVLP Paint Sprayer • Release the trigger (#77) at the end of each forward movement and pull it again when the return movement has started. This will avoid any joining marks caused by a second coat, especially for large surfaces (Fig. 8). •... -
Page 10: Thinning
Electric HVLP Paint Sprayer Thinning Inadequate Thinning: • Paint must be thinned by approx. 15% when using a paint sprayer. • Use water to thin water-based paint. • Use turps to thin oil-based paint. • For 1 litre of paint, add 150ml of water/turps. •... -
Page 11: Paint Gun
Electric HVLP Paint Sprayer Paint Gun • Disassemble the gun reservoir (#92). • Pour any residual paint into its container and seal it so that it can be used in the future. • Pour the thinner (in small amounts) into the reservoir, shake the gun lightly and atomise the thinner into a cleaning container. - Page 12 Electric HVLP Paint Sprayer 4. You must run enough water/turps through the sprayer to ensure absolutely all paint has been removed from the system. Keep spraying until there's absolutely no paint coming out - the oil/turps should be completely clear. 5.
-
Page 13: Troubleshooting
Electric HVLP Paint Sprayer Troubleshooting Problem Cause Solution Paint drips on the object to be painted. Product too diluted. Add undiluted product. Spray adjustment. Reduce the paint flow by tightening the screw (#71). Movement too slow. ... -
Page 14: Specifications
Electric HVLP Paint Sprayer If the spray is still not fine enough or the flow is inadequate, try thinning the paint a little more. Do not thin bulk amounts of paint until you have determined the ideal amount and tested it through the sprayer. - Page 15 ©2019 Unimac. All rights reserved. No part of this document, including descriptive content, concepts, ideas, diagrams or images may be reproduced or transmitted in any form or by any means, electronic or mechanical, including photocopying, scanning or recording, or any information storage and retrieval system,...
Need help?
Do you have a question about the PPTSPYUMCAH02 and is the answer not in the manual?
Questions and answers