Table of Contents
Advertisement
Advertisement
Table of Contents

Subscribe to Our Youtube Channel
Related Manuals for Bluebird EF400


Summary of Contents for Bluebird EF400
- Page 1 ENTERPRISE FULLTOUCH HANDHELD COMPUTER EF400 USER Manual...
- Page 2 BLUEBIRD is an emerging global brand, striving to lead the market in performance and mobility. Their products represent reliability, innovation, and innovative technology. Bluebird is a registered trademark from the global brand of Bluebird Inc. and is copyright protected. Bluebird and stylized Bluebird Logo are registered trademarks and symbols of Bluebird Inc.
-
Page 3: Table Of Contents
Contents This user manual is protected by copyright. Registered Trademark User’s Guidance Revision History Contents 1 About This Manual 2 Safety Information 2.1 Symbols ............................... 2 2.2 Device ..............................2 2.3 Environment ............................3 2.4 Battery and Charging ........................... 3 2.5 Distraction ............................ - Page 4 Contents 5.6 Customizing Your Start Screen ......................22 5.6.1 Adding Tiles ..........................22 5.6.2 Arranging Tiles ..........................22 5.6.3 Resizing Tiles ..........................22 5.6.4 Removing Tiles ..........................22 5.7 Using Your Device with Ease ......................23 5.7.1 Quick Actions ..........................23 5.7.2 Setting Date and Time ........................
- Page 5 Contents 7.3 Phone ..............................42 7.3.1 Making Calls ..........................42 7.3.2 Answering Calls ..........................46 7.3.3 Viewing Call History........................47 7.3.4 Making Emergency Calls ....................... 47 7.3.5 Making Speed Dial ........................47 7.3.6 Call Settings ..........................48 7.3.7 Voicemail ............................48 7.4 People ..............................
- Page 6 Contents 7.11.5 Microsoft PowerPoint ........................65 7.11.6 Microsoft OneNote ........................65 7.11.7 Microsoft OneDrive ........................66 7.11.8 Continuing with a Document on Another Device................67 7.12 Music .............................. 67 7.12.1 Playing Music ..........................67 7.12.2 Adding Music ..........................68 7.13 Videos .............................. 68 7.13.1 Playing Video ..........................
- Page 7 Contents 8.8 Snapdragon Camera.......................... 86 8.8.1 Taking Photos ..........................87 8.8.2 Taking Photos in Panoramic Mode ....................87 8.8.3 Recording Videos .......................... 87 8.8.4 Camera Settings ........................... 88 8.8.5 Video Settings ..........................89 8.9 Calendar ............................90 8.9.1 Creating Events ..........................90 8.9.2 Changing Calendar View .......................
- Page 8 Contents 9.2 Personalization ..........................101 9.2.1 Start Screen and Theme ......................101 9.2.2 Sound ............................101 9.2.3 Lock Screen..........................102 9.2.4 Notification ..........................102 9.2.5 Synchronization .......................... 102 9.2.6 Quiet Hours ..........................103 9.2.7 Driving Mode ..........................103 9.2.8 Accessories Apps ........................103 9.3 Accounts ............................
- Page 9 Contents 10 Settings (for Android) 10.1 Wi-Fi ............................... 113 10.2 Bluetooth ............................113 10.3 Ethernet ............................113 10.4 Data Usage ............................ 114 10.5 More Settings..........................114 10.6 Display ............................115 10.7 Sound and Notification ........................116 10.8 Storage ............................117 10.9 Battery ............................
-
Page 10: About This Manual
Bluebird is not liable for any issues caused by third-party apps or accessories. Modifying the device’s operating system or installing software from unknown sources may cause device malfunction or data loss. Improper or unauthorized use of the device is a violation of the Bluebird license agreement and void your one-year limited warranty. -
Page 11: Safety Information
2 Safety Information 2.1 Symbols This manual uses the following symbols to indicate hazards and additional information. Symbol Name Description Warning Indicates situations that could cause injury to yourself or others. Indicates situations that could cause damage to your device or other Caution equipment. -
Page 12: Environment
2 Safety Information 2.3 Environment Do not use the device while driving or operating heavy machinery. Doing so may result in death or serious injury. Do not use the device in locations with combustible goods. Doing so may result in an explosion. Do not use the device in dusty or hot locations. -
Page 13: Overview
3 Overview 3.1 Package Contents The package includes: EF400 device Battery Battery cover Micro USB cable Both Windows and Android packages include same components as described above. The illustrations may differ from your actual items. To purchase additional accessories, contact your sales representative. -
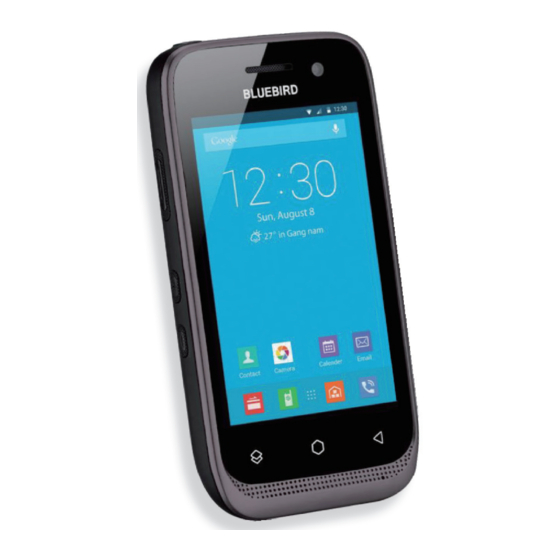
Page 14: Your Device
3 Overview 3.2 Your Device 3.2.1 Front For Windows For Androids & Windows and Android devices are same except for the touch buttons on the front of the devices. No. Name Description Receiver Allows user to hear the person they are talking to while on the phone. Indicates the status of the battery. - Page 15 3 Overview No. Name Description Searches for information online via Bing. If you tap and hold this button for a Search button few seconds, the voice recognition service will launch. Returns to the Start screen. If you tap and hold this button for a few seconds, Start button the FEEDBACK HUB app will launch.
-
Page 16: Back
3 Overview 3.2.2 Back No. Name Description Flash Illuminates your surroundings when using the camera and related apps. Rear camera Takes photos and record videos (13 Megapixel). Secondary Acts as sub microphone, removing noise and echoes. microphone External device Connects external devices such as an RFID reader (optional). connector Battery cover Protects the battery and inner part of the device. -
Page 17: Bottom And Top
3 Overview 3.2.3 Bottom and Top No. Name Description Barcode scanner Scans barcodes by emitting a red laser when you press the related button. Headset jack Connects to the headset. Turns the device or screen on or off. You can lock the device by turning off Power button the screen. -
Page 18: Getting Started
4 Getting Started 4.1 Cards There are two slots for a micro SD and a micro SIM card in the inner compartment on the back of your device. A micro SD card is required for external storage. A micro SIM card is required for using mobile services. All cards should be purchased separately if necessary. -
Page 19: Removing The Cards
4 Getting Started To insert the micro SD card Insert a micro SD card into the slot, pressing the lock with a card. Make sure that the gold contacts on the card are facing down. 4.1.2 Removing the Cards Pull the cards out to remove them, pressing the lock with your finger. -
Page 20: Battery
4 Getting Started 4.2 Battery EF400 uses a Lithium-ion rechargeable battery. Install the provided battery before charging the device. 4.2.1 Installing the Battery Slide the battery lock and lift up the battery cover. When removing the battery cover, be careful not to damage your fingernail. -
Page 21: Removing The Battery
4 Getting Started Replace the cover. Insert the top of the cover first and then press around the edges of the cover until it clicks into place. Close the battery lock to lock the battery cover. 4.2.2 Removing the Battery Remove the battery cover as described in Installing the Battery on page 11. -
Page 22: Charging The Battery
4 Getting Started 4.2.3 Charging the Battery The device can be charged with a charger or a cradle. You can also charge the battery by connecting it to your computer with the provided micro USB cable. Check the device’s battery status on the status bar. You can also check the battery status on the lock screen. -
Page 23: Extending The Battery Life
4 Getting Started 4.2.4 Extending the Battery Life You can improve the battery life in various ways. The easiest way is to use battery saver mode. When the device goes into battery saver mode, some background features and app settings may not function normally. -
Page 24: Basics (For Windows)
5 Basics (for Windows) This chapter explains the basics of how to use your Windows device. If you are an Android device user, refer to Basics (for Android) on page 27. 5.1 Turning the Device On and Off To turn on the device, press and hold the Power button for a few seconds. To turn off the device, press and hold the Power button for a few seconds, and then drag the “slide down to power off”... -
Page 25: Using Airplane Mode
5 Basics (for Windows) To turn the screen on or off, press the Power button. Registering the accounts without turning on the Wi-Fi may incur extra charges depending on your data plan. Do not turn off the device by removing the battery, as this may damage the device. 5.1.1 Using Airplane Mode On the Apps screen, tap Settings >... -
Page 26: Using The Touchscreen
5 Basics (for Windows) 5.3 Using the Touchscreen Use finger gestures to use the touchscreen effectively. Do not touch the screen with any sharp objects. Do not apply too much pressure to the touchscreen. Gesture Name Description Briefly touch an item to open, launch, or select it. Place two fingers on the screen and spread them apart to zoom Zoom in or out in. -
Page 27: Locking And Unlocking The Device
5 Basics (for Windows) 5.4 Locking and Unlocking the Device Lock the screen to protect your device and its data. The device locks if it is not in use for a specified period by default. To unlock the device, press the Power button to turn on the screen and drag upward from the bottom of the screen. -
Page 28: Using The Start Screen
5 Basics (for Windows) 5.5 Using the Start Screen The Start screen is where you open apps and utilities. It is filled with Live Tiles that display real time notifications and updates. No. Name Description Status bar Displays the status icons, notification icons, and current time. Displays the some apps in your device. -
Page 29: Viewing The Status Bar
5 Basics (for Windows) 5.5.1 Viewing the Status Bar The status bar appears at the top of the screen. It displays the status icons and the current time on the right, and the notification icons on the left. No. Description Notification icons Status icons and the current time 5.5.2 Notification Icons... -
Page 30: Status Icons
5 Basics (for Windows) 5.5.3 Status Icons The status icons in the status bar provide information about your device’s status, such as the remaining battery, data, and much more. Icon Description Indicates that your device is connected to an EDGE network. Indicates that your device is connected to a GPRS network. -
Page 31: Customizing Your Start Screen
5 Basics (for Windows) 5.6 Customizing Your Start Screen You can customize the Start screen by rearranging tiles, resizing tiles, and changing the background. 5.6.1 Adding Tiles The tiles allow you to launch an app or activate a feature quickly. They also allow you to see updates at a glance without opening them. -
Page 32: Using Your Device With Ease
5 Basics (for Windows) 5.7 Using Your Device with Ease Make it easier to see, hear, and use the device with its built-in accessibility features. On the Apps screen, tap Settings > ease of access and make the text size bigger, set a high-contrast theme, zoom in on the screen, and more to fit your individual needs. -
Page 33: Setting Date And Time
5 Basics (for Windows) 5.7.2 Setting Date and Time The date and time are automatically set based on the network you are connected to. To set the date and time manually On the Apps screen, tap Settings > date+time and disable Set date and time automatically. If you disable this option, the options for setting date and time will be activated. -
Page 34: Connectivity
5 Basics (for Windows) 5.8 Connectivity Connect to the Internet and other devices with various connection types. 5.8.1 Wi-Fi Connecting to a Wi-Fi network is an easy way of accessing the Internet. When you are out, you can connect to Wi-Fi networks in public places, such as libraries or coffee shops. On the Start screen, scroll down to the bottom of the Start screen, and tap All apps. - Page 35 5 Basics (for Windows) To pair with a Bluetooth device Pair your device with Bluetooth compatible devices. On the Apps screen, tap Settings > Bluetooth. Switch Status to On. Make sure your other devices have Bluetooth enabled. On the Bluetooth device list, tap the device name to pair with your device. Type or confirm the PIN, and tap done or ok, if required.
-
Page 36: Basics (For Android)
6 Basics (for Android) This chapter explains the basics of how to use your Android device. If you are a Windows device user, refer to Basics (for Windows) on page 15. 6.1 Turning the Device On and Off To turn on the device, press and hold the Power button for a few seconds. To turn off the device, press and hold the Power button, then tap Power off. -
Page 37: Resetting The Device
6 Basics (for Android) 6.2 Resetting the Device If your device does not work properly or freezes due to unknown errors, you can force the device to restart. To reset the device’s hardware Press the Volume down button while the device is turning on. Press the Volume up >... -
Page 38: Using The Touchscreen
6 Basics (for Android) 6.3 Using the Touchscreen Use finger gestures to use the touchscreen effectively. Do not touch the screen with any sharp objects. Do not apply too much pressure to the touchscreen. Gesture Name Description Briefly touch an item to open, launch, or select it. Place two fingers on the screen and spread them apart to zoom Zoom in or out in. -
Page 39: Locking And Unlocking The Device
6 Basics (for Android) 6.4 Locking and Unlocking the Device Lock the screen to protect your device and its data. The device locks if it is not in use for a specified period by default. To unlock the device, press the Power button to turn on the screen and drag upward from the bottom of the screen. -
Page 40: Using The Home Screen
6 Basics (for Android) 6.5 Using the Home Screen The Home screen is the starting point for all apps and features. It displays icons, shortcuts, and widgets for apps. No. Description Status bar Widget Location indicator App icons The Home screen has multiple pages. To view other pages, swipe left or right. The white bar at the bottom of the Home screen indicates the current page you are viewing. -
Page 41: Viewing The Status Bar
6 Basics (for Android) 6.5.1 Viewing the Status Bar The status bar appears at the top of the screen. It displays the status icons and the current time on the right, and the notification icons on the left. No. Description Notification icons Status icons and the current time 6.5.2 Notification Icons... - Page 42 6 Basics (for Android) Icon Description Indicates that the alarm is set. Indicates that the device is set to vibrate. Indicates that all sounds are turned off. Indicates that the microphone is muted during a call. Indicates that the battery is fully charged. Indicates that the battery is partially drained.
-
Page 43: Customizing Your Home Screen
6 Basics (for Android) 6.6 Customizing Your Home Screen You can customize the Home screen by adding shortcuts and widgets. 6.6.1 Adding Shortcuts or Widgets Shortcuts added on the Home screen allows you to access and launch apps or activate a feature quickly and easily. -
Page 44: Using Your Device With Ease
6 Basics (for Android) 6.7 Using Your Device with Ease Make it easier to see, hear, and use the device with its built-in accessibility features. On the Home screen, tap > Accessibility and make the text size bigger, increase text contrast, and more to fit your individual needs. -
Page 45: Setting Date And Time
6 Basics (for Android) 6.7.2 Setting Date and Time The date and time are automatically set based on the network you are connected to. To set the date and time manually On the Home screen, tap > Date & time, then disable Automatic date & time. If you turn off this option, the options for setting date and time will be activated. -
Page 46: Connectivity
6 Basics (for Android) 6.8 Connectivity 6.8.1 Wi-Fi Connecting to a Wi-Fi network is an easy way of accessing the Internet. When you are out, you can connect to Wi-Fi networks in public places, such as libraries or coffee shops. On the Home screen, tap >... - Page 47 6 Basics (for Android) To pair with a Bluetooth device Pair your device with Bluetooth compatible devices. On the Home screen, tap > Bluetooth. Turn the Bluetooth On. Make sure the devices you want to pair with have Bluetooth enabled. On the Bluetooth device list, tap the device you want to pair with.
-
Page 48: Applications (For Windows)
7 Applications (for Windows) 7.1 Installing and Uninstalling Apps You can purchase and download apps. On the Apps screen, tap Store. 7.1.1 Installing App In the Store, browse apps by category or tap to search for a keyword. Select an app you want to install and see whether the app is free or not. To download a free app, tap install. -
Page 49: Overview Of Apps
7 Applications (for Windows) 7.2 Overview of Apps On the Start screen, tap All apps to view your all apps. All the apps on your device will be displayed. Icon Name Description Alarms Use to set alarms. Use to check the battery usage and estimated remaining battery. Battery Saver Activate the battery saver mode to conserve the battery life. - Page 50 7 Applications (for Windows) Icon Name Description Use to work on MicroSoft office documents. Create and edit Word, Office Excel documents, view PowerPoint slides, and more. For more information, refer to Microsoft Office Mobile on page 61. Use to save and upload content saved in device. For more OneDrive information, refer to Microsoft OneDrive on page 66.
-
Page 51: Phone
7 Applications (for Windows) 7.3 Phone 7.3.1 Making Calls To make a call on the dialer screen On the Start screen, tap on your Phone app. Tap the keypad, enter a phone number, then tap call to call. Enter digits and tap save to save a new phone number in your Outlook contacts. Touch and hold number 1 key to use voice mail. - Page 52 7 Applications (for Windows) To use options during your call Icon Description speaker Turn the speakerphone on. mute Mute your microphone. Bluetooth Transfer the current call to the connected Bluetooth headset. hold Hold the current call. VIDEO Change to a video call. add call Add another person to the call.
- Page 53 7 Applications (for Windows) To make a call from contacts list On the Start screen, tap on your Phone app. Tap a name in your contacts in the CALL A CONTACT tab to dial the number. If you want to search for a contact, tap Only the contacts with phone numbers will be displayed on this screen.
- Page 54 7 Applications (for Windows) To make a call from history On the Start screen, tap On your Phone app, swipe the screen to the left or right until the history tab appears. Tap a name or a number in your history list to dial the number.
-
Page 55: Answering Calls
7 Applications (for Windows) 7.3.2 Answering Calls When you receive a phone call, the incoming call screen displays the caller ID, and any other available information, such as the caller’s name, if saved in the Contacts list. Tap one of the following buttons: Icon Description answer... -
Page 56: Viewing Call History
7 Applications (for Windows) 7.3.3 Viewing Call History To view the call log by incoming, outgoing, and missed calls or to clear the call history, tap on the Start screen. The call history displays the dialed, missed, and received calls. 7.3.4 Making Emergency Calls You can make emergency calls to 911 even when your phone is locked, not registered for mobile network service, or a SIM is not inserted. -
Page 57: Call Settings
7 Applications (for Windows) 7.3.6 Call Settings On the Start screen, tap > settings on any tab of the Phone app. This SETTINGS can only be accessed through this app. You can modify various call options. Text reply: Switch the text reply to On to send a text message when you cannot answer a call. To edit the text message, tap edit replies and enter a message to send. -
Page 58: People
7 Applications (for Windows) 7.4 People Use the People app to create rooms and groups for privately sharing information or having chat. Also you can save, view, and edit your contacts. on the Start screen or tap People on the Apps screen. 7.4.1 Making a Room or Group You can create a room for privately sharing information, such as schedule, photos, etc. -
Page 59: Editing Contacts
7 Applications (for Windows) 7.4.3 Editing Contacts To edit a contact details On the Start screen, tap Swipe the screen on People app until the CONTACTS tab appears. Tap the name of a contact to view their details and tap . -
Page 60: Finding Contacts
7 Applications (for Windows) 7.4.4 Finding Contacts You can search for contacts by name or number. On the Start screen, tap Swipe the screen on People app until CONTACTS tab appears. Enter letters of their name or digits of their phone number. As you type, contacts that includes the letters or numbers will appear below the search box. -
Page 61: Messaging
7 Applications (for Windows) 7.5 Messaging 7.5.1 Sending Messages On the Start screen, tap Tap the To field and enter the recipient’s phone number or name. > choose a contact. Type a recipient’s name or phone number. Tap and type the message contents in the message field. To attach a file, tap . -
Page 62: Email
7 Applications (for Windows) 7.6 Email Use this app to send or view emails. On the Start screen, tap To use web and data services, your device must be connected to a Wi-Fi or data networks. For more information on connecting to Wi-Fi, refer to Wi-Fi on page 25. Using the Internet browser or downloading from the Internet via your data network may incur extra charges depending on your data plan. -
Page 63: Reading An Email
7 Applications (for Windows) 7.6.2 Reading an Email On the Start screen, tap In the mailbox, tap an email to open it. Read the email. To save an attachment to your device, tap the attachment to download. Or, tap and hold the attachment and tap save. -
Page 64: Barcode
7 Applications (for Windows) 7.7 Barcode The EF400 includes a 2D barcode scanner. To use the barcode scanning function, On the Apps Screen, tap BB_EF_ScannerApp. Press the Right or Left button. A red laser will come from the top of your device. -
Page 65: Camera
7 Applications (for Windows) 7.8 Camera Use this app to take photos or record videos. On the Apps screen, tap Camera. If a micro SD card is installed, the photos and videos will be saved on the internal storage. The first time you open the Camera app, you will be prompted to add location tags to your photos and display the information. -
Page 66: Recording Videos
7 Applications (for Windows) 7.8.3 Recording Videos On the Apps screen, tap Camera. to switch to video mode in the viewfinder. Aim the camera at the object and adjust the image. To zoom in or out, spread or pinch two fingers on the screen. -
Page 67: Video Settings
7 Applications (for Windows) 7.8.5 Video Settings You can adjust various video options. This video settings menu can only be accessed through this app. On the Apps screen, tap Camera. to switch to video mode in the viewfinder. Tap the icons at the top of the screen. To add lenses to your camera, tap . -
Page 68: Sharing Photos Or Videos
7 Applications (for Windows) 7.9.2 Sharing Photos or Videos On the Apps screen, tap Photos. Tap all or albums to show the photos or videos. Tap a photo or video to share. and choose a share method and follow the on-screen instructions. Or, tap and hold the photo or video from the all or albums tab to share and tap share.. -
Page 69: Internet
7 Applications (for Windows) 7.10 Internet Use this app to browse the Internet. on your Start screen or Internet Explorer on the Apps screen. 7.10.1 Defining Internet Connections Change the Wi-Fi and mobile data settings to reduce data costs while using the web and data services. Using a Wi-Fi connection is generally faster and less expensive than using a mobile data connection. -
Page 70: Microsoft Office Mobile
7 Applications (for Windows) To open multiple webpages When you want to visit several webpages at the same time, you can open up to multiple browser tabs and switch between them. On the Start screen, tap To open a new page, tap >... -
Page 71: Creating Your Microsoft Account
7 Applications (for Windows) 7.11.1 Creating Your Microsoft Account Create a Microsoft account when you first set up your device or any time later. If you create a Microsoft account on your device, a mail account is added automatically. To use web and data services, your device must be connected to a Wi-Fi or data networks. Using the Internet browser or downloading from the Internet via your data network may incur extra charges depending on your data plan. -
Page 72: Microsoft Word
7 Applications (for Windows) 7.11.3 Microsoft Word To create a Word document On the Start screen, tap Swipe to recent. > a blank Word file or a template. When you stop working on a document and go back to it later, you will be in the same place where you left off in it. -
Page 73: Microsoft Excel
7 Applications (for Windows) 7.11.4 Microsoft Excel To create an Excel workbook On the Start screen, tap Swipe to recent. > a blank Excel file or a template. Tap a cell or the text box, and enter values or text. To switch between worksheets or charts in a workbook, tap To calculate (sum, average, etc.) numbers in a range of cells quickly, tap To find a word or number data, tap... -
Page 74: Microsoft Powerpoint
7 Applications (for Windows) 7.11.5 Microsoft PowerPoint To view or edit a PowerPoint presentation On the Start screen, tap Swipe to recent or places. When swiping to recent, skip to the step 3. When swiping to places, go to the next step. Tap the location of the file you want to view. -
Page 75: Microsoft Onedrive
7 Applications (for Windows) To view or edit a note On the Apps screen, tap OneNote > a note. View or edit the content. To find a word or phrase, tap To add the note to the Start screen, tap >... -
Page 76: Continuing With A Document On Another Device
7 Applications (for Windows) 7.11.8 Continuing with a Document on Another Device Upload and save your documents on OneDrive, and access your documents from any other devices. When working on an Office document, tap > save as..Enter a file name, set the file location to OneDrive. Tap save. -
Page 77: Adding Music
7 Applications (for Windows) 7.12.2 Adding Music On the Start screen, tap Connect the device to the computer with micro USB cable. Open Windows Explorer. If you are using Windows 8 and higher version, open File Explorer. Click the name of device > Phone > Music under Computer. Drag the file you want to add on the device from the computer and drop it in Music folder. -
Page 78: Podcast
7 Applications (for Windows) 7.14 Podcast Use this app to enjoy the latest audio and video podcasts on your device. 7.14.1 Downloading and Playing Podcasts On the Start screen, tap Enter the podcast name or the URL you want to find on the field in GET PODCASTS tab. and select one from the podcast lists. -
Page 79: Adding An Appointment
7 Applications (for Windows) 7.15.3 Adding an Appointment Add appointments to the calendar. You can set a reminder for an appointment. On the Apps screen, tap Calendar. > Enter the appointment details. Tap more details > Reminder and set the date and time. to save the appointment in your calendar. -
Page 80: Map
7 Applications (for Windows) 7.17 Map Use this app to find your location on a map, search for locations, and get directions to your destination. 7.17.1 Get Directions to Your Destination On the Apps screen, tap Maps. and enter the start and end point in each field. to get directions and calculate the time required to get to the destination. -
Page 81: Applications (For Android)
8 Applications (for Android) 8.1 Installing and Uninstalling Apps You can purchase and download apps. On the Apps screen, tap located in the top right of the screen. 8.1.1 Installing App In the Play Store, browse apps by category or enter the keywords on search field to search for a keyword. Select an app you want to install and see whether the app is free or not. -
Page 82: Overview Of Apps
Use to scan and read the barcode information. For more information, refer to BarcodeTest Barcode on page 86. BBSettings Use to change your Bluebird settings in Symbology and Fix/Volume/Mode. BBUpdate Use to update your device. Bluebird File Use to organize and manage your files. -
Page 83: Phone
8 Applications (for Android) 8.3 Phone 8.3.1 Making Calls On the Home screen, tap > . You can also directly open the Phone app from the lock screen. Swipe the screen to left while tapping You can simply dial the number, tap on a number on the call log, or choose a number in your contacts, or use Voice Dialer. - Page 84 8 Applications (for Android) To use options during your call Icon Description Turn the speakerphone on. Mute your microphone. Open the keypad. Hold a call. Add another person to the call. End the call.
- Page 85 8 Applications (for Android) To make a call from contacts list On the Home screen, tap > Tap the CONTACTS tab on your Phone app. Tap a name in your contacts list and then tap a phone number to dial the number.
- Page 86 8 Applications (for Android) To make a call from call log On the Home screen, tap > Tap the RECENTS tab on your Phone app. You can also open the call log by tapping > Call History. Tap a name > CALL BACK to dial the number.
- Page 87 8 Applications (for Android) To make a call from speed dial You can make quick calls without entering a phone number or searching for a contact with the speed dial function. You should assign a speed dial number to a contact first. For more information on creating new speed dial, refer to Making Speed dial on page 81.
-
Page 88: Answering Calls
8 Applications (for Android) 8.3.2 Answering Calls When you receive a phone call, the incoming call screen opens with the caller ID, and any other available information, such as the caller’s name, if saved in the contacts list. Tap and drag to one of the following icons: Icon Description... -
Page 89: Viewing Call Log
8 Applications (for Android) 8.3.3 Viewing Call Log The call log displays the dialed, missed, and received calls. On the Home screen, tap > Tap the RECENTS tab on your Phone app. You can also open the call log menu by tapping >... -
Page 90: Making Emergency Calls
8 Applications (for Android) 8.3.5 Making Emergency Calls You can make emergency calls to 911 even when your phone is locked, not registered for mobile network service, or a SIM is not inserted. No charges for making emergency calls. The emergency numbers may vary by country. 8.3.6 Making Speed dial To create a new speed dial On the Home screen, tap... -
Page 91: Phone Settings - Call Settings
8 Applications (for Android) 8.3.8 Phone Settings - Call Settings On the Home screen, tap > > > Settings > Call settings on any tab on your Phone app. This Call settings menu can only be accessed through this app. You can modify various call options. SUBS Settings Voicemail: Tap to set up your voicemail. -
Page 92: Voice Dialer
8 Applications (for Android) – TTY VCO: Enable VCO (Voice Carry over). VCO feature is designed for the people who can speak, but have difficulty hearing on the phone. You can use your voice to speak and read the other person’s response in a text typed by the operator. -
Page 93: Editing Contacts
8 Applications (for Android) 8.5.2 Editing Contacts To edit contact details On the Home screen, tap > All your contacts are listed in the ALL CONTACTS tab. Tap the name of a contact to view their details. Tap When you are finished, tap on the top left of the screen. -
Page 94: Finding Contacts
8 Applications (for Android) 8.5.3 Finding Contacts You can search for contacts by name or number. On the Home screen, tap > All your contacts are listed in the ALL CONTACTS tab. Enter letters of their name or digits of their phone number. As you type, contacts that includes the letters or numbers will appear below the search box. -
Page 95: Barcode
8 Applications (for Android) 8.7 Barcode The EF400 includes a 2D barcode scanner. To use the barcode scanning function, On the Home screen, tap > Tap Open to start scanning the barcode. Press the Right or Left button. A red laser will come from the top of your device. -
Page 96: Taking Photos
8 Applications (for Android) 8.8.1 Taking Photos On the Home screen, tap > and make sure that camera mode is set to Aim the camera at the object. To zoom in or out, spread or pinch two fingers on the screen. to take a photo. -
Page 97: Camera Settings
8 Applications (for Android) 8.8.4 Camera Settings You can modify various camera options. This camera settings menu can only be accessed through this app. On the Home screen, tap > Tap the flash status icon on the bottom right of the screen, or tap and hold the viewfinder to change the camera settings. -
Page 98: Video Settings
– Time lapse: Tap to turn the Time lapse feature on or off. Turn it on to set a time interval. – Video quality: Tap to set the video quality. – Video Encoder: Tap to set the video encoder. The EF400 supports MPEG4, H263, and H264 video playback. -
Page 99: Calendar
8 Applications (for Android) – Video HDR: Tap to select the checkbox to turn on the HDR feature, which takes multiple videos at different exposures and combines them into one vibrant video. – White balance: Tap to select the most suitable light source for your video. –... -
Page 100: Editing And Deleting Events
8 Applications (for Android) 8.9.4 Editing and Deleting Events On the Home screen, tap > > Schedule, Day, 3 Day, Week or Month. In Schedule, Day, 3 Day or Week view, tap an event to view its details. If you try to view an event’s details in Month view, tap an event and the screen will switch to Day view. -
Page 101: Clock
8 Applications (for Android) 8.10 Clock Use this app to set an alarm, view the time in cities around the world, or use a timer or a stopwatch. On the Home screen, tap > No. Description Alarm Clock Timer Stopwatch More options Current time and date of the location depending on your connected mobile network service Current time and date of the added cities... -
Page 102: Alarm And Clock
8 Applications (for Android) 8.10.1 Alarm and clock You can set, and delete an with the Clock app. To set an alarm On the Home screen, tap > > and set the time for the alarm and tap OK. Select the Repeat checkbox and select the days you want the alarm to sound on. If you want to change the alarm ringtone, tap Default ringtone. -
Page 103: Timer
8 Applications (for Android) 8.10.2 Timer On the Home screen, tap > > Tap the keypad to specify the time period. It is entered in the following order: hour, minute, second. If you want to delete the number you entered, tap to start the timer. -
Page 104: Settings
8 Applications (for Android) 8.10.4 Settings You can modify various clock options. This clock settings menu can only be accessed through this app. On the Home screen, tap > > Settings on any tab of Clock app. Clock Style: Tap and set the style of the Clock screen to analog or digital. Automatic home clock: Turn the Automatic home clock on to set a clock for your home city while traveling in a different time zone. -
Page 105: Downloads
8 Applications (for Android) 8.11 Downloads Use this app to view your downloaded files. On the Home screen, tap > . You can view the file list by date or by size. Select a file to open with an appropriate app. 8.12 Calculator Use this app for mathematical calculations. -
Page 106: Drive
8 Applications (for Android) 8.13.7 Drive Store your content on the cloud, access it from anywhere, and share it with others. 8.13.8 YouTube Watch or create videos and share them with others. 8.13.9 Photos Manage photos, albums, and videos that you have saved on the device. 8.13.10 Hangouts Chat with your friends individually or in groups and use images, emoticons, and video calls while you are chatting. -
Page 107: Settings (For Windows)
9 Settings (for Windows) Use this app to configure your Windows device. On the Apps screen, tap Settings. You can also add and tap a tile Settings on the Start screen. Tap enter your search term to search the settings menu. 9.1 Network and Wireless 9.1.1 Wi-Fi On the Apps screen, tap Settings >... -
Page 108: Cellular Data And Sim Card
9 Settings (for Windows) 9.1.4 Cellular Data and SIM Card On the Apps screen, tap Settings > cellular+SIM. Switch Data connection to On to connect to a mobile data network. If you connect the cellular data, it may incur extra charges. SIM for data connection: Tap drop-down list to select the SIM card to use for data connections. -
Page 109: Internet Sharing
9 Settings (for Windows) 9.1.6 Internet Sharing On the Apps screen, tap Settings > internet sharing. Switch Sharing to On to share the cellular data via Wi-Fi or Bluetooth. Tap Share over drop-down list to select the desired sharing method: Wi-Fi, Bluetooth. to edit the broadcast name and password. -
Page 110: Personalization
9 Settings (for Windows) 9.2 Personalization 9.2.1 Start Screen and Theme On the Apps screen, tap Settings > start+theme. Use this setting to personalize the Start screen by changing the background color and accent color. Background: Tap drop-down list to select the background color. Accent color: Tap drop-down list to select the color of highlighting characters. -
Page 111: Lock Screen
9 Settings (for Windows) 9.2.3 Lock Screen On the Apps screen, tap Settings > lock screen. Use this setting to configure the lock screen of your device. Background: Tap drop-down list to choose an image on your device or from the Internet to set as your lock screen. -
Page 112: Quiet Hours
9 Settings (for Windows) 9.2.6 Quiet Hours On the Apps screen, tap Settings > quiet hours. Use this setting to enable Quiet hours mode when you do not want to be interrupted by your device’s alarm or incoming calls. 9.2.7 Driving Mode On the Apps screen, tap Settings >... -
Page 113: System
9 Settings (for Windows) 9.4 System 9.4.1 About On the Apps screen, tap Settings > about. Use this setting to edit and check your device’s information. edit name: Tap to edit your device’s name by entering the new name and then tapping to save. -
Page 114: Storage Sense
9 Settings (for Windows) 9.4.5 Storage Sense On the Apps screen, tap Settings > storage sense. Use this setting to check the internal or external card storage space. Also, you can change the default storage space from phone to SD card and vice versa when storing new contents. 9.4.6 Battery Saver On the Apps screen, tap Settings >... -
Page 115: Apps Corner
9 Settings (for Windows) 9.4.9 Apps Corner On the Apps screen, tap Settings > apps corner. Use this setting to share some apps with other users when they borrow your device. You can make another Start screen for other users. Apps: Tap to select the apps you want to share. -
Page 116: Microsoft Office
9 Settings (for Windows) 9.4.11 Microsoft Office On the Apps screen, tap Settings > Office. Use this setting to manage and check the version of Microsoft Office installed on your device. User name: Tap field to enter your user name to identify yourself in documents. reset Office: Tap to reset the Microsoft Office apps. -
Page 117: Time And Language
9 Settings (for Windows) 9.5 Time and Language 9.5.1 Date and Time On the Apps screen, tap Settings > date+time. Use this setting to manage the date and time settings. 24-hour clock: Switch this option to On to use 24-hour format. If disabled, the clock will be displayed in the 12-hour format. -
Page 118: Keyboard
9 Settings (for Windows) 9.5.4 Keyboard On the Apps screen, tap Settings > keyboard. Use this setting to configure the keyboard settings. Tap add keyboards to add the keyboard types from the list. You can select the multiple checkboxes at once. -
Page 119: Speech
9 Settings (for Windows) – Background color: Tap to select the background color for the browser. – Background transparency: Tap to adjust the transparency of the browser background. – Window color: Tap to select the color of the browser window. –... -
Page 120: Advertising Id
9 Settings (for Windows) 9.7.3 Advertising ID On the Apps screen, tap Settings > advertising id. Use this setting to send your unique ID to app developers and advertising networks to help them improve the quality of their service. Switch Advertising ID to On to use this feature. If you want to clear all data from your advertising ID, tap reset your advertising ID. -
Page 121: Extras
9 Settings (for Windows) 9.9 Extras 9.9.1 Touch Setting On the Apps screen, tap Settings > touch setting. Tap Glove mode when you are using the device with gloves or Normal mode in according to your situation. 9.9.2 Button Setting On the Apps screen, tap Settings >... -
Page 122: Settings (For Android)
10 Settings (for Android) Use this app to configure your Android device. On the Home screen, tap . You can also add and tap a widget Settings on the Home screen. Tap enter your search term to search the Settings menu. 10.1 Wi-Fi On the Home screen, tap >... -
Page 123: Data Usage
10 Settings (for Android) 10.4 Data Usage On the Home screen, tap > Data usage. Turn Cellular data on to use the cellular data for mail app, GPS, etc. Turn Set cellular data limit on to make your device turn off cellular data once it reaches the set limit. The orange bar appears in graphs on the screen. -
Page 124: Display
10 Settings (for Android) 10.6 Display Use these Display settings to change the screen brightness and wallpaper, enable screen rotation, set the sleep time, change the font size, and configure other features of the display. On the Home screen, tap >... -
Page 125: Sound And Notification
10 Settings (for Android) 10.7 Sound and Notification Use this Sound settings to configure sound settings such as the call ringtone or system notification volume. On the Home screen, tap > Sound & notification. Sound Media volume: Tap and move the slider to adjust the volume of media. Alarm volume: Tap and move the slider to adjust the volume of the alarms. -
Page 126: Storage
10 Settings (for Android) 10.8 Storage You can check the internal or SD card storage space. Tap Erase SD card to delete all data saved on the SD card. On the Home screen, tap > Storage. 10.9 Battery Use these Battery settings to monitor battery usage. On the Home screen, tap >... -
Page 127: Users
10 Settings (for Android) 10.12 Users Use this User settings to manage users of your device. On the Home screen, tap > Users. Tap Add user to add other users. and select the checkbox for Add users when device is locked to add other users when the device is locked. - Page 128 10 Settings (for Android) Smart Lock – Trusted devices: Add a trusted device to keep your device unlocked when connecting via Bluetooth or NFC. – Trusted places: Add a trusted place to set your device to unlock when it is in select locations. –...
-
Page 129: Accounts
10 Settings (for Android) 10.15 Accounts Use this settings to manage accounts of your device. On the Home screen, tap > Accounts. Tap Add account to add other accounts. and select the checkbox for Auto-sync data to sync the data automatically. 10.16 Language and Input Use this Settings menu to change language and input method. -
Page 130: Backup And Reset
10 Settings (for Android) 10.17 Backup and Reset Use this Settings menu to perform factory reset. On the Home screen, tap > Backup & reset. Backup & restore Back up my data: Turn on this option to back up app data, Wi-Fi passwords and other data to Google servers. -
Page 131: Printing
10 Settings (for Android) Captions: Tap and switch this option to On to make captions appear on the bottom of the screen. You can set the language, text size, and caption style. Magnification gestures: Tap and switch this option to On to zoom in and out by triple-tapping the screen. You can also temporarily magnify screen content by triple-tapping and holding it. -
Page 132: Appendix A Device Specification
Appendix A Device Specification Physical Characteristics Dimensions (W x H x D) 68 X 136 X 15.4 mm Weight 200 g (with battery) Power input , 2 A Display 4-inch HD Gorilla Glass 3 Display; 800 X 480 pixels Rechargeable, 3.8 V, 2,860 mAh, Li-ion Standard battery Rechargeable, 3.8 V, 5,720 mAh, Li-ion Extended battery... - Page 133 Appendix A Device Specification User Environment Characteristics Durability TankSmith™ Technology -10°C to 50°C (-2°F to 122°F) Operating temperature Storage temperature -40°C to 70°C (-40°F to 158°F) Humidity 95%, non-condensing Communication Options LTE, HSPA+/HSPA/UMTS, EDGE/GSM, CDMA - LTE 3 (23.54 dBm), LTE 7 (24.1 dBm), LTE 20 (24.01 dBm) WWAN Radio (optional) - WCDMA 1 (24.87 dBm), WCDMA 8 (24.01 dBm) - GSM900 (32.3 dBm), GSM1800 (29.7 dBm)
-
Page 134: Appendix B Accessories
Appendix B Accessories Cradles 1-slot charging cradle: One charging slot for a handset, one charging slot for a spare battery, one micro USB port 4-slot charging cradle: Four charging slots for handsets, four charging slots for spare batteries, one micro USB port 1-slot Ethernet cradle: One charging slot for a handset, one charging slot for a spare battery, one micro USB port, Ethernet port... -
Page 135: Appendix C Troubleshooting
You can contact your local sales representative or you can send the device via a delivery service to Bluebird’s Korean headquarters. When sending the package, make sure you pay for the shipping fee in advance. When the repair is finished, Bluebird will cover the shipping cost. -
Page 136: Appendix D Safety Regulatory
Appendix D Safety Regulatory FCC compliance information This device complies with Part 15 of the FCC’s Rules. Operation is subject to the following two Conditions: This device may not cause harmful interference, and This device must accept any interference received, including interference that may cause undesirable operation. - Page 137 Hereby, Bluebird Inc. declares that the radio equipment type EF400 is in compliance with Directive 2014/53/ EU. This device can be operated in at least one Member state without infringing applicable requirements on the use of radio spectrum.
-
Page 138: Appendix E Warranty And Support
Bluebird will repair or replace the defective product according to its warranty policy. If the defective product within the range of warranty is not repairable or replaceable, Bluebird shall refund the purchasing price within a designated period from the date of receiving a notice of defect. - Page 139 We receive the products for our after-sales service through mail, delivery services and hand delivery only in principle. If you bought the product from a party other than Bluebird or an authorized Bluebird reseller, you need to register the product before using our after-sales service.
- Page 140 The warranty will not cover any damage which occurs during delivery. We advise you to use the box and protective cover supplied with the product. Make sure to deliver the product in a safe way. Bluebird assumes no responsibility for the loss of the product during delivery.
- Page 141 #1103, Gplus Kolon Digital Tower 11F, (GMT Time: +9 Hours) Digital-ro 26-gil 123, Guro-gu, Seoul, The center is closed on Saturdays, Republic of Korea(08390) Sundays, and Korean national holidays. Bluebird constantly strives to bring utmost satisfaction to all our customers.
Need help?
Do you have a question about the EF400 and is the answer not in the manual?
Questions and answers