Table of Contents
Advertisement
Advertisement
Table of Contents

Related Manuals for Bluebird VF550


Summary of Contents for Bluebird VF550
- Page 1 VF550 QUICK GUIDE...
-
Page 2: This User Manual Is Protected By Copyright
BLUEBIRD is an emerging global brand, striving to lead the market in performance and mobility. Their products represent reliability, innovation, and innovative technology. Bluebird is a registered trademark from the global brand of Bluebird Inc. and is copyright protected. • Bluebird and stylized Bluebird Logo are registered trademarks and symbols of Bluebird Inc. -
Page 3: Safety Information
1 Safety Information 1.1 Symbols This manual uses the following symbols to indicate hazards and additional information. Symbol Name Description Warning Indicates situations that could cause injury to yourself or others. Caution Indicates situations that could cause damage to your device or other equipment. Note Indicates additional information that can help you get the most out of the device. -
Page 4: Frequency Interference
Safety Information 1.3 Environment • Do not use the device while driving or operating heavy machinery. Doing so may result in death or serious injury. • Do not use the device in locations with combustible goods. Doing so may result in an explosion. •... -
Page 5: Package Contents
2 Overview 2.1 Package Contents The package includes: VF550 device Battery USB cable (C-type) Adapter SIM Tooling pin The illustrations may differ from your actual items. -
Page 6: Your Device
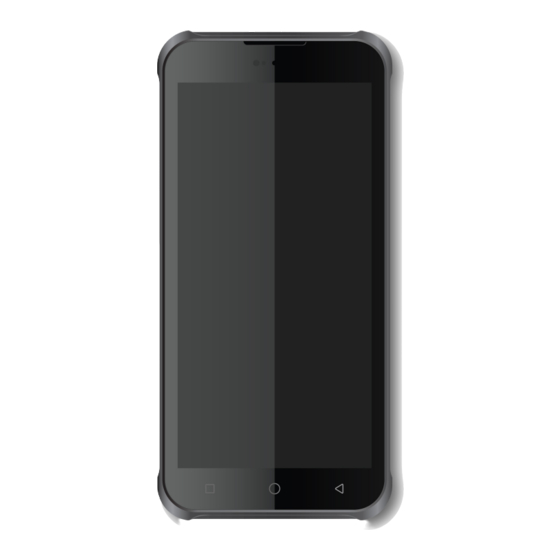
Overview 2.2 Your Device 2.2.1 Front Light sensor Receiver Proximity sensor Charging / Notification LED SIM card slot Volume up button Power Button Volume down button Scan button Scan button Touch screen Menu button Back button Home button 2.2.2 Back Rear camera Camera flash Battery release latch... -
Page 7: Bottom And Top
Overview 2.2.3 Bottom and Top Speaker Headset jack Microphone Interface connector Microphone Barcode scanner... -
Page 8: Getting Started
3 Getting Started 3.1 Installing the Cards 3.1.1 Inserting a Micro SIM card Remove the card slot on the right side of your device. Insert a micro SIM cards into the slots. Make sure that the gold contacts on the cards are facing down. Insert the card slot on your device. -
Page 9: Inserting A Microsd Card
Getting Started 3.1.2 Inserting a Micro SD Card Remove the card slot on the right side of your device. Insert a micro SD cards into the slots. Make sure that the gold contacts on the cards are facing down. Insert the card slot on your device. 3.1.3 Removing the Cards Remove the card slot on the right side of your device. -
Page 10: Installing The Battery
Getting Started 3.2 Battery 3.2.1 Installing the Battery 1 Place the back of the device facing up. 2 Insert the bottom of the battery into the device. 3 Press the top of the battery to fully insert the battery in the device. It will click when it is properly inserted. -
Page 11: Removing The Battery
Getting Started 3.2.2 Removing the Battery While holding down the battery release latch on both ends of the battery, pull the battery out. Before removing the battery, turn off the power. Failure to do so it may cause damage to the device. 3.2.3 Charging the Battery 1 Plug the C-type end of the charger into the multi-purpose jack on the buttom of the device. -
Page 12: Hand Strap
Getting Started 3.3 Handstrap 1. Insert the lower part of the strap into the strap bot hole and then fasten with the velcro. 2. Align the rubber band at the top of the strap with the hole of the strap top noting the direction. 3. - Page 13 Getting Started 4. Remove the four screws shown in the figure below with the phillips screwdriver. 5. Fasten the straps at the positions (1-3) where screws were removed by using four screws. 6. Adjust it with the velcro to fit your hand.
-
Page 14: Turning The Device On Or Off
4 Basics 4.1 Turning the Device On or Off 4.1.1 Turning the Device On Press and hold the Power button for a few seconds. 4.1.2 Turning the Device Off Press and hold the Power button for a few seconds. Tap Power off. •... -
Page 15: Using The Touch Screen
Basic 4.2 Using the Touchscreen Use finger gestures to use the touchscreen effectively. • Do not touch the screen with any sharp objects. • Do not apply too much pressure to the touchscreen. Gesture Name Description Briefly touch an item to open, launch, or select it. Place two fingers on the screen and spread them apart to zoom Zoom in or out in. -
Page 16: Using The Home Screen
Basic 4.3 Using the Home Screen The Home screen is the starting point for all apps and features. It displays icons, shortcuts, and widgets for apps. Drag upward from the bottom of the screen. Applications will be displayed on the screen. To view other pages, swipe left or right. -
Page 17: Connecting To A Wi-Fi Network
Basic 4.4 Connecting to a Wi-Fi Network Connecting to a Wi-Fi network is an easy way of accessing the Internet. When you are out, you can connect to Wi-Fi networks in public places. On the Home screen, tap > Wi-Fi. Make sure to turn Wi-Fi on. -
Page 18: Device Specification
5 Device Specification Physical Characteristics Dimensions (W x H x D) 158.25 x 75.8 x 19.0 (min 14.9) mm Weight 251g included battery Display 5.45” HD+ (1440 x 720), TFT-IPS Imager Window Corning Gorilla Glass 3 Capacitive multi-touch / Stylus Touchpanel Glove, Wet Backlight... -
Page 19: Performance Characteristics
• Support next two versions of Android Q and R Operating System • Upgrading to new supported versions of Android requires the purchase of a Bluebird Care™ Service contract 2GB RAM / 16GB Flash Memory 3GB RAM / 32GB Flash (Optional) -
Page 20: Communication Options
Device Specification Communication Options WWAN Radio GSM/GPRS/EDGEWCDMA/HSDPA/HSUPA/HSPA+LTE WLAN Radio 802.11 a/b/g/n/ac/d/h/i/k/r/w 5GHz: 802.11 a/n/ac – up to 433.3Mbps; WLAN Data Rates 2.4GHz: 802.11 b/g/n – up to 72.2 Mbps WPAN Radio Bluetooth V5.0 BLE, Class 2 Accessories 1 or 4 Slot Charging cradle, 1 or 4 Slot Ethernet cradle, Handstrap & Stylus Holder, Screen Protect Film, Trigger Handle, UHF RFID Reader Sled (w/RFR900), Optical Fingerprint*, Physical Keypad*, External Loud Accessories... -
Page 21: Troubleshooting
You can contact your local sales representative or you can send the device via a delivery service to Bluebird’s Korean headquarters. When sending the package, make sure you pay for the shipping fee in advance. When the repair is finished, Bluebird will cover the shipping cost. -
Page 22: Warranty And Support
• We receive the products for our after-sales service through mail, delivery services and hand delivery only in principle. • If you bought the product from a party other than Bluebird or an authorized Bluebird reseller, you need to register the product before using our after-sales service. - Page 23 Warranty and Support Charged services • In the following cases, it will be charged when requesting for after-sales service. –– Service request due to inappropriate use of the device by the customer –– Loss of PIN number –– Use of programs that might affect the program (over-clock, forceful changes in the input of the system, personal developments) •...
-
Page 24: Warranty Certificate
Bluebird will repair or replace the defective product according to its warranty policy. • If the defective product within the range of warranty is not repairable or replaceable, Bluebird shall refund the purchasing price within a designated period from the date of receiving a notice of defect. - Page 25 This device complies with part 15 of the FCC Rules. Operation is subject to the following two conditions: (1) This device may not cause harmful interference, and (2) this device must accept any interference received, including interference that may cause undesired operation. This equipment has been tested and found to comply with the limits for a Class B digital device, pursuant to Part 15 of the FCC Rules.
- Page 26 (GMT Time: +9 Hours) The center is closed on Saturdays, Sundays, and Korean national holidays. Customer Service Center #1103, Gplus Kolon Digital Tower 11F, Digital-ro 26-gil 123, Guro-gu, Seoul, Republic of Korea(08390) Bluebird constantly strives to bring utmost satisfaction to all our customers.
Need help?
Do you have a question about the VF550 and is the answer not in the manual?
Questions and answers
i need to get thw barcode scanned from the device scanner into the app i **** developing so can process it . how to do that.
To scan a barcode on the Bluebird VF550 device:
1. On the Home screen, tap the barcode scanning application.
2. Tap Open to start the barcode scanning function.
3. Press the Right or Left button to activate the scanner. A red laser beam will appear from the top of the device.
4. Aim the red beam across the barcode you want to scan.
5. Maintain a distance of about 10 cm (4 inches) for the best results.
6. Hold the device at an appropriate angle for accurate scanning.
The scanned barcode data can then be processed by the application in use.
This answer is automatically generated