Advertisement
Table of Contents
- 1 Table of Contents
- 2 Note on User Guide
- 3 Warnings
- 4 First Use
- 5 Folding and Unfolding
- 6 Charging the the Battery
- 7 Autonomy of VELOCIPTOR es 110 or
- 8 Display
- 9 Remote Control Management
- 10 How to Use the Scooter
- 11 Technical Specifications
- 12 Extract from Current Legislation in Italy
- 13 Information to Users about Household Appliances
- 14 Warranty
- Download this manual
Advertisement
Table of Contents

Subscribe to Our Youtube Channel
Related Manuals for EMG velociptor ES 110 OR


Summary of Contents for EMG velociptor ES 110 OR
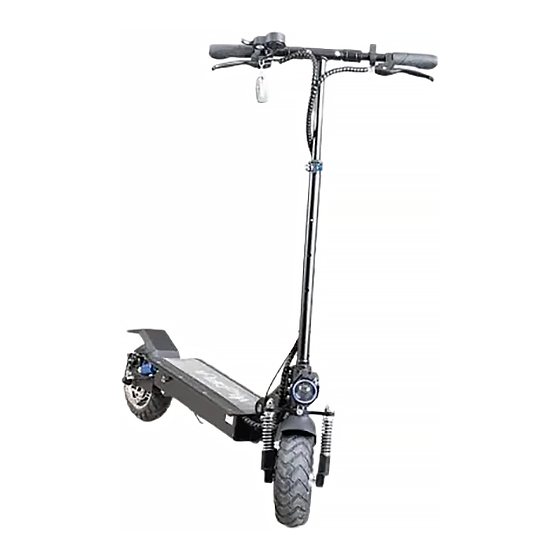
- Page 1 ES 110 OR USER GUIDE...
- Page 2 Thank you for purchasing the electric scooter VELOCIPTOR ES 110 OR Please read the manual before using the product, and keep it in a safe place for future reference.
-
Page 3: Table Of Contents
Warnings ..................5 First use ..................6 Folding and unfolding ..............9 Charging the the battery ............11 Autonomy of VELOCIPTOR ES 110 OR ........12 Display ..................12 Remote control management ..........15 How to use the scooter ............. 16 Technical specifications ............. -
Page 4: Note On User Guide
Note on user guide This manual provides the user a description of the characteristics and ope- ration. The use of the vehicle is the sole responsibility of the driver who, after re- a-ding and understanding this manual, and after asking the seller and / or the manufacturer for any clarifications deemed necessary, considers him- self suitable from a psychological and physical point of view to the use of the vehicle. -
Page 5: Warnings
The use of VELOCIPTOR ES 110 OR by minors must always be supervised by an adult. Do not drive VELOCIPTOR ES 110 OR with more than one person on the platform, as it may cause loss of control of the vehicle. -
Page 6: First Use
first use Before first use, it is recommended to make some adjustments in order to adapt the scooter to your height and driving style. Adjusting the folding mechanism If the main bar is loose or difficult to bend, you can adjust it. Turn the nut located at the bottom of the handlebar (visible after folding the scooter). - Page 7 first use Display It is possible to loosen the display fixing bolts on the handlebar, and rota- te it, so that it is clearly readable and the accelerator lever is comfortable and safe for use. Once the adjustment has been made, properly tighten the nuts.
- Page 8 first use Loosening of the handlebar The handlebar may vibrate and this behaviour may increase over time. If the mechanism swings too much, it can be adjusted with the screw (5) loca- ted where the handlebar folds (when the handlebar is bent, the bolt is visible).
-
Page 9: Folding And Unfolding
FOLDING AND UNFOLDING Folding the scooter Open the quick release clamp on the handlebar, push it down and lock the clamp. Pull both handles outwards and fold the handlebar down Push the lever down to unlock the folding mechanism. Push the steering bar slightly forward, open the second folding le- ver (“click”... - Page 10 FOLDING AND UNFOLDING Opening the scooter Open the folding lever (“click” sound is made) and continue to open the frame until the bar reaches the vertical position and the locking mecha- nism engages (another “click” is heard). Push the lever up until the fixing lever locks. Pull the handles upwards until you hear a “click”.
-
Page 11: Charging The The Battery
Charging the battery Before first use, charge the battery to 100% capacity. To make sure you reach your destination, we recommend that you fully charge the battery when the display shows battery level with 2 bars. NOTE: the battery must be charged every 30 days, even if the scooter is not used;... -
Page 12: Autonomy Of Velociptor Es 110 Or
Autonomy of VELOCIPTOR ES 110 OR The maximum distance that can be traveled with a single battery charge is approximately 35 km. However, this value must be con- sidered indicative since it can be influenced by numerous factors. Among the factors that can most affect battery life are the following: Transported weight: •... - Page 13 Display 1 Speed 2 Speed level 3 Mode button 4 Power button 5 Throttle 6 Battery charge level 7 Travel time 8 USB port (on the back of the display) Values displayed a / current speed in km/h b / speed level: 1 - ECO up to 6 Km/h; 2 - DRIVE up to 20 Km/h; 3 - SPORT up to 25 Km / h c / Battery charge level (the indicator varies according to the instantaneous load / consumption of the engine)
- Page 14 Display USB Port There is a USB port on the back of the display that allows you to charge a phone or tablet while the scooter is on. Lights and horn control To activate the horn, press the green button on the keypad shown below. The lights are controlled by pressing the red button;...
-
Page 15: Remote Control Management
REMOTE CONTROL MANAGEMENT The scooter is equipped with a remote control which can control some fun- ctions, as shown below. The remote control works with CR2032 batteries, which must be replaced when the remote control is not working any longer. -
Page 16: How To Use The Scooter
HOW TO USE THE SCOOTER First of all, it is advisable to adjust the rear disc brake, tightening it or ma- king it softer, according to your driving style. Start the engine by pressing the ignition button. Get on the scooter and make sure the stand is in the closed position; act gently on the accelerator lever to start the electric motor. -
Page 17: Extract From Current Legislation In Italy
EXTRACT FROM CURRENT LEGISLATION IN IT ALY Since the kick scooter is considered as a velocipede in the current legislation, it is not subject to any provisions relating to homologation, approval, registration, plate informa- tion or insurance coverage. Electric scooters can be used on urban roads with a speed limit of 50 km/h where the circulation of velocipedes is allowed, and on suburban roads only within the cycle path on the road side. -
Page 18: Information To Users About Household Appliances
Information to users ABOUT household appliances pursuant to Legislative Decree No. 49 of March 14, 2014 “Implementa-tion of Directive 2012/19 / EU on waste electrical and electronic equi-pment (WEEE)”. The crossed-out wheeled bin symbol shown on the equi- pment indicates that the product at the end of its useful life must be collected separately from other waste. -
Page 19: Warranty
warranty 1. The warranty comes into force on the date of the tax document and covers ma- nufacturing defects and consequent failures that arose during the warranty period. 2. In the event of a device failure, the buyer can ask for assistance contact the retailer where you purchased the product or: center Trevi S.p.a. - Page 20 warranty 5. The mere authorization to send the product to the service center does not imply that the defect has been recognized as covered by the warranty with consequent free repair of the product. The product must be shipped in the original packaging, or in another suitable packaging, and in any case inserted in a protective packaging that is suitable for shipment by courier or postal service.
- Page 24 Trevi S.p.A. Strada Consolare Rimini-San Marino 62, 47924 Rimini (RN) Italia...
Need help?
Do you have a question about the velociptor ES 110 OR and is the answer not in the manual?
Questions and answers