Advertisement
Quick Links
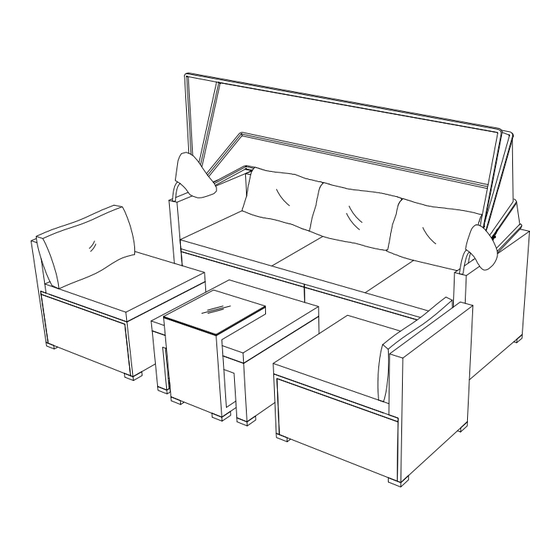
ASSEMBLY INSTRUCTION
WF199168; WF199169; WF199170
Notice:
1. 50% Tighten before fixing all screws, Allen wrench is
recommended instead of an electric drill.
2. Place the item on a flat ground to adjust and make sure
it remains stable.
3. Tighten up all screws with tools gradually.
4. If the screws are not aligned with holes during assembly,
please loosen all the other screws to 50% and continue
the assembly process.
5. If the item is not stable, please loosen all the screws,
adjust it on a flat ground and tighten up all screws again.
6. Note : If one or some screws are fully tightened during
assembly, chances are the others will not be aligned with
holes. In addition, all the holes are designed to be relatively
larger to provide more space for the adjustment of the screws.
RATTAN FURNITURE
01 / 19
Advertisement

Related Manuals for RATTAN WF199168


Summary of Contents for RATTAN WF199168
- Page 1 ASSEMBLY INSTRUCTION RATTAN FURNITURE WF199168; WF199169; WF199170 Notice: 1. 50% Tighten before fixing all screws, Allen wrench is recommended instead of an electric drill. 2. Place the item on a flat ground to adjust and make sure it remains stable.
- Page 2 02 / 19...
- Page 3 Part List and Hardware (1 PC) (1 PC) (1 PC) (1 PC) (1 PC) (1 PC) (1 PC) (1 PC) (1 PC) (1 PC) (1 PC) (1 PC) (2 PCS) (2 PCS) (1 PC) (4 PCS) (6 PCS) (5 PCS) 03 / 19...
- Page 4 Part List and Hardware (1 PC) (1 PC) (1 PC) (1 PC) (1 PC) (1 PC) (1 PC) (1 PC) (1 PC) (1 PC) (1 PC) (1 PC) Ø6 x 14 mm M6 x 40 mm M6 x 35 mm M6 x 30 mm (44 PCS) (75 PCS)
- Page 5 CARTON CONTENT: W F199168: E x1 D x1 A x1 B x1 C x1 F x1 S1 x1 S2 x1 S3 x1 G x1 H x1 R x1 T2 x1 T3 x1 U2 x1 U3 x1 T1 x1 U1 x1 V2 x1 V3 x1 I x1...
- Page 6 Step 1: 100% Step 2: 06 / 19...
- Page 7 Step 3: 100% M *1 Step 4: 07 / 19...
- Page 8 Step 5: N *1 O *1 Step 6: 08 / 19...
- Page 9 Step 7: Step 8: 09 / 19...
- Page 10 Step 9: Step 10: 10 / 19...
- Page 11 Step 11: 100% Step 12: C*1 D*1 11 / 19...
- Page 12 Step 13: A *1 Step 14: *2 B*1 12 / 19...
- Page 13 Step 15: E *1 Step 16: 13 / 19...
- Page 14 Step 17: H *1 Step 18: I *1 G *1 14 / 19...
- Page 15 Step 19: 100% Step 20: 100% Part A S1*1 S2*1 S3*1 15 / 19...
- Page 16 Step 21: 100% Part B T1*1 T2*1 T3*1 Step 22: 100% Part C U1*1 U2*1 U3*1 16 / 19...
- Page 17 Step 23: 100% Part D V1*1 V2*1 V3*1 Step 24: Part A Part B Part C Part D J *1 17 / 19...
- Page 18 Step 25: 100% Part B Part A Part C Part D 18 / 19...
- Page 19 Step 26: Q *3 R *3 19 / 19...
Need help?
Do you have a question about the WF199168 and is the answer not in the manual?
Questions and answers