Advertisement
Quick Links
Advertisement

Related Manuals for RATTAN A00261-BLDG


Summary of Contents for RATTAN A00261-BLDG
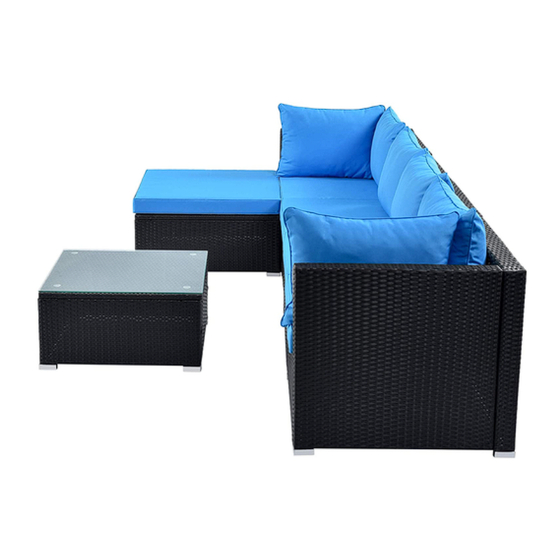
- Page 1 USER S MANUAL RATTAN L SHAPE SOFA A00261-BLDG A00261-GRDG...
-
Page 2: Before You Start
Contact Us! Need Help! Do NOT return this item. Contact our friendly customer service department for help first. Before You Start Please do not exceed the weight limitation of each items Do not stand on or use any part of this item as step ladder Read each step carefully before starting. - Page 3 Bottom Bottom Notice: 1. 50% Tighten before xing all screws, Allen wrench is recommended instead of an electric drill. 2. Place the item on a at ground to adjust and make sure it remains stable. 3. Tighten up all screws with tools gradually. 4.
- Page 4 Part List & Hardware Left frame (1 pc) Panel side frame (1 pc) Side frame (1 pc) Seat frame D (1 pc) Back frame E (1 pc) Right frame (1 pc) Lid open frame (2 pcs) Back frame (1 pc) Seat frame (1 pc) Small corner frame (1 pc) Big corner frame (1 pc)
- Page 5 Part List & Hardware Table top (1 pc) Stool feet frame (4 pcs) Stool side frame (4 pcs) Stool top frame (2 pcs) Bottom frame (1 pc) Side frame (1 pc) Bolt M6x70 (8 pcs)2 Rain cover (2 pcs) Bottom frame (1 pc) Bolt M6x45 (5 pcs) Bolt M6x35 (30 pcs) Bolt M6x25 (29...
- Page 6 Part List & Hardware Back pillow (6 pcs) Seat cushion (3 pcs) Small corner pillow (1 pc) Stool cushion (2 pcs)
- Page 7 STEP 1 STEP 2 Connect Back Frame E (E) & Seat Frame D (D) Connect part from STEP 1 & Left Frame (A) with Bolt (3) with Bolt (1) & (3) STEP 3 Connect part from STEP 2 & Lid Open Frame (G)
- Page 8 STEP 4 Connect part from STEP 3 & Side Frame (C) with Bolt (4) STEP 5 STEP 6 Connect part from STEP 4 & Rain Cover (Y) Connect part from STEP 5 & Bottom Frame (W) with Bolt (3)
- Page 9 Put on Seat Cushion (9) & Back Pillow (8) to complete Left Corner Sofa STEP 7 Connect Back Frame (H) & Seat Frame (I) with Bolt (3)
- Page 10 STEP 8 Connect part from STEP 7 & Right Frame (F) with Bolt (1) & (3) STEP 9 Connect part from STEP 8 & Lid Open Frame (G)
- Page 11 STEP 10 Connect part from STEP 9 & Side Frame (X) with Bolt (4) STEP 11 STEP 12 Connect part from STEP 10 & Rain Cover (Y) Connect part from STEP 11 & Bottom Frame (Z) with Bolt (3)
- Page 12 Put on Seat Cushion (9) & Back Pillow (8) to complete Right Corner Sofa STEP 13 Connect Big Corner Frame (L) & Corner Seat Frame (M) with Bolt (3)
- Page 13 STEP 14 Connect part from STEP 13 & Small Corner Frame (K) with Bolt (2) & (3) STEP 15 Connect part from STEP 14 & Panel Side Frame (B) with Bolt (4)
- Page 14 STEP 16 Connect part from STEP 15 & Corner Front Frame (N) with Bolt (2) & (4) STEP 17 Put on Seat Cushion (9), Back Pillow (8) & Small Corner Pillow (10) to complete Corner Sofa...
- Page 15 STEP 18 Connect Table Feet Frame (O) & Middle Table Frame (P) with Bolt (1) STEP 19 Connect part from STEP 18 & Table Feet Frame (O) with Bolt (1)
- Page 16 STEP 20 Connect part from STEP 19 & Table Top Frame (Q) with Bolt (5) STEP 21 Put on Table Glass (7) to complete the Table...
- Page 17 STEP 23 STEP 22 Connect Stool Feet Frame (R) & 2x Connect part from STEP 22 & Stool Stool Side Frame (S) with Bolt (4) Side Frame (R) with Bolt (4) STEP 24 STEP 25 Connect part from STEP 23 & Stool Put on Stool Cushion (11) to complete the Stool Seat Frame (T) with Bolt (4)
- Page 18 Care and Maintenance Use a soft, clean cloth that will not scratch the surface when dusting. Use of furniture polish is not necessary. Should you choose to use polish, test first in an inconspicuous area. Using solvents of any kind on your furniture may damage the finish. Liquid spills should be removed immediately.
Need help?
Do you have a question about the A00261-BLDG and is the answer not in the manual?
Questions and answers