Advertisement
Quick Links
Attention:
Do not remove the bindings holding the two extension arms until fully assembled. These are
spring-loaded and can cause serious injury if allowed to spring free.
Attention:
Read this instruction manual carefully and completely before mounting and
usage. Keep this manual for future reference.
Dear Customer:
Congratulations and thank you for buying an awning from us. To enjoy this product for a long time
and for your own and the safety of other people please obey the mounting instructions.
Before you start mounting and using the awning, please get familiar with this product. Make sure all parts listed up
in below packing lists are delivered and intact. If you find that there are parts missing or damaged please do not
install the awning but contact after service . Do not start the mounting if parts are missing.
Instructions for Installation
And Operation
840-213 840-213V01 EN C000000
1
Advertisement

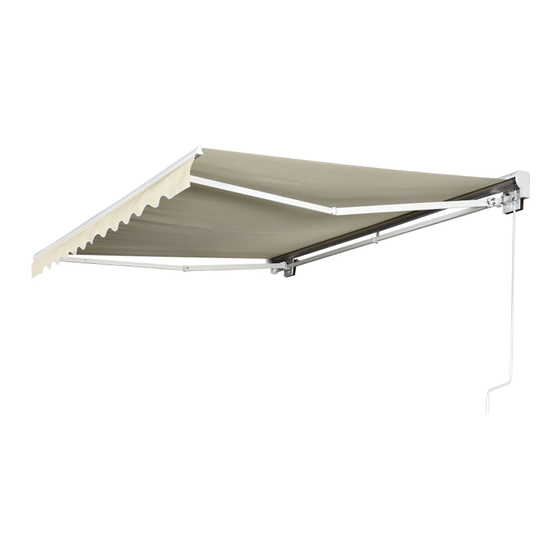
Summary of Contents for Outsunny 840-213
- Page 1 Instructions for Installation And Operation 840-213 840-213V01 EN C000000 Attention: Do not remove the bindings holding the two extension arms until fully assembled. These are spring-loaded and can cause serious injury if allowed to spring free. Attention: Read this instruction manual carefully and completely before mounting and usage.
- Page 2 List of the parts , Please choose part 20 instead of part 12. 29 -2 x1 29 -1 x1 25 x1 28 x1...
- Page 3 Explosive drawing of Awning...
-
Page 4: Important Safety Instructions
Important Safety Instructions Warning: For your own and the safety of other persons it is important to follow below instructions and obey warnings. Symbol explanation This warning triangle calls attention to hazards that it can lead to death or to severe injuries or which is important for the functioning of the awning. - Page 5 In case of rain retract the awning if tilt angle is less than 14°. Nobody is allowed to climb onto the awning. Hanging anything on the awning is forbidden. Sheeting was used to protect the paint. This must be removed afterwards. When extended, various forces, including wind and rain, will affect an awning.
- Page 6 Step 2: Torsion bar and arm assembly: keep the four face aligned , connect the torsion bar with the connectors and secure it with the corresponding bolts as figure below: Then assembly the arm to the torsion bar as figure below. Two arms need in the same direction, the rope of arm cannot be unlocked until the whole assembly are complete.
- Page 7 Step 4: Front bar wrist support assembly: Slide the front bar feet into the front bar without tightening. As shown in the figure below: Step 5: Arms with front bar assembly: Put front bar feet bolt through the hole of small arm, then position the front bar. After positioning, tighten the nut with wrench, as figure below:...
- Page 8 Step 6: Link the self-locking nut Link the self-locking nut into screw which at the bottom of the screw in front bar feet by a wrench, stop when the thread leakage 1 ~ 2 laps. As shown in the figure below: ATTENTION: BEFORE BLOCKING THE NUT, ENSURE THAT THE ARMS ARE PROPERLY ALIGNED.
- Page 9 Step 8: Fabric and valance assembly: Open the fabric bag, Spread out both fabric 14A and valance 14B and use the cloth guiding wire to line through the fabric. As shown in the figure below: Step 9: Roll in the fabric on the roller Roll in the fabric on the roller, pay attention to the fabric direction needed, as shown in the figure below: Please face up the fabric when assembling.
- Page 10 Step 10: One end of fabric through the groove of front bar, well-distributed the fabric after pull in all fabric, then insert shaft of roller into the square hole of gear case. As shown in the figure below, 24-1 24-3 24-5 24-4...
- Page 11 Step 12: Assemble middle bracket and cover 29-2 29-1 24-1 24-3 24-5 24-4...
-
Page 12: Installation Procedure
Installation procedure: Step 1: Draw lines on the wall Choose the position,then draw up the position of bolt holt hole by pencil as blow picture,please make sure hole the of each group on the same horizontally or vertically. Attention figure in “ L ”is product’s length , the blow picture is mean the distance for brackets holes is L-14cm(For example: the product actual length of 2.95 m, the distance =2950mm-140mm=2810mm);... - Page 13 Step 2. Installing the brackets Drill the hole according to the line which was draw up in step 1 by 14mm( or 5/8 inch) wall drill, please pay attention to the deep of hole that should not be less than 9cm. Making the expansion bolt through the bracket(keep the barbed side up), hitting the expansion bolt into the hole with tighten by wrench.
- Page 15 Note: The awning is already delivered with an optimally adjusted tilt angle. However, users can adjust the screen angle within a range of 5° to 40° As shown in the figure: Step 6: The right way of the awning using The awning can be operated normally when finish adjusting the horizontal of the front bar.
- Page 16 Extend and retract the awning The awning can be extended and retracted by a crank handle included in delivery or remote control. Drawing 8. 2: Drawing 8. 1: Press the extension bu�on "EXT" for Insert the handle in the loop the awning extension.


Need help?
Do you have a question about the 840-213 and is the answer not in the manual?
Questions and answers