Advertisement
Quick Links
Patty-O-Matic, Inc.
®
The World's Finest Food Machines
Model 330A
Owner's Manual
Revised January 2011
Patty-O-Matic Inc.
Route 547
P.O. Box 404 Farmingdale NJ,07727
Tel: (732) 938-2757
Fax: (732) 938-5809
Toll Free in USA: 877-938-5244
Website: www.pattyomatic.com
Email: info@pattyomatic.com
Advertisement

Subscribe to Our Youtube Channel
Related Manuals for Patty-O-Matic 330A


Summary of Contents for Patty-O-Matic 330A
- Page 1 Patty-O-Matic, Inc. ® The World’s Finest Food Machines Model 330A Owner’s Manual Revised January 2011 Patty-O-Matic Inc. Route 547 P.O. Box 404 Farmingdale NJ,07727 Tel: (732) 938-2757 Fax: (732) 938-5809 Toll Free in USA: 877-938-5244 Website: www.pattyomatic.com Email: info@pattyomatic.com...
- Page 2 • Introduction to your new machine Page 3 • Installing Mold Plate Guard Page 3 • Installing Feed Tray Page 3 • Accessories Equipped with the Model 330A Page 4 • Parts to Become Familiar with Page 5 • Label Location and Description Pages 6&7 •...
- Page 3 Please become familiar with this manual and your machine will give you many years of productive service. The Model 330A is shipped to you in at least two cartons which contain the patty machine, feed tray, mold plate guard, spare parts box, receiving table, and this manual.
- Page 4 Accessories Equipped with the Model 330A Item# Description Part # Spare Parts Box Holds Spare Parts, Patty Paper Sample, Machine Lubricant, Speed Driver, and Locator Rings Receiving Table 609-6 Speed Driver Bottle of Machine Lubricant and Cleaner Gallon of Machine Lubricant(Separate Order Only)
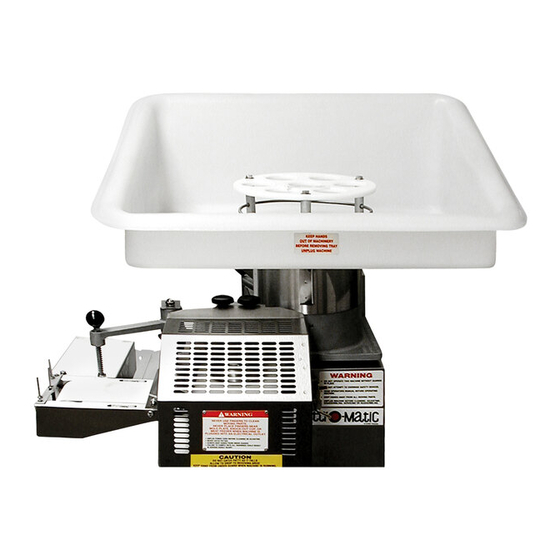
- Page 5 Please become familiar with some of the parts of your machine prior to operating machine Feeder Feeder Top Feeder Pressure Washer View Plate Meat Stop Mixer Collar Feeder Side View Chamber Hopper X Bolt Mold Plate Assembly Side View Spacer Plate T-Knob Mold Plate Assembly Underside View Ring Pin Pressure Plate...
- Page 6 Proper Label Location for a Model 330A...
- Page 7 Item # Description Part # Danger Label 3 514-09a Warning Orange 514-02 Patty-O-Matic 514-08 Safety instructions 514-06 Danger Label 1 514-03 Danger Label 2 514-00 Serial Tag 514-15 Store Tool 514-14 Warning Manual 514-01 Danger on/off 514-05 Do Not Pressure Wash...
- Page 8 Proper Procedure for Operating a Model 330A When the Model 330A is fully assembled with all guards secured in their proper place, put product to be portion molded in the Feed Tray. Push the product through the holes in the Feed Tray Guard into the Hopper opening. DO NOT PUT HANDS OR FINGERS, OR FOREIGN OBJESTS, SUCH AS STOMPERS OR PLUNGERS INTO THE HOPPER.
- Page 9 Changing Your Machine’s Mold Plate Always disconnect the machine from its power source before attempting to change or clean any of the machines component parts. First remove the T-Knob from the Back Drive of the Mold Plate, then pull the Mold Plate out from the back of the machine.
- Page 10 Feed Tray Proper Disassembly for Cleaning Your Model 330A: Always Unplug Machine From its Mold Plate Electrical Source Before Cleaning Guard Push Rod - Remove Feed Tray by lifting it off the Hopper, and Mold Plate Guard by loosening the Mold Plate Guard Knobs, Pressure Plate and unlatching the push rod.
- Page 11 Paper Sleeves should be adjusted for different size patty paper Patty-O-Matic Inc. offers the highest quality patty paper, machine lubricant, and machine grease. Please contact the factory for information on these products. Toll Free in the U.S.A. 877-938-5244 Outside the U.S.A.
- Page 12 Points of Daily Lubrication For Your Model 330A: Always Unplug Machine and use Food Approved Oil and Grease! The Following Parts should be lubricated daily to ensure proper machine maintenance Tower Stem - Pressure Foot should be lifted up and oiled. Hold the Ball knob and Ball Knob lift up.
- Page 13 Poly Coved Feed Tray Mold Plate Guard Assembly Machine may be equipped with a different tray *Numbers 5 & 6 also come as an assembly Knock Out Cup Assembly Knock Out Cup Exploded View *Knock Out Cup Hardware is also sold as an assembly. -Knock Out Cup Assembly w/ Hardware is Part #571 -Knock Out Cup Hardware Only is Part #571-H1 Item#...
- Page 14 Hopper Front View Hopper Rear View Hopper Bottom View Feeder Top View Item# Description Part # Hopper Casting Chamber Lid 545-A Hex Hold Down Bolt (also used as Hopper hold down) 556B X-Bolt Guard Post Guard Information Plate 551-B Meat Stop c/w Washer Pressure Plate Block Hardware 548-C Pressure Plate Block...
- Page 15 Machine Front View Machine Left Side View Machine Right Side View Machine Rear View Item# Description Part# Item # Description Part # Feed Tray Tower Sleeve 620-16 Paper Interleaver Arm and Bolts Feed Tray Tower Block 620-6 Knock Out Arm and Bolts 502B Tool Holder Knock Out Cup...
- Page 16 Paper Interleaver Top View (Conveyor Belt is Removed for Visual) Paper Motor Paper Return Bracket Item # Description Part # Item# Description Part# Paper Interleaver Motor c/w Paper Stop Extension Shaft 2 Return Bracket Mounting Screws249 Weight Shaft Left Return Spring 246L Weight Shaft Support Right Return Spring...
- Page 17 Ring Pin Pressure Plate Mold Plate Bottom View Mold Plate Side View Feeder Washer Hopper and Feeder Assembled Top View & Shear Pin Spacer Plate Hold Down Bolt Item # Description Part # T-Knob Hopper Casting Item # Description Part # Hold Down Bolt 556B Pressure Plate Ball Knob...
- Page 18 Machine Switches Front View Guard Switch Interior View On/Off Switch Interior View Tower Switch Interior View Item# Description Part # Key Latch 609-A1 Plunger Switch Boot 608-1C On/Off Switch Guard On/Off Switch Boot 500B Power Cord 115-01 Wire Grommet Guard Switch 608-1B Guard Switch Wire 608-1D...
- Page 19 Tower Assembly w/ Tower Block Tower Assembly Exploded Bottom View Tower Assembly Tower Assembly Inverted Top View Machine View Item# Description Part # Tower Sleeve 620-16 Tower Stem 620-3 Tower Tube 620-5 Tower Block 620-6 Tower Locator Lock Bolt 620-7 Tower Switch 620-10B Rubber Seal...
- Page 20 Main Shaft Fender Washer and Hardware 240-1 Main Shaft Driven Sprocket(Specify Amount of Teeth) 240 Main Shaft Threaded Insert Set Screw 464-2 Main Shaft Threaded Insert 464-1 Main Shaft Sprocket Key 330A Grease Line System(Not completely shown) Main Shaft C/W Insert and Set Screw...
- Page 21 Crank Housing Assembly Side View Crank Shaft Assembly Crank/Connecting Arm Assembly Exploded View Item # Description Part # Item # Description Part # Connecting Arm Crank Shaft Sprocket Crank Arm Timing Chain and Link Crank Shaft Housing Casting Crank Arm Hardware Grease Line T Fitting Connecting Arm Thrust Washer 456B...
- Page 22 Motor to Main Shaft Bottom View Idler Arm Assembly Parts Part # 229 – Idler Arm Assembly Includes spring, tab, arm, and all hardware Item# Description Part # Machine Legs (set of 4)(Only 2 shown) Motor Drive Sprocket Motor to Main Shaft Chain and Link Idler Arm Shoulder Bolt Hardware 229B Idler Arm Shoulder Bolt...
- Page 23 Knock Out Cam Bottom View Knock Out Lever Assembly Knock Out Shaft and Lever Assembly 8 & 9 Item# Description Part # Crank Housing Hardware Steel Knock Out Cam Assembly 472-S Machine Legs (set of 4)(2 Shown) Steel KO Cam Drive Key(Not Shown) 477-1 Knock Out Shaft Knock Out Lever...
- Page 24 Main Motor Side View Main Shaft Machine View Mold Plate Guide Rails Front View Mold Plate Guide Rail Please call factory for instructions on installing new Mold Plate Guide Rails Toll Free in the U.S.A. 877-938-5244 Outside the U.S.A. 732-938-2757 Item# Description Part #...
- Page 26 Model 330A Warranty Information This appliance is guaranteed to original purchaser to be free from defects in materials and workmanship. Warranty shall be limited to repairing or exchanging any part that in our judgment shows evidence of defect within one year of original date of purchase.
- Page 27 Important Information on Your Machine Patty-O-Matic Inc. Model 330A Serial Number_________________________________________________ Date Purchased________________________________________________ Purchased From What Dealer___________________________________ Dealer Address and Phone Number_______________________________ _____ _________________________________________ ______________________________________________ ______________________________________________ Maintenance Performed on Machine______________________________ ___________________________________________________ ___________________________________________________ ___________________________________________________ Owner’s Notes_________________________________________________ _____________________________________________________________ _____________________________________________________________ _____________________________________________________________ _____________________________________________________________ _____________________________________________________________...
- Page 28 Notes ______________________________________________________ ______________________________________________________ ______________________________________________________ ______________________________________________________ ______________________________________________________ ______________________________________________________ ______________________________________________________ ______________________________________________________ ______________________________________________________ ______________________________________________________ ______________________________________________________ ______________________________________________________ ______________________________________________________ ______________________________________________________ ______________________________________________________ ______________________________________________________ ______________________________________________________...
Need help?
Do you have a question about the 330A and is the answer not in the manual?
Questions and answers