Advertisement
Available languages
Available languages
Quick Links
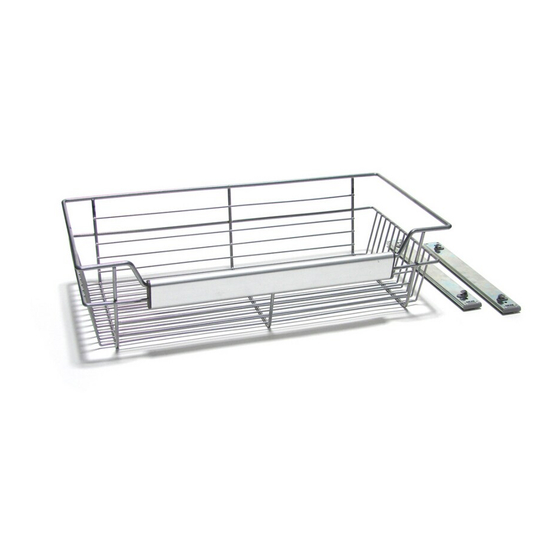
12 IN. & 16 IN. WIRE BASKET
ASSEMBLY INSTRUCTIONS
For Use with JLH732, JLH733, JLH734, JLH735, JLH736, JLH737
30.48 CM. & 40.64 CM. INSTRUCCIONES DE MONTAJE
CESTA DE ALAMBRE
30,48 CM. & 40,64 CM. INSTRUCTIONS DE MONTAGE
PANIER MÉTALLIQUE
Baskets can be mounted under a shelf or within a tower. When installing multiple
baskets within a tower, always work up from the bottom basket.
Cestas se pueden montar debajo de un estante o en una torre. Al instalar cestos
múltiples dentro de una torre, siempre funciona a partir de la canasta inferior.
Paniers peut être monté sous une étagère ou dans une tour. Lors de
l'installation des paniers multiples au sein d'une tour, toujours le travail à partir
IMPORTANT: DO NOT RETURN TO STORE!
For missing or damaged parts, technical or assembly questions, please call John Louis Customer
IMPORTANTE: ¡NO LO DEVUELVA A LA TIENDA!
Llame al servicio al cliente local de John Louis al 1-800-480-6985
para aclarar sus dudas sobre pérdidas, daños, asuntos écnicos y ensamblaje.
IMPORTANT: NE PAS RENVOYER OU RAPPORTER AU MAGASIN
Si vous avez une question concernant l'assemblage, des piéces manquantes ou endommagées ou
un probléme technique, appelez le Service á la clientéle de John Louis au 1-800-480-6985.
PARTS LIST
Lista De Piezas
A
B
Quantity: 1
Drawer face
Glide
Canasta
Deslizante
Panier
Glisse
D
E
Quantity: 2
Rear under mount bracket
Front under mount bracket
De nuevo bajo soporte de
Delantera contra el soporte
montaje
de montaje
Arrière sous support de
Avant sous support de
montage
montage
G
Quantity: 8
3/4 in. machine screw
.635 cm. tornillo de máquina
.635 cm. vis de la machine
1
du panier inférieur.
Service at 1-800-480-6985
Liste Des Piéces
C
Quantity: 2
Drawer left side
Sujetapapeles
Attache
F
Quantity: 2
#6 3/4 in. screw
#6 1.9 cm. tornillo
#6 1,9 cm. vis
G
Quantity: 1
Bracket template
Soporte de plantilla
Gabarit de la bride
WITHIN TOWER INSTALLATION
STEP 1 - Attaching Slides To Tower
NOTE: THE SLIDE ATTACHES TO THE 2ND HORIZONTAL BAR.
1.
Position basket at desired height location.
2.
Note the area between the tower grooves where the basket lines up.
3.
Mark the location & remove basket.
4.
At the marked location, align the template provided between the tower
grooves.
5.
Mark the location using the center hole on the template.
!
6.
Repeat on back rail and on opposite tower side.
Quantity: 4
7.
Fully extend the slide & move lever to separate glide.
Quantity: 8
8.
Position the glide at the marks with the open end facing outward.
9.
Secure the glide using #6 3/4 in. screws.
10. Repeat for opposite tower side.
Advertisement

Related Manuals for John Louis Home JLH732


Summary of Contents for John Louis Home JLH732
- Page 1 Position basket at desired height location. 12 IN. & 16 IN. WIRE BASKET ASSEMBLY INSTRUCTIONS For Use with JLH732, JLH733, JLH734, JLH735, JLH736, JLH737 30.48 CM. & 40.64 CM. INSTRUCCIONES DE MONTAJE CESTA DE ALAMBRE 30,48 CM. & 40,64 CM. INSTRUCTIONS DE MONTAGE Note the area between the tower grooves where the basket lines up.
- Page 2 UNDER SHELF INSTALLATION STEP 1 - Attaching Slides To Shelf Brackets with flanges are used for front position. Brackets without flanges are used for back position. Place a set of brackets flat side up. Extend glide & move lever to release & separate. Position open end of glide with front bracket &...
- Page 3 STEP 2 - Attaching The Basket Re-attach slides. Insert plastic clips into glide. Rotate clip & push top to snap clip into lock position. Repeat at all clip locations. 12. Square the back of the glide & secure with 3/4 in. screws. 13.
- Page 4 INSTALACIÓN DENTRO DE LA TORRE PASO 1 – Fijación de las correderas a la torre NOTA: LA CORREDERA SE FIJA A LA SEGUNDA BARRA HORIZONTAL. Coloque la cesta a la altura deseada. PASO 2 – Fijación de la cesta Vuelva a fijar las correderas. Inserte los sujetadores de plástico en el deslizador.
- Page 5 INSTALACIÓN DEBAJO DE LOS ESTANTES PASO 1 – Fijación de las correderas al estante Se usan sostenes con rebordes para la posición frontal. Se usan sostenes sin rebordes para la posición trasera. Coloque un grupo de sostenes con el lado plano hacia arriba. Extienda el deslizador y mueva la palanca para liberarlo y separarlo.
- Page 6 Placez le panier à l’emplacement de la hauteur désirée. PASO 2 – Fijación de la cesta Vuelva a fijar las correderas. Inserte los sujetadores de plástico en el deslizador. Gire el sujetador y empuje la parte superior para que se trabe en la posición correcta con un chasquido.
- Page 7 Placez le bout ouvert de la glissière avec le support avant et alignez avec ÉTAPE 2 – Fixation du panier les trous de vis. Fixez la glissière aux supports avec des vis à métal de 6,25 mm. Réattachez les glissières. Insérez les pattes de plastique dans la glissière.
- Page 8 16. Égalisez l’arrière de la glissière et fixez à l’aide des vis de 19 mm. For questions concerning missing or damaged parts, technical specs and / or assembly help, please contact John Louis Home Customer Service at: Si tiene preguntas sobre partes faltantes o dañadas, especificaciones técnicas o asistencia para el armado, comuníquese con el Servicio al Cliente de John Louis...