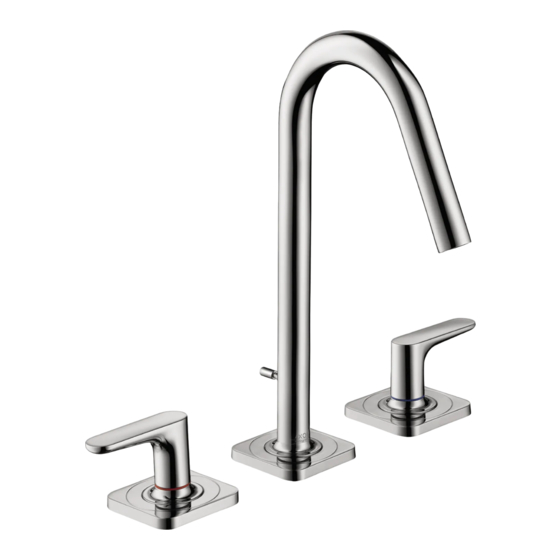
Hans Grohe AXOR Citterio M 34133 1 Series Installation/User Instructions/Warranty
Hide thumbs
Also See for AXOR Citterio M 34133 1 Series:
- Installation/user instructions/warranty (21 pages)
Summary of Contents for Hans Grohe AXOR Citterio M 34133 1 Series
- Page 1 Installation / User Instructions / Warranty Instructions de montage / Mode d'emploi / Garantie Instrucciones de montaje / Manejo / Garantía Citterio M 34133xx1...
-
Page 2: Technical Information
English Français Données techniques Technical Information Recommended water pressure 15 - 75 PSI Pression d’eau recommandée 15 - 75 PSI Max. water pressure 145 PSI Pression d’eau maximum 145 PSI Recommended hot water temp. 120° - 140° F* Température recommandée 120°... -
Page 3: Datos Tecnicos
Español Datos tecnicos Tools Required / Outiles Utiles / Herramientas Útiles Presión recomendada en servicio 15 - 75 PSI Presión en servicio max. 145 PSI Temperatura recomendada del 120° - 140° F* agua caliente Temperatura del agua caliente max. 165°F* 9 mm Caudal máximo 1.5 GPM... - Page 4 5⅜" 5⅝" 2⅜" 2⅜" 2⅜" 1¼" 1⅛" ½ 8" 34133xx1 2¼" 1¼" 1¼" O.D.
-
Page 5: Installation / Installation / Instalación
Installation / Installation / Instalación English Français Español To insure proper operation of the Pour vous assurer que le robinet Para asegurar el funcionamiento faucet, install the hot valve on the fonctionne correctement, installez adecuado del grifo, instale la vál- vula de agua caliente en el lado left, and the cold valve on the right. - Page 6 English Français Español Tighten the screws. Serrez les vis. Apriete los tornillos. Push the handles into place. Poussez les poignées pour les Coloque las manijas en su lugar. mettre en place. Push the spout shank up through Poussez le corps du bec vers le Empuje el tubo del surtidor hacia the mounting surface.
- Page 7 English Français Español Check the alignment of the Vérifiez l’alignement des poignées. Inspeccione la alineación de las handles. manijas. If one is not aligned, pull it off, turn Si l’une des poignées n’est pas Si alguna no está alineada, tire it slightly, and reinstall it.
- Page 8 2 mm English Français Español Lubricate spout the o-ring. Lubrifieaz le joint torique du bec. Lubrique los retenes anulares del surtidor Push the spout into place. Poussez le bec pour le mettre en place. Coloque el surtidor en su lugar. Tighten the spout screw.
- Page 9 English Français Español Tighten the mounting nut screws. Serrez les vis de l’écrou de mon- Apriete los tornillos de la tuerca de tage. montaje. Install the drain pull rod. Installez la tige d’entraînement du Instale el tirador de drenaje. trou d’écoulement. Screw the hoses into the spout Vissez à...
- Page 10 9 mm 16 mm English Français Español Connect the hoses to the valves. Raccordez les tuyaux aux valves. Conecte las mangueras a las Tighten using two wrenches. Serrez à l’aide de deux clés. válvulas. Apriete utilizando dos llaves. Do not allow the hoses Assurez-vous que les to twist.
- Page 11 > 2 min English Français Español Flush the hot and cold supplies for Rincez le robinet pendant au moins Lave el grifo durante al menos 2 at least 2 minutes. 2 minutes. minutos. Install the aerator. Installez l’aérateur. Instale el aireador. Do not over-tighten the Ne serrez pas trop No apriete el aireador...
- Page 12 Installation / Installation / Instalación Masilla de petróleo-basó puede dañar Petroleum-based plumbers putty may Le mastic de pétrole-basé peut en- damage some sink materials. Please dommager la surface de quelque la superficie de algún bañeras. Consulte refer to the instructions included baignoires.
- Page 13 Replacement Parts / Pièces détachées / Repuestos 98928xx0 95382000 98987000 30x1.5 34095xx0 95701xx0 13961000 98927000 98932000 98929xx0 94008000 98930xx0 94009000 96321001 xx = Colors / Couleurs / Acabados 00 = Chrome 82 = Brushed Nickel...
- Page 14 User Instructions / Instructions de service / Manejo ferme ouvert cerrado abierto Cleaning / Nettoyage / Limpiar...
- Page 15 Cleaning Recommendation for Hansgrohe Products Modern bathroom faucets, kitchen faucets and shower products are made from different materials to comply with the needs of the market with regard to design and functionality. To avoid damage to the product, it is necessary to take proper care of For best results: •...
- Page 16 • Ne pulvérisez pas les nettoyants directement sur le produit car des gouttes pourraient entrer dans les ouvertures et les fentes et causer des dommages. Lorsque vous utilisez des nettoyants par pulvérisation, pulvérisez le nettoyant sur un chiffon ou une éponge douce. Important •...
-
Page 17: Limited Consumer Warranty
Limited Consumer Warranty This product has been manufactured and tested to the highest quality standards by Hansgrohe, Inc. (“Hansgrohe”). This warranty is limited to Hansgrohe products that are purchased by a consumer in the United States or Canada after March 1, 1996, and installed in either in the United States or in Canada. WHO IS COVERED BY THE WARRANTY This warranty extends to the original purchaser only. - Page 18 EXCLUSIONS AND LIMITATIONS REPAIR OR REPLACEMENT (OR, IN LIMITED CIRCUMSTANCES, REFUND OF THE PURCHASE PRICE) AS PROVIDED UNDER THIS WARRANTY IS THE EXCLUSIVE REMEDY OF THE PURCHASER. HANSGROHE NEITHER ASSUMES NOR AUTHORIZES ANY PERSON TO CREATE FOR IT ANY OTHER OBLIGATION OR LIABILITY IN CONNECTION WITH THIS PRODUCT.
- Page 20 Hansgrohe, Inc. • 1490 Bluegrass Lakes Parkway • Alpharetta, GA 30004 Tel. 800-334-0455 • Fax 770-360-9887 www.hansgrohe-usa.com...


Need help?
Do you have a question about the AXOR Citterio M 34133 1 Series and is the answer not in the manual?
Questions and answers