smirthwaite Hardrock User Manual
Hide thumbs
Also See for Hardrock:
- Instructions for use manual (20 pages) ,
- Instructions for use manual (25 pages)
Table of Contents
Advertisement
Quick Links
Advertisement
Table of Contents

Related Manuals for smirthwaite Hardrock


Summary of Contents for smirthwaite Hardrock
- Page 1 User Manual Hardrock P a g e...
-
Page 2: Table Of Contents
Vicinity to Other Equipment ....................7 Incident Reporting ....................... 7 Additional Warnings and Safety Notices ................7 Components/Key Parts ......................9 Key Parts ..........................9 Hardrock Configurations ....................10 Packaging ......................... 10 Installation ..........................11 Adjustments ........................11 3.1.1 Seat Height ........................ 11 3.1.2... - Page 3 CONTENTS Final Inspection ........................18 Technical Specification ......................19 Chair Dimensions......................19 Environmental - Storage and Operating Conditions ............19 6.2.1 Normal operating conditions ..................20 6.2.2 Shipping and storage conditions ................20 Standards Applied......................20 Disposal ..........................20 General Inspection and Maintenance ................... 21 Daily Checks - To Be Completed by User .................
-
Page 4: Safety Instructions And Warnings
If you require larger print or videos – these are available on the Smirthwaite website: www.smirthwaite.co.uk/product/Hardrock-chair/ The information in this manual is important for the safety of anyone near the Hardrock chair and must be read and understood to help prevent injuries. It is also crucial to the proper operation and maintenance of the Hardrock chair. -
Page 5: Symbols Used
European Community 1.4 Contraindications/Limitations There are no known “contraindications” associated with the usage of the Hardrock chair and its accessories, provided they are used as per manufacturer’s recommendations and guidelines. Smirthwaite Ltd. does not recommend a required number of care givers for the use of our... -
Page 6: Intended Use
Hardrock. The Hardrock is designed to be checked and adjusted by a therapist to ensure the child is seated correctly. 1.6 Chair Operating Environment The Hardrock chair is suitable for use within the professional health care facility environment as well as the home health care environment. -
Page 7: Vicinity To Other Equipment
• Adjusting the seat height of the Hardrock is easier and safer if carried out by two people. • Ensure all castors on the mobile base are locked with castors facing inwards by tilting the chair slightly onto its side before making any adjustments. - Page 8 SAFETY INSTRUCTIONS AND WARNINGS • If rear transporter wheels have not been fitted, Hardrock should only be moved by two people. • Only Hardrock fitted onto mobile base can be used as an indoor transit chair. • The Hardrock castors are designed for indoor use only and may be damaged if used outdoors.
-
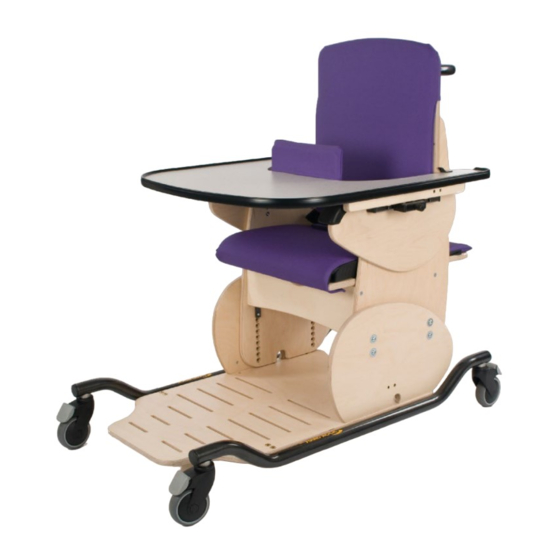
Page 9: Components/Key Parts
Please see above to familiarise yourself with the components of the Hardrock chair. The image above shows the key components of the Hardrock chair. If you have not received all the components contact your local Smirthwaite dealer immediately – contact details are provided on... -
Page 10: Hardrock Configurations
Smirthwaite Ltd. will document and maintain a record of the original product configuration at the time of first sale. Smirthwaite Ltd. will not be held responsible for any subsequent changes to this configuration unless authorized to do so in writing by Smirthwaite Ltd. -
Page 11: Installation
INSTALLATION 3.0 INSTALLATION When delivered, the chair will be supplied fully assembled except for the attachment of any special accessories ordered. Always turn hand wheels, levers and screws clockwise to tighten or anti- clockwise to loosen. 3.1 Adjustments 3.1.1 Seat Height •... -
Page 12: Armrest
INSTALLATION 3.1.3 Armrest • Loosen the 2 hexagon screws ( C ) • Position at required height using any of the holes available. • Tighten the screws. • Ensure that both armrests are set at the same height and horizontal. Always lock the castors when attaching items or making adjustments. -
Page 13: Compatible Accessories
COMPATIBLE ACCESSORIES 4.0 COMPATIBLE ACCESSORIES The Hardrock chair comes with a variety of compatible accessories. These accessories and part codes are listed below; Size 1 Size 2 Size 3 Size 4 Accessories CODE CODE CODE CODE Chair 8201 8202 8203... -
Page 14: Tray
COMPATIBLE ACCESSORIES 4.1 Tray • Hold the sides of the tray • Pull 2 plunger pins (D) out to rest and park at an angle. • Rest back of tray on armrest. • Slide back of tray under the tray retainer (E) and then to desired position. -
Page 15: Straps And Harnesses
COMPATIBLE ACCESSORIES 4.3 Straps and Harnesses 4.3.1 Pelvic Lap Strap • The buckle is operated in the same way as the thoracic supports (see section 4.2) • To adjust the length on the strap, simply adjust the amount of strap that is fed through the cam-lock fasteners, which are located on the back of the chair. -
Page 16: Buckle And Strap Operation
COMPATIBLE ACCESSORIES 4.4 Buckle and Strap Operation 4.4.1 Buckle Strap (Standard) • The buckle is secured by pushing (I) into (J). • To release the buckle, press both sides of (I) 4.4.2 Strap Length • The length of the straps can be altered by adjusting the amount of the strap that is fed through the cam-locks and tri- glides (if applicable). -
Page 17: Stabilisers
COMPATIBLE ACCESSORIES 4.7 Stabilisers 4.7.1 Retrofitting • Slacken side panel fixing screws located under the chassis • Insert stabilizers through the ‘mouse- hole’ (L) of the side panel. • Turn the stabilizer to the vertical position (as shown on the right). •... -
Page 18: Final Inspection
• Confirm with the operator if the chair is safe to use and that it has been left in a working state. Isolate the chair if it is not safe to operate. • Complete all documentation – see Hardrock User Manual for more details Incorrect use may result in personal injury or damage to objects. -
Page 19: Technical Specification
It is not intended to be used in environments where there are rapid changes in the environmental temperature and humidity during intended use. The Hardrock chair suffers little from any effects of lint, dust and light. Lint – Due to there being no mechanical or electrical mechanisms on the •... -
Page 20: Normal Operating Conditions
It is recommended that the chair is stored in a cool, dry place out of direct sunlight. If cleaning is required after storage, please see section 7.6 ‘Cleaning’ of the user manual for instructions. Shipping and storage conditions are also contained on Hardrock Box Label: 6.3 Standards Applied The standards that have been applied to the device are as follows: •... -
Page 21: General Inspection And Maintenance
• Check the strap is securely fastened to the poppers on the underside of the chair. 7.2 Service Interval The Hardrock chair should be serviced annually. Servicing must only be undertaken by a Smirthwaite Ltd. service engineer, or by a Smirthwaite Ltd. trained representative. -
Page 22: Extending Nominal Service Life
• Use by a client who is extremely active, either voluntarily or involuntarily. 7.4 Extending Nominal Service Life At Smirthwaite Ltd. we are proud to produce products that have a reputation for quality and durability. We believe our products have the potential to provide benefits to our clients beyond the nominal service life documented above. -
Page 23: Cleaning
8.1 General cleaning The exterior of the Hardrock chair can be cleaned using a damp soapy cloth for general cleaning duties. Please ensure the cloth is damp and not wet. Ensure the exterior of the chair is dry after cleaning. -
Page 24: Service Record History
SERVICE DOCUMENTATION 9.2 Service Record History Complete this record after each service, repair inspection and/or maintenance. * Photocopy additional pages as required * 9.2.1 Product Information Model Size Date of Manufacture Serial Number 9.2.2 Service & inspection record form: Date Procedure Service Personnel... -
Page 25: Warranty
WARRANTY 10.0 WARRANTY Smirthwaite Ltd warrants the products detailed on your order to be free from defects in materials and workmanship for a period of 2 years from date of delivery. If a fault develops during the period, please call Customer Services by email or telephone 01626 835552 who will advise you on the best course of action. - Page 26 Smirthwaite Ltd, 16 Wentworth Road • Heathfield • Newton Abbot • Devon • TQ12 6TL Part Number: 999-1-09 / Rev: 2 / Date: Sep 21...
Need help?
Do you have a question about the Hardrock and is the answer not in the manual?
Questions and answers