Table of Contents
Advertisement
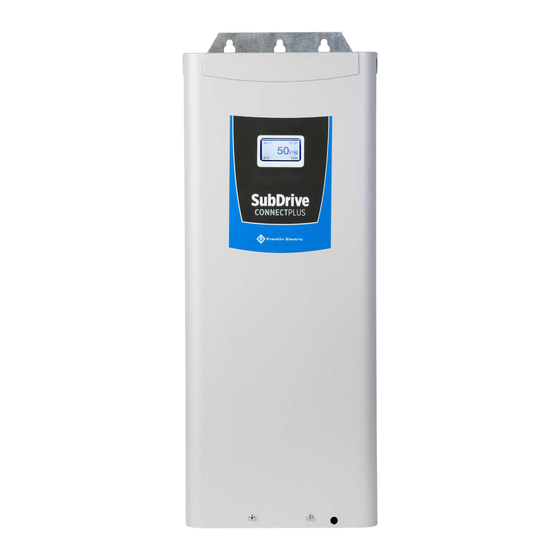
QUICKSTART GUIDE
SubDrive Connect Plus
Physical Installation
QUICKSTART GUIDE
Environmental Requirements
Risk of damage to drive
installation, or environment.
•
Install in a location where temperature is within the range of product rating.
•
Mount VFD vertically (top up) for proper heat dissipation.
•
Do not mount VFD in direct sunlight or near other heat sources.
•
Do not install in corrosive environments.
•
Install away from direct sunlight and extreme temperatures or humidity.
•
Installation of non-approved screening may damage the drive and/or reduce output.
The drive is intended for operation in ambient temperatures from -13 °F to 122 °F (-25 °C to 50 °C).
•
Allow at least 6 inches (15.24 cm) of clearance on all sides of the unit for air flow.
The drive is suitable for outdoor use with a NEMA 3R rating, provided:
•
Mount the drive on a back plate 6" (15 cm) larger than the outer dimensions of the
enclosure in order to maintain the NEMA 3R rating.
•
The unit must be mounted vertically with the wiring end oriented downward, and the
cover must be properly secured (also applies to indoor installations).
•
NEMA 3R enclosures are capable of withstanding downward-directed rain only.
Protect from hose-directed or sprayed water as well as blowing rain.
Mounting the Drive
1.
Mount the drive using all three keyhole slots on the top side of the enclosure.
2. At least two keyhole screws at the top must attach to a solid structure such as a stud or
brace.
3. Secure the three additional mounting holes on the bottom.
4. All six screw hole locations should be used to ensure the drive is securely mounted.
IMPORTANT: Do not drill holes in the drive.
Risk of bodily injury or damage to drive or other equipment.
•
The drive should be mounted on a structure such as a wall or post capable of supporting the weight
of the unit, at least 18" (45.7 cm) above the ground.
•
The drive must be mounted on a heat-resistant back plate.
•
Ensure suitable mounting hardware is used when installing the drive.
•
Do not install the drive on unreinforced drywall.
•
Use two persons when lifting the drive for transport or installation. If using lifting equipment, it must
be in good condition and rated for at least 5 times the weight of the drive.
•
Wear protective gloves while installing the drive to guard against sharp edges.
,
or malfunction can occur due to improper handling,
This QuickStart Guide
includes basic installa-
tion, setup, and opera-
tion information.
For additional important
safety and operation
information, please refer
to the
SubDrive Connect Plus
Owner's Manual
and the AIM Manual
available at:
www.franklinwater.com.
Warm Air
6 in mín.
(15.25 cm)
6 in mín.
(15.25 cm)
(15.25 cm)
6 in mín.
(15.25 cm)
Cold Air
6 in mín.
Advertisement
Table of Contents

Related Manuals for Franklin Electric SubDrive Connect Plus SDCP-SUB0723


Summary of Contents for Franklin Electric SubDrive Connect Plus SDCP-SUB0723
- Page 1 QUICKSTART GUIDE SubDrive Connect Plus Physical Installation QUICKSTART GUIDE This QuickStart Guide includes basic installa- Environmental Requirements tion, setup, and opera- tion information. For additional important Risk of damage to drive or malfunction can occur due to improper handling, safety and operation installation, or environment.
-
Page 2: Electrical Installation
QUICKSTART GUIDE Electrical Installation Electrical Installation Wiring Guidelines Risk of damage to VFD or malfunction can occur. Follow all wire routing and grounding instructions carefully. Inductive currents caused by parallel wiring, or close proximity between high voltage and control wiring can cause unexpected behaviors. •... -
Page 3: Power Wiring Connections
QUICKSTART GUIDE Electrical Installation Power Wiring Connections Contact with hazardous voltage could result in death or serious injury. • Disconnect and lock out all power before installing or servicing equipment. • Connect the motor, the drive, metal plumbing, and all other metal near the motor or cable to the power supply ground terminal using wire no smaller than motor cable wires. - Page 4 QUICKSTART GUIDE Electrical Installation Power Circuit and Motor Connections NOTE: Do not use power tools to tighten these screws, use hand tools only. Refer to “Maximum Torque” on page 2 for wire size and torque information. Power Input Connector: Remove one of the knockouts on the bottom left side of the drive. Route the incoming power leads through the opening on the bottom left side of the drive and connect them to the Power Board terminal block (#1 above).
-
Page 5: Control Circuit Connections
• I-/V- Negative connections for the excitation and voltage sensing circuits for two, three, and four wire PT100/PT1000 RTD sensors. 6. Moisture Sensor – The WET SENSOR terminal supports the Franklin Electric Moisture Sensor. • Connect the red cable lead to the +24 terminal. -
Page 6: Drive Configuration
QUICKSTART GUIDE Drive Configuration Drive Configuration To adjust system settings, make sure power is off for five minutes, and remove the cover. Then, power the drive to make menu and DIP switch changes. When changes are complete, power off the drive before replacing the cover. DIP Switch Settings CF PF AO AB BP... -
Page 7: Menu Settings
QUICKSTART GUIDE Drive Configuration Menu Settings To adjust system settings, make sure power is off, and remove the cover. Then, power the drive to make menu changes. When changes are complete, power off the drive before replacing the cover. Use the arrow keys to the right of the Display to navigate through the setup menus. -
Page 8: Special Functions
QUICKSTART GUIDE Drive Configuration Drawdown: When using a pressure transducer, a pressure offset can be set to allow for more water to be drawn from the pressure tank before a sleeping drive will start. This will reduce sleep/wakeup cycles. For example, a system setpoint pressure of 50 PSI and a drawdown value of 20 PSI would cause the drive to maintain system pres- sure at 50 PSI when running;... -
Page 9: Operation
QUICKSTART GUIDE Operation Operation Hand/Auto Mode When powered up, the drive reads the signal on Control Board J10 (Hand/Auto). If a Hand/Auto switch is not used, the absence of a connection here appears as an open switch, and puts the drive in Auto mode. When a Hand/Auto switch is used, an open switch puts the drive in Auto mode. -
Page 10: Setup Bluetooth Connection
QUICKSTART GUIDE FE Connect Mobile App for SubDrive Connect Plus FE Connect Mobile App for SubDrive Connect Plus The SubDrive Connect Plus companion app is an intuitive way to wirelessly configure and control your VFD. It provides features such as: •... -
Page 11: Troubleshooting
QUICKSTART GUIDE Troubleshooting Troubleshooting Diagnostic Fault Codes Code Reset Fault Possible Cause Corrective Action Auto Motor Underload • Over-pumped well • Frequency near maximum with load less than configured ULD • Broken shaft or coupling sensitivity • Blocked screen, worn pump •... -
Page 12: Safety Information
6-inch submersible motors or above-ground centrifu- • This equipment produces high temperatures during normal gal motors. Use of this unit with any other Franklin Electric operation. Use caution when contacting surfaces. motor or with motors from other manufacturers may result in •...
Need help?
Do you have a question about the SubDrive Connect Plus SDCP-SUB0723 and is the answer not in the manual?
Questions and answers