
Related Manuals for EliteModels 40in Tiger Sports Trainer ARF


Summary of Contents for EliteModels 40in Tiger Sports Trainer ARF
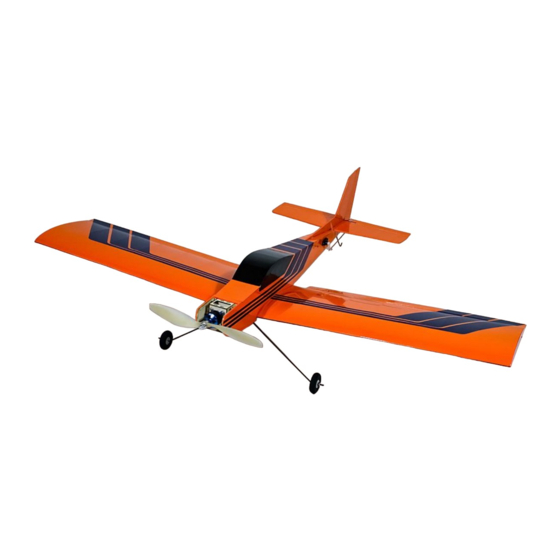
- Page 1 40in Tiger Sports Trainer ARF Specifications Wingspan:40.1 in (1020mm) Length:30.7 in (780mm) Flying Weight: 6...
- Page 2 Dear Customer, Congratulations on your purchase of the Tiger ARF from Value Hobby. We thank you for your generous support, and hope you enjoy your new airplane. At Value Hobby, we hope to offer competitive prices, good performance, and products that you can setup and use with ease. That’s why we extensively researched and tested this airplane, and suggested all the products necessary for you to setup properly.
-
Page 3: Motor Mount
Before Starting Assembly Unpack your airplane and examine the components. Check for damage of any kind. If you see any damage, please contact Value Hobby immediately. Airframe Parts 1. Fuselage 2. Right Wing 3. Left Wing 4. Vertical Fin 5. Elevator 6. - Page 4 9. Landing Gear (2 pieces) 10. Z-Bend Wire (Φ1.8 x 150mm, 4 pieces) 11. Engine Push Rod (Φ1.8 x 180mm, if nitro engine is used) 12. Tail Skid 13. Control Horn (4 pieces) 14. Landing Gear Plate (2 pieces) 15. Servo Connector (4 pieces) 16.
- Page 5 RECOMMENDED EQUIPMENT Product Quantity FrSky Taranis Q X7 Transmitter Mode 2 White FRY-RC-5938 Towerpro SG90 Analog Plastic Gear Micro Servo (24in Long Servo Wire) TWP-SV-0357 GForce E400 Brushless Outrunner Motor (2212-1250KV) VHB-MT5336 GForce 30A Brushless ESC VHB-SC-4496 GForce 30C 2200mAh 3S 11.1V LiPO (T- Connector) RFI-LP-1898 Gemfan APC Style 10 x 5 1050 Nylon E-Prop...
-
Page 6: Wing Assembly
Install the servo connector on the servo arm. Wing Assembly Locate the following parts: 2 x Z-Bend Wire 2 x Control Horn 1 x Wing Dowel 2 x Servo Connector 2 x Micro Servo, at least 20oz torque (Not included) Secure the control horn on the aileron. -
Page 7: Tail Assembly
Secure the Z-bend wire into the servo connector. Drill a hole which depth is 10 mm and diameter is 3 Then connect this Z-bend wire to the control horns. mm on the center of the wing. Apply the epoxy to the joint areas of the wing. Secure wing dowel into the hole with CA glue. - Page 8 Secure vertical fin onto the elevator with CA glue. Remove the covering on the pre-cut opening of the elevator with soldering iron. Then secure the tail onto the fuselage with CA glue. Remove the covering on the pre-cut opening of the vertical fin with soldering iron.
- Page 9 Secure the control horn on the pre-cut slot of the Secure the control horn on the elevator. vertical fin. Secure the servo into the fuselage. Install the servo onto the fuselage. Install Z-bend wire into the control horn on the Install Z-bend wire into the control horn on the elevator.
-
Page 10: Landing Gear Assembly
Landing Gear Assembly Secure the landing gear into the fuselage with landing gear screws. Locate the following parts: 2 x Landing Gear 1 X Tail Skid 2 x Landing Gear Plate 2 x Wheel Collar 4 x Landing Gear Screw 2 x Foam Wheel Secure the foam wheel into the nose landing gear with wheel collar. -
Page 11: Electronics Installation
Secure the tail skid into the fuselage with CA glue. Drill through four pre-cut holes on the nose with a 3mm diameter drill bit. Electronics Installation Secure the motor mount onto the fuselage with four motor mount screws. Then tighten them with four Locate the following parts: nuts. - Page 12 Secure the wing on the fuselage with two wing screws and two washers. The CG should be 60mm (2.3-2.4in) from the leading edge of the wing. The CG varies with your motor and battery. You might need to use the ballast to change the CG.
Need help?
Do you have a question about the 40in Tiger Sports Trainer ARF and is the answer not in the manual?
Questions and answers