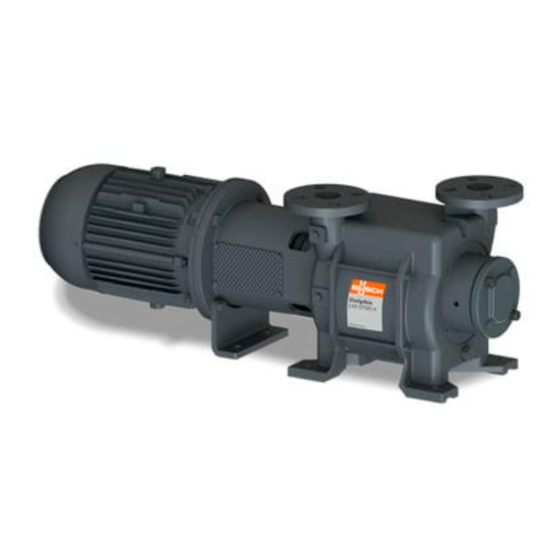
BUSCH DOLPHIN LM 0180 A Retrofit Instructions
Hide thumbs
Also See for DOLPHIN LM 0180 A:
- Instruction manual (28 pages) ,
- Instruction manual (40 pages) ,
- Instructions manual (44 pages)

Related Manuals for BUSCH DOLPHIN LM 0180 A


Summary of Contents for BUSCH DOLPHIN LM 0180 A
- Page 1 Retrofit Instructions DOLPHIN Variable-Frequency Drive Installation LM 0180 A, LM 0270 A LT 0170 A, LT 0220 A 0870232639/-0001_en / Original instructions / Modifications reserved 16/09/2021...
-
Page 2: Table Of Contents
Table of Contents Table of Contents 1 Safety ............................3 2 Introduction ..........................3 3 Retrofit Kit Description ......................4 3.1 Scope of Delivery ......................4 3.1.1 Variable-Frequency Drive with Motor..............4 3.2 Motor Compatibility ......................5 4 Transport ..........................5 5 Storage .............................6 6 Installation..........................6 6.1 Installation Conditions ...................... -
Page 3: Safety
Safety Prior to handling the machine, this instruction manual should be read and understood. If anything needs to be clarified, please contact your Busch representative. Read this manual carefully before use and keep for future reference. This instruction manual remains valid as long as the customer does not change anything on the product. -
Page 4: Retrofit Kit Description
3 | Retrofit Kit Description Retrofit Kit Description 3.1 Scope of Delivery The retrofit kit with motor is available to suit the DOLPHIN LM 0180 A and LM 0270 A or LT 0170 A and LT 0220 A. 3.1.1 Variable-Frequency Drive with Motor 5.5kW &... -
Page 5: Motor Compatibility
NOTICE Non-compatible motor Risk of damage to the machine and the variable-frequency drive • Make sure to use a compatible motor and approved by Busch. The variable-frequency drive is only compatible with the following motor(s): Motor type Power / Voltage Size Part no. -
Page 6: Storage
5 | Storage Storage NOTICE Long storage time. Risk of damage to the variable-frequency drive! Due to a long storage time the capacitors of the variable-frequency drive can lose effi- ciency because of electrochemical processes. In worst case it can lead to a short circuit and therefore to a damage to the variable-frequency drive. -
Page 7: Variable-Frequency Drive Installation Location
Installation | 6 6.1.1 Variable-Frequency Drive Installation Location • Make sure that the variable-frequency drive is located as below: 6.1.2 Line Protection • Make sure that the cross-section of the supply line is designed according to the trans- fer category and the maximum permitted current. The contractor commissioning the device must ensure protection for the power line. -
Page 8: Preventing Electromagnetic Interferences
6 | Installation Electromagnetic compatibili- Immune to interference acc. to DIN EN 61800-3 Cooling Active cooling & Passive * Do not cover/block cooling outlets. 6.1.4 Preventing Electromagnetic Interferences Where possible use shielded lines for control circuits. The shielding should be applied to the line end with special care and without laying the leads across longer stretches without shielding. -
Page 9: Variable-Frequency Drive Installation
Installation | 6 6.2 Variable-Frequency Drive Installation NOTICE Sealing not correctly mounted. Loss of the protection class! • Make sure during assembly tasks to correctly mount all sealing. • Replace any worn or damaged seal. 6.2.1 Dismantle the Motor Terminal Box •... -
Page 10: Install Adapter
6 | Installation 6.2.2 Install Adapter • Use new provided gasket located on the top of the motor inline with the x4 tapped holes. • Taking the adaptor plate begin to position on top of the rubber gasket, carefully pass motor wires through the center and place onto motor top where the adaptor place will mount. -
Page 11: Mount Variable-Frequency Drive
Installation | 6 6.2.3 Mount Variable-Frequency Drive pos. 1 pos. 2 pos. 4 pos. 3 pos. 5 pos. 6 • Remove the four screws and the housing cover of the variable-frequency drive to ac- cess the internal parts, beware the earth connection cable between the cover and the housing. -
Page 12: Motor & Coupling Installation
6 | Installation 6.3 Motor & Coupling Installation • Refer to coupling manufacturer’s manual for details of coupling fitment to motor and pump shafts. • Install motor adaptor to motor pedestal then install motor onto motor adaptor. 6.4 Electrical Connection DANGER Risk of death due to electrical shock! Death or serious injury! - Page 13 Installation | 6 Installation and Retrofit Instructions DOLPHIN LM 0180-0270 A, LT 0170-0220 13 / 20 A_EN_en...
- Page 14 6 | Installation Please refer to motor nameplate & datasheet for technical information. Hardware enable (see diagram “Hardware enable, sizes A – D”) NOTICE Incorrect direction of rotation. Risk of damage to the machine! • Operation in the wrong direction of rotation can destroy the machine in a short time! Prior to start-up, ensure that the machine is operated in the right direction.
-
Page 15: Commissioning
LT 0170 A LT 0220 A Remote speed control and parametrisation are only possible via the remote control and the PC-Software. Contact your Busch representative for more information. NOTICE Frequent starts and stops by connecting and disconnecting from the power supply. -
Page 16: Troubleshooting
• Check the LED on the frequency drive (VFD) is de- variable-frequency drive fective. display, if red, it is faulty (contact Busch or read er- ror with software). En. HW has not been • Using a jumper cable connected. from terminal relay box X5 - 24V Out to En. -
Page 17: Led Flash Codes
Troubleshooting | 8 8.1 LED Flash Codes When an error occurs, the LEDs on the variable-frequency drive display a flashing code that allows the errors to be diagnosed. The following table contains an overview: Red LED Green LED State Boot loader active (flashing in turn) Ready for operation (activate En_HW for operation) Operation / ready Warning... -
Page 18: Technical Data
9 | Technical Data Technical Data Below additional technical data once the variable-frequency drive has been installed on the motor. The technical datas of the machine in the original instruction manual remain valid after the retrofitting. LM 0180-0270 A with VFD - LT 0170-0220 A with VFD Allowed frequency range 34 –... - Page 19 Note...
- Page 20 Busch Vacuum Solutions We shape vacuum for you. Argentina Denmark Malaysia South Africa info@busch.com.ar info@busch.dk busch@busch.com.my info@busch.co.za Australia Finland Mexico Spain sales@busch.com.au info@busch.fi info@busch.com.mx contacto@buschiberica.es Austria France Netherlands Sweden busch@busch.at busch@busch.fr info@busch.nl info@busch.se Bangladesh Germany New Zealand Switzerland sales@busch.com.bd info@busch.de sales@busch.co.nz...
Need help?
Do you have a question about the DOLPHIN LM 0180 A and is the answer not in the manual?
Questions and answers