Table of Contents
Advertisement
Quick Links
Advertisement
Table of Contents

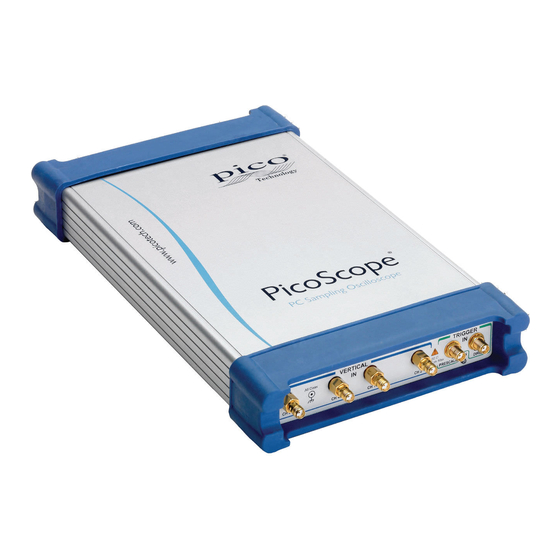
Summary of Contents for PICO PicoScope 9000 Series
- Page 1 PicoScope 9000 Series PC Sampling Oscilloscopes Quick Start GuiDe...
- Page 2 PicoScope 9000 Series PC Sampling Oscilloscopes Quick Start Guide DO134-8...
- Page 3 Issue record: 17.07.08 First version. 20.11.08 Added 9211. 27.04.10 Changed part no. to 9211A. 06.06.11 Added 9221A & 9231A. Added 64-bit Windows & Win7. 12.12.11 Simplified cover. 01.02.13 Various small updates. 20.06.13 Added 9300 Series. Updated safety & setup information. 12.11.13 Added PicoScopes 9311, 9312, and 9321.
-
Page 4: Table Of Contents
Pico Technology PC Sampling Oscilloscope Quick Start Guide CONTENTS Introduction Safety information Symbols Maximum input ranges Grounding External connections Environment Care of the product Conformance FCC notice CE notice System requirements Included with your PicoScope Installing the PicoScope 9000 and PicoSample 3 software 9... -
Page 5: Introduction
PC Sampling Oscilloscope Quick Start Guide Pico Technology Introduction Thank you for purchasing a PicoScope 9000 Series PC Sampling Oscilloscope, a high-bandwidth, high-effective-sampling-rate measuring instrument specifically designed for capturing and analysing cyclical waveforms or clocked data streams. Once you have finished the basic installations described here, the User’s Guide will provide further information about setting up and using the hardware and software. -
Page 6: Maximum Input Ranges
Operate within the safe input range to prevent electric shock and injury. WARNING To prevent injury or death, PicoScope 9000 Series oscilloscopes must not be connected to the mains (line power), either directly or through any probe, adaptor, attenuator, or connector, except the AC adaptor supplied with the product. -
Page 7: External Connections
(non-condensing) Care of the product The product contains no user-serviceable parts. Repair, servicing and calibration require specialized test equipment and must only be performed by Pico Technology or an approved service provider. There may be a charge for these services. -
Page 8: Conformance
Pico Technology PC Sampling Oscilloscope Quick Start Guide CAUTION Do not block the air vents at the back or front of the instrument as overheating will damage the oscilloscope. CAUTION When cleaning the product, use a soft cloth and a solution of mild soap or detergent in water. -
Page 9: Included With Your Picoscope
PC Sampling Oscilloscope Quick Start Guide Pico Technology Included with your PicoScope The main oscilloscope kit contains: 9000 Series oscilloscope Storage and carry case Software disc SMA/PC3.5/2.92 wrench Quick start guide Power supply 12 V DC at 3.5 A, universal input ... -
Page 10: Installing The Picoscope 9000 And Picosample 3 Software
Stop! Do not connect the oscilloscope until the software has been successfully installed. Insert the Pico software disc into your CD-ROM drive. It should start automatically, but if it does not simply go to My Computer and select the Pico CD. -
Page 11: Using Your Oscilloscope
PC Sampling Oscilloscope Quick Start Guide Pico Technology Using your oscilloscope Connection diagrams Basic setups for all 9200 and 9300 Series PicoScopes. PicoScope 9211 and 9231 TDR single-ended setup. PicoScope 9211 and 9231 TDT single-ended setup. Clock recovery setup for PicoScope 9231, 9302, and 9321. - Page 12 Pico Technology PC Sampling Oscilloscope Quick Start Guide PicoScope 9311 TDT single-ended and differential setups. PicoScope 9312 TDR single-ended and differential setups. Note: the arrangement of the front panel connectors varies between models. Always check the labelling on the front panel of your PicoScope 9312 TDT single-ended and differential setups.
-
Page 13: Getting Started With The Software
PC Sampling Oscilloscope Quick Start Guide Pico Technology Getting started with the software In this example we will use the PicoSample 3 software and the PicoScope 9300 Series oscilloscope's built-in pulse generator (labelled Aux Out on the rear panel) as the signal source. -
Page 14: Adding Measurements
Pico Technology PC Sampling Oscilloscope Quick Start Guide If you are using a 9000 Series oscilloscope which does not have a built-in pulse generator, select Demo when starting the software to use the demonstration signal generator. 7. Select Auto Scale from the top menu bar. -
Page 15: Configuring The Display
PC Sampling Oscilloscope Quick Start Guide Pico Technology Configuring the display With the NRZ waveform chosen, select Display from the bottom menu bar. Select Var Color Grading from the side menu to adjust the view of the waveform. Click on the waveform and drag it to the left, as shown below. -
Page 16: Free Newsletter
To subscribe, visit www.picotech.com/newsletter/ Software updates and replacement The latest versions of all Pico software and manuals can be downloaded free of charge www.picotech.com If you require a new software disc, please contact Pico Technology or your distributor. - Page 17 PC Sampling Oscilloscope Quick Start Guide Pico Technology Pico Technology James House Colmworth Business Park St. Neots Cambridgeshire PE19 8YP United Kingdom Tel: +44 (0) 1480 396395 Fax: +44 (0) 1480 396296 Website: www.picotech.com Email: support@picotech.com Copyright © 2008-2013 Pico Technology. All rights reserved. DO134-8...
- Page 18 DO134-8...


Need help?
Do you have a question about the PicoScope 9000 Series and is the answer not in the manual?
Questions and answers