Table of Contents

Related Manuals for Potensic Dreamer Pro


Summary of Contents for Potensic Dreamer Pro
- Page 1 DANGER Only suitable for age 14+ Dreamer Pro User Manual Email: support@potensic.com(USA) Tel: 858-222-1895 Email: support.ca@potensic.com(CA) Web: www.potensic.com Email: support.uk@potensic.com(UK) FB: www.facebook.com/Potensic...
-
Page 2: Table Of Contents
Contents Reading Tips Get Tutorials Package List Download PotensicPro App Product Overview Daily Maintenance Drone Installation Drone Diagram Remote Control Diagram About Aircraft Aircraft Overview Flight Mode Intelligent Flight Modes Return to home (RTH) Drone Smart Battery Charging Indicator Status Remote Control Remote Control Mode Remote Control Charging... -
Page 3: Reading Tips
Reading Tips Get Tutorials It is recommended that users watch the tutorial video first, and then read the "User Manual". Please click the link or scean the QR code below to get tutorial videos. Link: https://www.youtube.com/channel/UCKjU1_4HmL0XAXng0J9-NCg QR Code Packing List Drone with camera x1 Smart battery x1 Remote control x1... -
Page 4: Download Potensicpro App
Download PotensicPro App Android users Please search and download the drone App "PotensicPro" in Google Play or scan the QR code below to download. This App is compatible with Android 5.0 and above. For Android iOS Users Please search and download the drone App "PotensicPro" in APP store or scan the QR code below to download. -
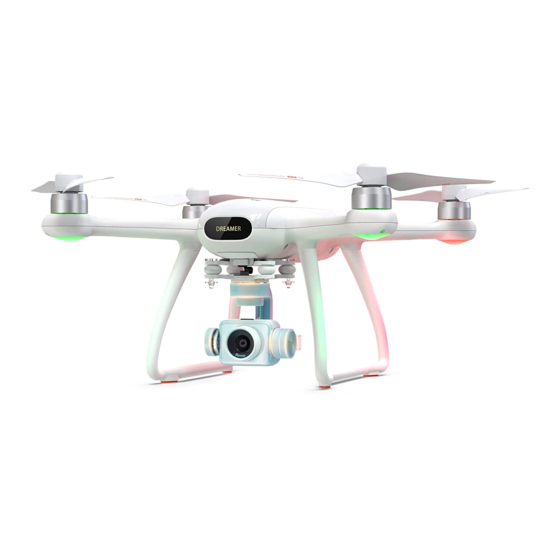
Page 5: Product Overview
Product Overview This chapter mainly introduces the functional features of Dreamer Pro, guides on how to install the aircraft, and introduces the names of various parts of the aircraft and remote control. Thank you for purchasing Potensic Dreamer Pro drone. Please read the user manual carefully and keep it for future reference. - Page 6 2.2 Propeller Installation 1.When installing blades, pay attention to the "CW" and "CCW" marks on the blades. 2.Press down the blade in alignment with the central axis, and rotate according to the lock marked direction by the blade lock until it is fully screwed. After installation, the propeller will pop up and lock.
-
Page 7: Drone Diagram
2.4 App Real-time Image Connecting Follow these steps to connect your mobile device: 1. Expand and adjust the antenna position. 2. Open the remote control pull-out board, and then put your mobile phone into it. The size range of the clamping machine is 97-178mm 3. -
Page 8: Remote Control Diagram
Remote Control Diagram Know Your Remote Control Dreamer Pro uses a 5.8G remote control with complete function buttons. It can support various operations and settings of the drone and camera within a maximum communication distance of 2000m, and can display real-time HD pictures on the mobile device through PotensicPro app. The remote control has a built-in rechargeable lithium battery, which can work continuously for up to 2.5hours. - Page 9 Camera brightness adjustment thumbwheel Turn the thumbwheel to adjust the exposure of the camera. Dreamer Pro uses a 5.8G remote control with complete function buttons. It can support various operations and settings of the drone and camera within a maximum communication distance of 1000m, and can display real-time HD pictures on the mobile device through PotensicPro app.
-
Page 10: About Aircraft
In this chapter, the functions of various components on the aircraft are described in detail. 2. Flight Modes Dreamer Pro adopts a new generation of Potensic flight control, which supports the following two flight modes: GPS mode: Use GPS module to achieve precise hovering, waypoint flight and other intelligent flight modes. -
Page 11: Intelligent Flight Modes
3. Intelligent Flight Modes 3.1 Headless Mode After take-off, the headless mode can be started only when the flight distance is more than 10 meters. Click the headless mode icon in app to enter headless mode, and then click once again to exit headless mode and the drone will land on the ground to automatically. -
Page 12: Return To Home (Rth)
3.4 Waypoint Flight Mode Click the icon to start the waypoint flight mode. Set multiple position points on the map, and the drone will fly in the order of set points(15 point at most). The map will identify the serial number of each point. The normal flight altitude is more than 5m, and the GPS signal is no less than 6. -
Page 13: Drone Smart Battery
5. Drone Smart Battery Please return in time and charge the battery when the drone in low battery. Connect the adapter correctly as shown in the figure to charge. The indicator flashes when charging, and goes out when fully charged. It takes about 2 hours. Note 1. -
Page 14: Remote Control
Remote Control 1. Remote Control Mode There are two remote control modes of this product, mode 1 and mode 2. Mode 1 is the default setting. Mode 1 Forward Right stick Left stick Upward Downward Backward Turn counterclockwise Turn clockwise Move Left Move right Mode 2... -
Page 15: Remote Control Frequency Linking
Camera and Gimbal 1. Camera Overview The Dreamer Pro adopts a 1/3-inch CMOS Sony sensor with 16MP camera. Equipped with low distortion wide-angle lens. The blue glass filter can effectively improve the picture quality. Standard UV lens to protect the lens. When recording video, Dreamer Pro supports 4K ultra-high-definition video recording at up to 30 frames per second, providing 4 times the full HD resolution of image details. -
Page 16: Support Micro Sd Card
2. Support Micro SD Card Insert the micro SD card into the camera SD card slot. It is recommended to use SD card products of class10 or above, brand such as SanDisk, Kingston or Samsung, which require a minimum SD card capacity of 4GB and a maximum of 256GB. -
Page 17: Potensicpro App
PotensicPro App 1. Operation Interface Return to the menu GPS mode/Attitude mode Photo/Video switch GPS signal level Drone status Photo Taking/Video Recording Transmission signal level Standard mode/Sport mode Camera setting Head mode/Headless mode Drone power Camera pitch adjustment Lock/Unlock Setting interface Vertical flight speed Intelligent flight mode settings Flight height... - Page 18 2. Intelligent Flight Mode Headless mode / Head-hold Circling mode Follow me mode Lock / Unlock Waypoint mode Virtual control stick GPS mode / Attitude mode 3. Setting Interface More Main controller settings Remote control settings About smart batteries Calibration settings...
-
Page 19: About Flight
About Flight This chapter introduces flight environment requirements, precautions, and flight operation procedures. 1. Flight Environment Requirements 1. Please do not fly in bad weather, such as strong wind (wind speed 5 and above), snow, rain, foggy weather, etc. 2. Choose an open place without surrounding tall buildings as the flight site. Buildings that use a lot of steel will affect the geomagnetic work, and will block the GPS signal, resulting in poor positioning of the aircraft or even unable to locate. -
Page 20: Geomagnetic Calibration
4. Geomagnetic Calibration Geomagnetic calibration is required for the first flight (after once calibration, the same region within 300km doesn't need calibration). If the geomagnetism of the aircraft is disturbed, the manual re-calibration may need to done to the drone. Picture Picture Step 1: Enter the PotensicPro App setting interface, click the second column, and select geomagnetic... -
Page 21: Beginner Mode
5. Beginner Mode The beginner mode is in default. Under the beginner mode: A. The flight distance is limited to 0 ~ 30m B. The flight altitude is limited to 0-30m 6. Take-off and Landing Manually take off: Push the left and right stick inwards 45 degrees(Picture 1) at the same time, unlock the drone or click the App unlock icon , and push up the throttle lever. -
Page 22: Appendix
Appendix 1. Specification Drone Take-off weight: 820g ± 5g Maximum ascending speed: 5 m/s (sport mode); 3m/s (standard mode) Maximum descending speed: 2 m/s (sport mode); 2 m/s (standard mode) Maximum horizontal flight speed: 8 m/s (sport mode); 5 m/s (standard mode) Flight time: 28 minutes Working environment temperature: 0°... -
Page 23: Frequent Q&A
2. Frequent Q&A Problem Solution Cannot unlock Restart drone and remote control. Device is not connected properly Check if the drone is geomagnetic calibrated. Check the surrounding environment of the Cannot find GPS signal or GPS level drops drone to see if there is high-frequency signal interference. - Page 24 3. In order to properly use this product, please use original parts for modification or maintenance to ensure flight safety. Please operate and use this product to the extent permitted by its functions, and it shall not be used for illegal purposes beyond safety laws and regulations. 4.
-
Page 25: Warning And Tips
4. Warning and Tips 1. The package and instructions contain important information and should be properly kept. 2. It is your responsibility to ensure that this drone will not cause injury and property loss. 3. The commissioning and installation of the drone shall be carried out in strict accordance with operation instructions. -
Page 26: Fcc Requirement
5. FCC Requirement Changes or modifications not expressly approved by the party responsible for compliance could void the user’s authority to operate the equipment. This device complies with Part 15 of the FCC Rules. Operation is subject to the following two conditions: (1) This device may not cause harmful interference, and (2) This device must accept any interference received, including interference that may cause undesired operation. - Page 27 Name Dreamer Pro Model DSDR01C Battery voltage 15.2V Manufacturer DeepSea Innovation Co., LTD 3rd Floor, Building 4, Silicon Valley Address Courtyard, Qingquan Road, Shenzhen, CN Battery information Capacity: 3000mAh,45.6Wh Input:100-240V,50/60Hz 1.0A Adapter information Output:17.5V-1.5A EC REP: DST Co., Ltd. Fifth Floor 3 Gower Street,London,WC1E 6HA,UK Warning: This product can only be used by adults or children above 14 years old.
- Page 28 封底...
- Page 29 Reading Tips Get Tutorials Android users This chapter mainly introduces the functional features of Dreamer Pro, guides on how to install the 1. Expand and adjust the antenna position. Get Tutorials aircraft, and introduces the names of various parts of the aircraft and remote control.
Need help?
Do you have a question about the Dreamer Pro and is the answer not in the manual?
Questions and answers