Table of Contents
Advertisement
Advertisement
Table of Contents

Related Manuals for Potensic A30


Summary of Contents for Potensic A30
- Page 1 Operation Guidance...
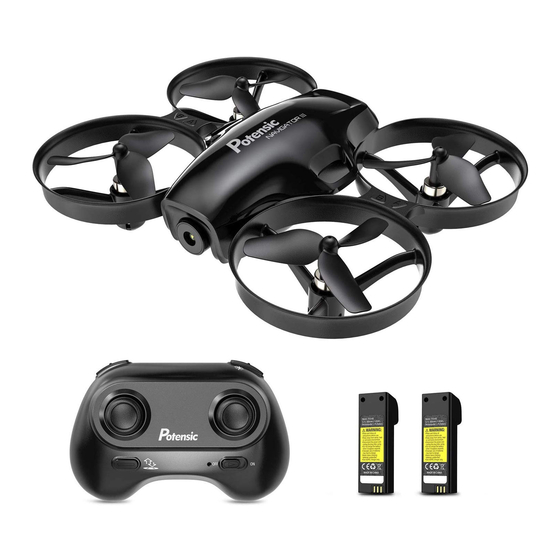
- Page 2 http://www.ipotensic.com Overview of drone and transmitter Drone Front LED Light Propeller A Propeller B Drone cover Propeller B Propeller A Power switch Rear Drone body Battery Rear...
- Page 3 http://www.ipotensic.com Main parameter Drone Size 140x140x43.5mm Flying Distance/Radius Weight of drone Charging time ~80 mins of drone battery Flight time 6~7 mins Drone battery 3.7V x 500mAh Frequency 2.4Ghz Exploded View...
- Page 4 http://www.ipotensic.com Name Name Back cover of light Drone cover Propeller A Front cover of light Propeller B Light Board Clockwise Motor Light Organic Board Battery Receiver Board Drone body Inner box of battery Buckle Counterclockwise Motor Transmitter Headless Mode function High / Medium/ Low Speed button...
- Page 5 http://www.ipotensic.com Trimmer Mode button (Press down the left stick) Move the Stick forward / backward / left / right to fly Left Stick the droneto up / down / turn left / turn right. Move the Stick forward / backward / left / right to fly Right Stick the drone to forward / backward / left / right.
- Page 6 http://www.ipotensic.com Open the battery cover of the transmitter, insert 3 AAA batteries following the polarity indicators ( Picture below, battery is not included) and then close it. Battery Cover 3X1.5V Alkaline Battery 1. Make sure the electrodes are correct. 2. Do not mix new with old batteries. Notice: 3.
- Page 7 http://www.ipotensic.com Parts installation Charging Instruction for Drone Battery 1. Connect the drone battery with USB cable first and then choose one of the method as below picture shown to connect with USB plug. 2.The indicator light on drone battery will become red and it will turn green when fully charged.
- Page 8 http://www.ipotensic.com Assemble/Disassemble the Propellers To disassemble, press the motor and gently pull the propeller upward with another hand. To install the propeller, align and snap on the propeller blade to the motor. Picture 7 Note: Align propeller A with the motor marked A, and align propeller B with the motor marked B.
- Page 9 http://www.ipotensic.com Drone battery installation When installing, insert the battery into the drone as per diagram (on picture 8) and the battery sticker should be facing upward. When removing, pull up the drone buckle and pull out the battery buckle (Picture 9). Stickers up Picture 8 Battery buckle...
- Page 10 http://www.ipotensic.com Precautions before flying 1. Make sure the transmitter and the battery of the drone are fully charged. 2. Before starting, please confirm that the left stick of the transmitter is in the middle position. 3. Please follow the correct steps to turn on the drone/trans- mitter.
- Page 11 http://www.ipotensic.com Flying steps Syncing Frequencies Turn on the transmitter and the power indicator light on it flashes rapidly. Pull the left stick to the lowest position and then release. The power indicator on transmitter will flash slowly and the controller is ready for pairing. Turn on the drone.
-
Page 12: Take Off
http://www.ipotensic.com Take off After calibration successfully, press this button, the drone will fly up and keep flying at an altitude of approximately 1.2 meters automatically. Landing Press it to land the drone automatically. (In this mode, DO NOT touch the left stick, otherwise it might not work). Emergency Landing In an emergency situation, such as if it is about to hit people or obstacles, press the Taking Off/ Landing / Emergency Stop... - Page 13 http://www.ipotensic.com Calibration (This action is operated when flying abnormally) Push the right stick as picture shown after successful frequency pairing. Please loose it when the drone body light flash quickly , indicating that gyro calibration is completed. Tips: Crashing the drone may cause the connection to fail, making the drone hard to control.
- Page 14 http://www.ipotensic.com Flight Control Push the stick, then the drone flies up. Pull the stick, the drone goes down. Left stick Move the stick to the left, the drone rotates counterclockwise Move the stick to the right, the drone rotates clockwise.
- Page 15 http://www.ipotensic.com Push the stick, the drone flies forward. Pull the stick, the drone goes Right stick backward. Move the stick to the left, the drone moves to the left Move the stick to the right, the drone moves to the right...
- Page 16 http://www.ipotensic.com Forward/Backward Trimmer When flying, if the drone tilts forward , press the trimmer button, and push the right stick backward. Otherwise push forward. Left/Right Tilts Trimmer When flying, if the drone tilts to the left, press the trimmer button, and push the right stick to the right.
- Page 17 http://www.ipotensic.com High / Medium/Low Speed Mode Switch Press down on the key, it will beep, this indicates the low speed mode ”L”; Press down again, it will beep twice, for the middle speed mode “M”; Press down again ,it'll beep three times, for the high speed mode “H”.
- Page 18 http://www.ipotensic.com Front Front Left Right Left Right Rear Rear * Press headless mode button to activate the function, at this time the LED light on the rear of drone keeps shiny for three times and stops for 1s; Heading Hold To exit the Headless Mode, press Mode the button again, at this time the...
- Page 19 http://www.ipotensic.com Stuck Protection 1. When the propeller is stuck, the LED light of the drone will have quick flash. Then the Stuck Protection will be activated and motors will stop working. 2. Pull down the left stick to the lowest position and then release it, the drone LED will become a solid color and stuck protection will be released and the drone can fly again.
- Page 20 http://www.ipotensic.com Buckle Light board Receiver board Clockwise motor Counterclockwise motor USB Charger (red/black line) (blue/white line) Drone battery Transmitter Statement Our products are constantly improved,so designs and specifications are ready to change without notice. All the information on this guidebook is carefully proofread, we make every effort to be accurate.
- Page 21 http://www.ipotensic.com...
- Page 22 http://www.ipotensic.com...
- Page 23 http://www.ipotensic.com FCC Note This equipment has been tested and found to comply with the limits for a Class B digital device, pursuant to Part 15 of the FCC Rules. These limits are designed to provide reasonable protection against harmful interference in a residential installation.
- Page 24 http://www.ipotensic.com FCC Notice The equipment may generate or use radio frequency energy. Changes or modifications to this equipment may cause harmful interference unless the modifications are expressly approved in the instruction manual. Modifications not authorized by the manufacturer may void user’s authority to operate this device.
Need help?
Do you have a question about the A30 and is the answer not in the manual?
Questions and answers