Crestron AirMedia 3 Series Product Manual
Hide thumbs
Also See for AirMedia 3 Series:
- Product manual (174 pages) ,
- Quick start manual (9 pages) ,
- Getting started (2 pages)

Related Manuals for Crestron AirMedia 3 Series


Summary of Contents for Crestron AirMedia 3 Series
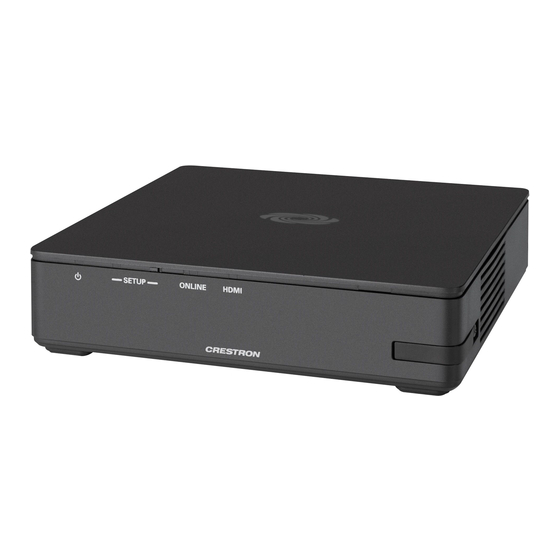
- Page 1 AirMedia® Series 3 Receivers AM-3100-WF AM-3100-WF-I AM-3200 AM-3200-WF AM-3200-WF-I Product Manual Crestron Electronics, Inc.
- Page 2 Other trademarks, registered trademarks, and trade names may be used in this document to refer to either the entities claiming the marks and names or their products. Crestron disclaims any proprietary interest in the marks and names of others. Crestron is not responsible for errors in typography or photography.
-
Page 3: Table Of Contents
Contents Overview Configuration Connect to the Receiver Log Out from the Receiver Action Menu Save Changes Revert Update Firmware Restore Reboot Download Logs Manage EDIDs (Receiver 200 Models Only) Manage Certificates Manage Device Drivers Manage Images Status Device Network HDMI Input (Receiver 200 Models Only) HDMI Output AirMedia Control System... - Page 4 Add a Touch Screen Screen Controls Room Scheduling Present a Source AirMedia Canvas Enterprise Deployment Options XiO Cloud® Service Crestron Deployment Tool for PowerShell® Software Appendix A: Enabling Modern Authentication for EWS Create the Application Obtain Authentication IDs Configure Additional Settings Branding Authentication API Permissions...
-
Page 5: Overview
Overview AirMedia® Series 3 receivers enable secure wireless collaboration in the modern digital workspace. Install the receivers in conference rooms, huddle rooms, lounges, lobbies, or almost any space to establish a productive meeting environment. This product manual discusses the requirements, configuration instructions, and operating instructions for AirMedia Series 3 receivers. - Page 6 Feature Comparison FEATURE AM-3100-WF(-I) AM-3200 AM-3200-WF(-I) AirMedia Series 3 technology ü ü ü AirMedia Output Resolution 1080p60 1080p60 1080p60 AirMedia Device Support Windows® OS (all versions) ü ü ü Mac® devices ü ü ü iPad® devices ü ü ü iPhone® devices ü...
- Page 7 ü ü ü Authentication Crestron® Control .AV Framework™ Platform ü ü ü XiO Cloud® Service ü ü ü Crestron Studio® Software SIMPL Windows ü ü ü SIMPL# Future release Future release Future release Virtual Control (VC-4) ü ü ü Video Inputs HDMI®...
- Page 8 Depth: 5 in. Depth: 6.93 in. Depth: 6.93 in. (127 mm) (177 mm) (177 mm) Connection via Crestron Fusion® software (to be supported in a future firmware release) may allow additional providers. 4 • AirMedia® Series 3 Receivers Product Manual — Doc. 9020B...
-
Page 9: Configuration
Configuration Configure the AirMedia receiver using the included web configuration interface. The web configuration interface is accessible from a web browser. To access the receiver's web configuration interface, a computer must be connected to the same network as the AirMedia receiver. -
Page 10: Log Out From The Receiver
2. Select the settings button in the title bar to log in. NOTE: Prior to displaying the prompt for login credentials, the web browser may display a security warning message about the security certificate. It is safe to ignore this warning as long as the user verifies that the browser’s address bar indicates the receiver IP address or host name as shown on the display device. -
Page 11: Action Menu
To upgrade the device firmware manually with a downloaded PUF (package update file), select Update Firmware. The Firmware Upgrade dialog box opens. NOTE: Visit crestron.com/firmware to download the latest firmware PUF. Product Manual — Doc. 9020B AirMedia® Series 3 Receivers • 7... -
Page 12: Restore
Firmware Upgrade Dialog Box To upload a firmware PUF through the web configuration interface: 1. Select Browse, and then navigate to the firmware PUF on the host computer. 2. Select the firmware PUF, and then select Open. 3. Select Load to load the PUF to the receiver. The upload progress is shown in the dialog box. -
Page 13: Manage Edids (Receiver 200 Models Only)
Manage EDIDs (Receiver 200 Models Only) Select Manage EDIDs to manage Extended Display Identification Data (EDID) profiles that are installed on the receiver. The Manage EDIDs window opens. Default EDIDs Select Default EDIDs to view EDIDs preinstalled on the receiver. Manage EDIDs - Default EDIDs Tab Enter text in the Search... -
Page 14: Manage Certificates
Manage EDIDs - User EDIDs Tab Enter text in the Search... field to find and display EDIDs that match the search term(s). EDIDs are listed in table format. If the EDIDs span multiple pages, use the navigation arrows on the bottom of the page to move forward or backward through the pages, or select a page number to navigate to that page. -
Page 15: Manage Device Drivers
Manage Device Drivers Select Manage Device Drivers to manage any drivers that are installed on the receiver. The Manage Device Drivers window appears. Support for CEC, Crestron Connected® control, IP, serial, and infrared profiles are built-in. Default Drivers Select Default Drivers to view information for the drivers preinstalled on the receiver. - Page 16 Manage Device Drivers - User Drivers Tab Drivers are listed in table format. The following information is displayed for each driver: Type: The supported display type (flat panel display, projector, etc.) Manufacturer: The driver manufacturer Supported Models: The display model name Communication: The driver communication type (Serial/RS-232, IR, IP, CEC) DriverVersion: The version of the installed driver Select Close to close the Manage Device Drivers window.
-
Page 17: Manage Images
Import from Cloud Crestron maintains a cloud-based driver database. To load drivers to the receiver from the cloud: 1. Select Import from Cloud. 2. Enter text in the Search... field to find and display drivers that match the search term(s). -
Page 18: Status
To add an image to the receiver: NOTES: Up to 20 images can be loaded. The receiver's storage capacity is 100 MB. Custom background images should be jpg files with resolutions no higher than 4096 x 2304 pixels. Images with resolutions higher than 4096 x 2304 pixels may exceed the receiver's storage limit when rendered and will inhibit performance. -
Page 19: Device
Device Select Device to view general receiver information. Status – Device The following Device information is displayed: Model: The receiver model name. Serial Number: The receiver serial number. Firmware Version: The firmware version loaded onto the receiver. Select + More Details at the bottom of the tab to display an expanded section that shows additional information. -
Page 20: Network
Network Select Network to view the status of the network settings for the receiver. Status – Network The following Network information is displayed: Host Name: The receiver hostname Domain: The receiver domain name DNS Servers: The DNS (domain name server) addresses used to resolve the receiver domain to an IP address 16 •... - Page 21 Select the + (plus) icon next to Adapter 1 to view the following DHCP server settings: DHCP: Reports whether the IP address is dynamic (Yes) or static (No) IP Address: The receiver IP address Subnet Mask: The receiver subnet mask Default Gateway: The gateway router address Link Active: Reports the status of the Ethernet connection.
-
Page 22: Hdmi Input (Receiver 200 Models Only)
HDMI Input (Receiver 200 Models Only) Select HDMI Input to view the status of a device connected to the HDMI input. Status – HDMI Input The following HDMI Input information is displayed: Sync Detected: Indicates whether a sync is present between the source connected to the HDMI input and the receiver Resolution: The resolution of the source connected to the HDMI input Source HDCP: Indicates whether HDCP is active or inactive... -
Page 23: Hdmi Output
HDMI Output Select HDMI Output to view the status of a display device connected to the HDMI output. Status – HDMI Output Select the + (plus) icon next to Connected Display to view the following display settings: Sink Connected: Reports whether or not a display is connected Manufacturer: The manufacturer name of the display device Name: The name of the display device Select the + (plus) icon next to Output Signal to view the following output signal settings:... -
Page 24: Airmedia
AirMedia Select AirMedia to view the status of the AirMedia connection. Status – AirMedia Connection Select the + (plus) icon next to Connections to view the connection settings for devices using AirMedia: Summary: Reports the status of the device and the total amount of users connected to the receiver Status: Reports Idle when no users are connected, Active when a user is connected but not presenting, and Presenting when a user is presenting... -
Page 25: Control System
IP ID: The IP ID used to connect the receiver to a control system Room ID: The control system room ID that the receiver is associated with (for connections to the Crestron Virtual Control server-based control system) IP Address/Hostname: The control system IP address or hostname... -
Page 26: Connected Devices
Connected Devices Select Connected Devices to view the status of any connected devices such as a display, occupancy sensor, or touch panel. Status – Connected Devices Select the + (plus) icon next to Connected Display to view the following display settings: Detected Manufacturer: The manufacturer of the connected display Detected Name: The name given to the connected display Select the + (plus) icon next to Network Occupancy Sensor to view the following occupancy... -
Page 27: Settings
Settings Select Settings to configure various device settings. Once any changes have been made to the receiver configuration, the Action button becomes a Save Changes button. Select Save Changes to save changes to the configuration settings. If a reboot is required after changes have been saved, select Yes to reboot the device or No to cancel the reboot. - Page 28 Language: Select the language that will be displayed on the receiver from the drop-down list Room Name: Enter the room name for the space that the receiver is installed in Network Select Network to configure the receiver's network settings. System Setup – Network 24 •...
- Page 29 Host Name: Enter the receiver host name (22 characters or less). Domain: Enter the fully qualified domain name on the network (optional). This field is prefilled when the DHCP toggle is turned on. NOTE: A host name and domain name can act as an alternative to IP addressing for connecting client computers to the device.
- Page 30 Wireless Access Point: The device can be used as a Wireless Access Point (WAP) so that users can present wirelessly without using a corporate Wi-Fi network. NOTE: Wireless Access Point functionality is not available on the AM-3200. It is only available on Wi-Fi network capable AirMedia receivers. Wireless Access Point Mode: Turn on the toggle to enable the receiver to operate as a Wireless Access Point Name/SSID: Enter a name for the wireless network.
- Page 31 HTTP Settings HTTP Proxy: Turn on the toggle to allow the device to use an HTTP proxy server. HTTP Proxy Address: Enter the IP address of the HTTP proxy server. HTTP Proxy Port: Enter the port number of the HTTP proxy server. Username: Enter the username required for the HTTP proxy server.
- Page 32 Select a Power Mode option from the dropdown list: NOTE: Business Hours + Occupancy Based is the default setting. Select Business Hours + Occupancy Based to apply the following behavior: The display device is on and the receiver is awake during business hours. Define business hours using the table: Enabled: Turn the toggle on to include the day in the business hours schedule.
- Page 33 Auto Update: Turn the toggle on to allow automatic updates. Custom URL: Turn the toggle on to use a custom update server URL. If turned off, the server URL will default to the standard Crestron update server. Product Manual — Doc. 9020B...
- Page 34 Custom URL Path: If Custom URL is turned on, enter the custom URL path for the update server. Schedule: Set the schedule for when the device checks for updates. Day of Week: Select the day of the week when the device will check for updates. Select Daily to have the device check for updates every day.
- Page 35 Date/Time Select Date/Time to configure the settings for the receiver's internal clock. System Setup – Configure Date/Time Synchronization: The receiver’s internal clock can be synchronized with a time server. Time Synchronization: Turn on the toggle to use time synchronization via SNTP (Simple Network Time Protocol).
- Page 36 NTP Time Servers: With Time Synchronization turned on, use the provided table to enter information regarding the SNTP server(s) used to synchronize the date and time for the receiver. Select Add to add a new SNTP server entry into the table. Enter the following information for each entry: Enter the SNTP server address into the Address text field.
- Page 37 Control System Select Control System to connect and configure a control system with the receiver. The receiver can be controlled by a Crestron control system or by a virtual control system's SIMPL or SIMPL# program. System Setup – Control System Encrypt Connection: Turn the toggle on to use SSL encryption for communication with the control system.
-
Page 38: Services
Select Services to configure the device's connection with calendaring applications. Services screen Fusion: Crestron Fusion functionality will be supported in a future release. Calendar: Turn the toggle on to use a calendaring application with the AirMedia device. Scheduling Type: Select a calendaring service from the dropdown menu. - Page 39 System Initialization 5. Select Register Now. The Registration Status, Registration URL, and Registration Code fields will appear. 6. Copy the code in the Registration Code field. Product Manual — Doc. 9020B AirMedia® Series 3 Receivers • 35...
- Page 40 7. In the Registration URL field, select Sign in with Google. The Connect a device screen appears. Connect a device Screen 8. Enter the registration code in the Enter Code field and select Next. The Choose an account screen appears. 9.
- Page 41 Microsoft Exchange Server and Microsoft 365 Software, Modern Authentication To use the device with Microsoft Exchange Server and Microsoft 365 Software (Modern Authentication enabled): 1. Turn on the Calendar toggle as described in Services (on page 34). 2. Select Exchange/O365 from the Scheduling Type dropdown menu. 3.
- Page 42 8. Select Register Now. A code and a Microsoft icon will appear. 9. Copy the code in the Registration Code field. 10. Select Sign in with Microsoft in the Registration URL field. An Enter code screen will appear. 11. Enter the registration code and select Next. 12.
- Page 43 13. On first use, a permissions required window will be displayed. Select Accept. 14. Sign in to the Microsoft 365 service. Once signed in, a confirmation message will appear, and the Registration Status will be updated. To disconnect the calendar from the device, select Unregister and follow the instructions for activating a new configuration.
-
Page 44: Audio-Video
8. Enter the URL of the Exchange server in the Exchange Web Services URL field. 9. Select Save Changes. In the System Initialization dialog box, select Yes to continue. System initialization will occur. To disconnect the calendar from the device, select Unregister and follow the instructions for activating a new configuration. - Page 45 General HDMI Input: Turn the toggle on to enable the HDMI input port. HDCP Support: Turn the toggle on to allow source signals that require HDCP compliance to pass through to the display device. EDID EDID-HDMI 1: Select an EDID profile loaded to the receiver to use for the HDMI input.
-
Page 46: Connected Devices
Flex Mode: Turn the toggle on when using the receiver with a Crestron Flex conference system. Flex Mode disables the HDMI output from the AirMedia device unless a source is active. NOTE: When using the device in Flex Mode, Crestron recommends setting HDCP Mode to Never. - Page 47 A list of connected devices is along with each device's Name, Type, Model, and Status . Select the edit button to modify the connected device's settings. Select the test driver button send commands to a display device to test the driver's functionality. Select the + (plus) icon next to Front of the Room Display to display settings for the front of the room experience splash screen.
- Page 48 Enable Custom Logo Graphics: Turn the toggle on to display a custom logo on the display device. An Add Logo option will appear when the change is saved. When the toggle is off, the Crestron logo is displayed. NOTES: The optimal image size for a logo is 600 x 100 pixels. Custom graphics that are larger than 600 x 100 pixels are scaled down while maintaining their aspect ratio.
- Page 49 Refresh Image: Turn the toggle on to allow the system to periodically download the remotely stored logo and background images from the URLs specified for the custom logo or background. Refresh Image Interval: Enter the amount of time between downloads (in minutes). The minimum amount of time available is one minute, and the maximum amount of time is 65,535 minutes (about 45 days).
-
Page 50: Routing
NOTE: Emergency broadcasts are sent from Crestron Fusion which is to be supported in a future firmware release. For more information on emergency broadcasts, refer to the Crestron Fusion® Software SSI Model Reference Guide (Doc. - Page 51 Settings Screen – Routing Select the + (plus) icons next to Input Routing and Audio Video Routes to display the Routing Mode setting and a list of the routed sources. By default, routing is automatic, meaning the last connected source will be routed to the display device. Select one of the following routing modes from the dropdown list: Automatic Input Routing: Automatically route the last connected source to the display device.
-
Page 52: Digital Signage
Digital Signage Select Digital Signage to configure the device’s operation with the Appspace platform. The AirMedia receiver can display content from an Appspace digital signage channel when no presentation is being made, or the room is not occupied. NOTE: This is an early-preview feature and should not be deployed at the enterprise level. A full release of the feature is planned for the future. -
Page 53: Airmedia
Signage in Standby: Turns on the display when the AirMedia receiver goes to sleep based on occupancy. Signage as a Background: Turns on the display along with the calendar, date/time, system name, connection info, and branding portions of the display. NOTES: When the Signage as a Background toggle is turned on, the Enable Custom Backgrounds setting (described in... - Page 54 AirMedia Screen - General Settings 50 • AirMedia® Series 3 Receivers Product Manual — Doc. 9020B...
- Page 55 General Settings Select the General Settings tab to configure settings for AirMedia, the AirMedia Canvas, and Miracast. AirMedia: Turn the toggle on to enable AirMedia wireless presentation on the AirMedia receiver. AirMedia Certificate: Turn the toggle on to use a third party certificate to encrypt connections between the sender applications for Windows and Android and the receiver.
- Page 56 AirMedia Canvas Functionality AirMedia Canvas allows two sources to present simultaneously on the display. AirMedia Canvas automatically configures the best possible layout to maximize screen coverage based on the number of active sources, the type of sources, their orientation, and their aspect ratios. The following sources can share space on a display simultaneously: AirMedia (Windows, Android, Mac, iOS, AirPlay/Miracast) NOTE:...
- Page 57 Network Adapter Select the Network Adapter tab to select the Ethernet ports assigned for use by AirMedia. AirMedia Screen - Network Adapter LAN 1 - Main: Allow AirMedia connections from the local area network. WLAN: Allow AirMedia connections from the receiver's self hosted Wi-Fi access point (Wi-Fi network enabled models only).
- Page 58 Show Login Code: Turn the toggle on to show the access code on the display device. Login Code Mode: Select a radio button to specify how the access code is used. Disabled: Allows any user with the device’s IP address or host name to open a client connection without entering an access code.
- Page 59 Show AirMedia Connection Info Overlay: Turn the toggle on to show connection information on a display device when a user is presenting. Crestron recommends turning this setting on. LAN Connection Information Show Connection Info: Turn the toggle on to display connection information on the display device.
- Page 60 Application Downloads Select Application Downloads to configure how AirMedia client applications are presented to the user for download. Client applications are required to present from a user's computer as described in Present with AirMedia (on page 69). AirMedia Screen - Application Downloads Select a radio button for the Windows Download and MacOS Download settings to decide how AirMedia client applications are presented to users according to their computer's operating system:...
- Page 61 Miracast Miracast technology allows users to wirelessly share content from a Microsoft® Windows® 10 device to the receiver. Miracast technology is built into the Microsoft Windows 10 operating system, so no additional software installation is required. NOTE: Refer to the AirMedia Presentation Gateway Security Reference Guide (Doc 7693) for best practices for configuring the system for Miracast.
-
Page 62: Security
Miracast Connection Modes: Select one of the radio buttons (Infrastructure, WiFi Direct Only, or Both) to configure how a Mircast capable device connects to the receiver. Select Infrastructure to connect via the local area network. When selected, Wi-Fi is used for discovery only. Select WiFi Direct Only to connect via a Wi-Fi point-to-point connection (Wi-Fi Direct®... -
Page 63: Authentication
By default, authentication is required to access the web configuration interface or to connect to an AirMedia Series 3 receiver through Crestron Toolbox™ software. When a user attempts to sign into the device for the first time, the web configuration interface prompts the user to enter... - Page 64 Select Change Current User Password to change the password for the current user. The Change Password dialog box is displayed. Change Password Dialog Box Enter the existing password in the Current Password field. Then, enter a new password in the Password field, and reenter the password in the Confirm Password field.
- Page 65 Receiver users are listed in table format. The following information is displayed for each user: Username: The chosen username AD User: Reports whether the user is (Yes) or is not (No) authenticated through Active Directory NOTE: A user must be added to an Active Directory group before the user may be selected as an Active Directory user.
- Page 66 Name: The chosen username Active Directory User: Turn on the toggle to use authentication via Active Directory for the selected user. Password: Enter a new password for the selected user. Confirm Password: Reenter the password provided in the Password field. Groups: Add the user to one or more groups.
- Page 67 If the receiver groups span multiple pages, use the navigation arrows on the bottom of the page to move forward or backward through the pages, or select a page number to navigate to that page. An Action column is also provided for each group that allows various actions to be performed. The following selections may be selected from the Action column: Select the information button to view a group's name, access level, and Active...
-
Page 68: 802.1X Configuration
802.1x Configuration Select 802.1x Configuration to display selections for configuring IEEE 802.1x network authentication for receiver security. 802.1x Configuration Tab Selections IEEE 802.1x Authentication: Turn on the toggle to use 802.1x authentication for the receiver. Authentication Method: Select an 802.1x authentication method (EAP-TLS Certificate or EAP MSCHAP V2- password) from the dropdown menu. - Page 69 Select Trusted Certificate Authorities: Select trusted CAs (Certificate Authorities) from the provided CAs to be used for server validation: Select the corresponding check box for each CA that you wish to make a trusted CA. Enter a search term into the text field to search for and display CAs that match the search term.
- Page 70 If the CAs span multiple pages, use the navigation arrows on the bottom of the page to move forward or backward through the pages, or select a page number to navigate to that page. Select the trashcan button in the Action column for a CA to delete it. Select Yes to delete the certificate or No to cancel.
-
Page 71: Front Of Room Experience
Front of Room Experience - Welcome Screen Customizable Logo: Shows the Crestron logo by default. To upload a custom logo, refer to Connected Devices (on page 42). -
Page 72: User Presentation
Presentation Options: Shows all of the available ways of sharing content. When a presentation mode is enabled, the presentation option tile will appear on the front of room display. When a presentation mode is disabled, the presentation option tile will not appear. -
Page 73: Operation
For details, visit present.crestron.com. Mobile devices can share their content using the Crestron AirMedia app which is available for iOS and Android™ devices. Both apps may be used for full screen sharing on devices running Android 5.0 Lollipop or iOS 8 and above. - Page 74 1. Open a web browser on the computer, and navigate to the web address or IP address shown on the display device. The welcome screen is displayed. Welcome Screen 2. Select Start Presenting. The AirMedia screen will display. AirMedia Screen 70 •...
-
Page 75: Share Content
3. Select the button for your computer’s operating system to download the client application. The client application requires no installation. The application will be downloaded and run locally. NOTE: When used on a Mac, the AirMedia client application must be run from within the disk image file. - Page 76 From a Windows Computer Once the client application is downloaded, content can be shared. To share content from a Windows computer: 1. Run the client application. The Connect screen appears and lists any discovered AirMedia devices. Connect 2. Select Connect under the desired receiver or enter the device's IP address in the search bar and press enter.
- Page 77 3. If a code is required, enter the code shown on the display device. Otherwise, the contents of the computer screen will be presented on the display connected to the receiver. Once connected, the client application displays the presentation controls. Presentation Controls Product Manual —...
- Page 78 4. Direct the presentation with the following controls: Dock : Dock the presentation. When docked, the computer no longer shares its screen but remains connected to the receiver. Pause : Start or freeze the computer's screen. [Volume] : Control the output volume of the display. Disconnect : End connection between the computer and the receiver.
- Page 79 OK to save the changes or select Cancel to cancel. AirMedia Settings Dialog Box Crestron recommends turning the Auto Update toggle to On. Crestron recommends turning the Auto Discovery toggle to On. When User Locks the Screen sets the operation of the client software when a connected computer is locked.
- Page 80 From a Mac Once the client application is downloaded, content can be shared. To share content from a Mac: 1. Run the client application. The Connect screen appears and lists any discovered AirMedia devices. Enter Code Dialog Box 2. Select Connect to the right of the desired receiver or enter the device's IP address in the search bar and press enter.
- Page 81 3. If a code is required, enter the code shown on the display device. Follow the onscreen instructions to present. Select OK to return to the presentation controls. Presentation Controls 4. Direct the presentation with the following controls: : Dock functionality to be supported in a future release. : Control the output volume of the display.
- Page 82 From an iOS Device Content can be shared from an iOS device using the built-in screen mirroring functionality. To share content from an iOS device: 1. Open the AirMedia application. The Connect screen appears and lists any discovered AirMedia devices. Connect 2.
- Page 83 4. Follow the onscreen instructions and select OK. Once connected, the application offers presentation controls. Presentation Controls Product Manual — Doc. 9020B AirMedia® Series 3 Receivers • 79...
- Page 84 5. Direct the presentation with the following controls: Dock : Dock functionality to be supported in a future release. Disconnect : End the connection between the device and the receiver. Select Session control to open the Session menu, which lists each presenter along with corresponding presentation controls.
- Page 85 From an Android Device Content can be shared from an Android device using the AirMedia application. To share content from an Android device: 1. Open the AirMedia application. The Connect screen appears and lists any discovered AirMedia devices. Connect 2. Select the desired receiver or enter the receiver's IP address in the search bar and press Enter on the phone's onscreen keyboard.
- Page 86 Presentation Confirmation 4. Select Start now to begin presenting. 82 • AirMedia® Series 3 Receivers Product Manual — Doc. 9020B...
- Page 87 To end the presentation, make one of the following selections: Stop Presentation with AirMedia: Stop presenting from the Android device but remain connected to the receiver. Disconnect from AirMedia: Stop presenting from the Android device and disconnect from the receiver. Presentation Screen Product Manual —...
-
Page 88: Touch Screen Operation
Using Miracast Miracast is a mirroring protocol and wireless technology used to project your screen to the receiver without the need to install an application on your Windows computer. To present using Miracast with an AirMedia receiver: 1. Open the Windows connect menu via the Windows notification center or via the shortcut (Windows) + K. -
Page 89: Screen Controls
AM-3100-WF AM-3100-WF-I AM-3200 AM-3200-WF AM-3200-WF-I For details on manually loading a touch screen project file, refer to the touch screen's product manual: TSW-570, TSW-770, and TSW-1070 Product Manual (Doc. 8550) TS-770 and TS-1070 Product Manual (Doc. 8555) Screen Controls When connected, the touch screen will display the home screen. Home Screen The footer bar provides the same buttons regardless of which screen is selected. - Page 90 20 seconds. The System Info screen provides the device IP address, the device hostname, the Crestron Fusion server connection status, the Crestron Fusion room name, the device MAC address, the device serial number, and the .AV Framework version number.
-
Page 91: Room Scheduling
Tap Home to display the Home screen. Tap Present to view presentation options. For details, refer to Present a Source (on page 90). Tap the back button to return to the previous screen Room Scheduling The Home screen is used to reserve the conference room. Tap Home to display the home screen. - Page 92 Home Screen – Reserved Room Reserve the Room To reserve an ad hoc meeting from the home screen when the room is available: 1. Tap RESERVE NOW on the home screen. The New Meeting screen is displayed. NOTE: RESERVE NOW meetings may only be scheduled for the current day. New Meeting Screen 88 •...
- Page 93 2. Tap one of the available meeting end times to set the duration of the meeting. The room can be reserved for up to three lengths: Until the current half hour interval ends (If the current time is 4:44 pm, the end time for this option is 5:00 pm.) This is the default setting.
-
Page 94: Present A Source
Present a Source To present a connected source, tap Present from the function menu. The Present a Source screen appears. The Present a Source screen allows content to be routed from a connected device to the main display in the room. Present a Source Screen To present content from a source device, select one of the available presentation options. - Page 95 Present via HDMI To display content from a source connected via HDMI, tap HDMI . The following screen will appear. Present Screen - HDMI Source The dot in the center of the screen turns green if the source is connected and turns red if the source is disconnected.
-
Page 96: Airmedia Canvas
Refer to Present with AirMedia (on page 69) for instructions on connecting to AirMedia and sharing content. AirMedia Canvas When configured, the receiver can show two sources on the display device simultaneously. The touch screen is used to manage the sources shown on the display device. NOTE: For details on configuring the receiver to use the AirMedia Canvas feature, refer to AirMedia (on page 49). - Page 97 1. Connect all sources to the receiver. 2. Tap the first source for presentation. The content will appear on the display device with presentation controls. Select the volume button to mute or unmute the source's volume. Select Stop to dock the presentation. When docked, the source stops presenting but remains connected to the display.
- Page 98 4. Tap the second source for presentation. The display device will show the two sources side by side. NOTE: The dock control feature will be implemented for Apple® devices in a future release. Select the disconnect button to end the presentation and disconnect the source device.
-
Page 99: Enterprise Deployment Options
XiO Cloud® service allows supported devices across an enterprise to be managed and configured from one central and secure location in the cloud. Supported Crestron® devices are configured to connect to the service out of the box. Use of the service requires a registered XiO Cloud account. To register for an XiO Cloud account, refer to www.crestron.com/Support/Tools/Licensing-Registration/XiO-Cloud-Registration-... -
Page 100: Crestron Deployment Tool For Powershell® Software
Crestron Deployment Tool for PowerShell® Software Crestron has developed a tool for customers without the ability to use CPS to assist in deploying multiple devices without the need to configure each device individually. With this tool, an administrator has the ability to input all of the settings to be configured on multiple receivers, and then use PowerShell®... -
Page 101: Appendix A: Enabling Modern Authentication For Ews
AirMedia receiver uses this access method to provide heightened user authentication. Use the following procedures to define a new application in Azure Active Directory. Once the application is defined, multiple Crestron devices can leverage calendar integration with Microsoft 365 and Modern Authentication without additional setup in the Microsoft EWS service. - Page 102 3. Select App registrations from the Azure widget menu. App registrations Selection 4. Select + New registration. App registrations - New registration Screen 98 • AirMedia® Series 3 Receivers Product Manual — Doc. 9020B...
- Page 103 A dialog box for creating the app is displayed. Register an application Dialog Box 5. Enter the following information: Name: Enter a user-facing name of the application (in the Azure environment). This can be any string 120 characters or less. It is possible to have more than one application registered with the same display name.
-
Page 104: Obtain Authentication Ids
Obtain Authentication IDs Once the app is registered, the application and directory IDs must be obtained to connect the receiver to the Azure AD app. 1. Select App registrations from the Azure widget menu. 2. Select the application created for the receiver. An application dialog box is displayed. 3. -
Page 105: Branding
Branding Select Branding under the Manage section of the application navigation menu to configure branding settings for the app. Application Branding Screen The following branding settings can be configured for the application: Name: Required. Set the user-friendly name of the application. This is the same name that was defined when registering the application, but it can be changed here. -
Page 106: Authentication
Authentication Select Authentication under the Manage section of the application navigation menu to configure authentication settings for the app. Application Authentication Screen The following authentication settings can be configured for the application: + Add a Platform: Select this button to create a platform for app authentication. The Configure platforms pane is displayed on the right side of the screen. - Page 107 Configure platforms Pane Select Mobile and desktop applications to display settings for configuring this platform. Configure Desktop + devices Pane Azure AD requires the use of a redirect URI, but the AirMedia receiver does not. Enter a valid URI address and select Configure. Supported account types: Select an account type for the app.
-
Page 108: Api Permissions
API Permissions Select API Permissions under the Manage section of the application navigation menu to configure API permissions for the app. API Permissions Screen The following API permissions settings can be configured for the application: Select + Add a Permission to create a new API permission for the app. The Request API permissions pane is displayed on the right side of the screen. - Page 109 To set the API permissions for EWS: 1. Select Exchange to display a list of permissions for EWS. Request API permissions Pane - Exchange 2. Expand the EWS accordion. 3. Fill the checkbox next to EWS.AccessAsUser.All to allow the application to make requests to the Exchange Web Services API on behalf of the configured user.
- Page 110 2. Fill the checkboxes next to the following settings to enable the functionality described below: offline_access: Allows the application to receive a Refresh Token, which can be exchanged for a new Access Token, when it expires. This is required for long running applications, so user consent is not required each time an access token expires.
- Page 111 This page is intentionally left blank. Product Manual — Doc. 9020B AirMedia® Series 3 Receivers • 107...
- Page 112 Product Manual — Doc. 9020B Crestron Electronics, Inc. (2057327) 15 Volvo Drive, Rockleigh, NJ 07647 10/15/21 Tel: 888.CRESTRON Specifications subject to Fax: 201.767.7656 change without notice. www.crestron.com...
Need help?
Do you have a question about the AirMedia 3 Series and is the answer not in the manual?
Questions and answers