Table of Contents
Advertisement
Available languages
Available languages
Quick Links
Advertisement
Table of Contents

Summary of Contents for THE BOLD LOOK OF KOHLER K-1108
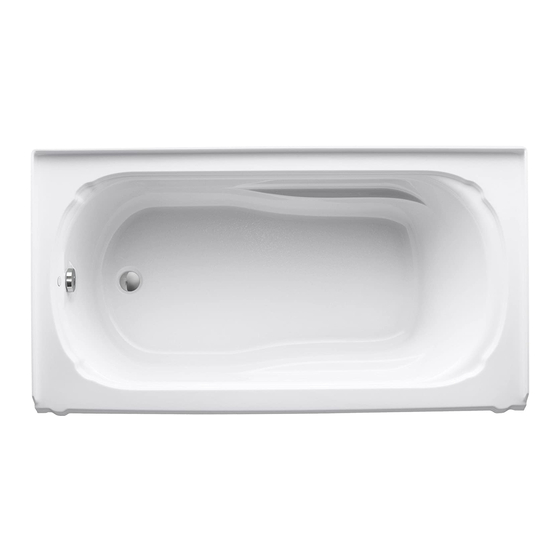
- Page 1 Installation Guide Flanged Acrylic Bath with Integral Apron K-1108 K-1150 K-1184 M product numbers are for Mexico (i.e. K-12345M) Los números de productos seguidos de M corresponden a México (Ej. K-12345M) Français, page “Français-1” Español, página“ Español-1” 1014139-2-C...
-
Page 2: Tools And Materials
Tools and Materials Tape Safety Plus: Sealant Pencil Level Measure Glasses • #6 Large-head galvanized nails • Conventional woodworking tools and materials • Drop cloth • Construction adhesive (optional) • Cement or mortar (optional) • 2x4's or 2x6's • Water-resistant wall material •... -
Page 3: Prepare The Site
Construct 2x4 or 2x6 stud framing according to the Position the rough roughing-in plumbing information Verify that the subfloor offers adequate support, and is flat and level Alcove Installation 1. Prepare the Site WARNING: Risk of product damage. Do not support the bath by the rim. NOTICE: Unless otherwise specified, floor support under the bath must provide for a minimum of 80 lbs./square foot (390 Kg./square meter) loading. - Page 4 Spread a 2" (5.1 cm) layer of cement or mortar bed Apply construction material. adhesive to the support blocks. Clear spaces for support blocks. 3. Secure the Bath to the Subfloor CAUTION: Risk of product damage. Do not support the bath by the rim. Choose the installation option that best applies to your particular installation.
-
Page 5: Install The Plumbing
Nail 1/4" (6 mm) Drill a small hole thick furring strips through the nailing-in to the studs. flange at each stud. Stud Use #6 large-head galvanized nails to secure the nailing-in flange to the studs. 4. Secure the Bath to the Stud Framing Drill a small pilot hole through the nailing–in flange at each stud location. -
Page 6: Complete The Installation
Water-Resistant Framing Wall Material Finished Wall Apply silicone sealant to the Bath joint between the bath and the finished wall 6. Complete the Installation NOTE: Models with an integral apron are designed so the finished wall material [1-1/2″ (3.8 cm) maximum] will overlap the apron columns. -
Page 7: Guide D'installation
Guide d’installation Baignoire en acrylique à bride avec bandeau intégré Outils et matériaux Lunettes de Mètre Crayon Niveau Matériau d'étanchéité protection ruban à papier à bulle Plus: • Clous galvanisés No. 6 à tête large • Outils conventionnels de menuiserie et matériaux •... -
Page 8: Préparer Le Site
Construire le cadre avec des montants Positionner de 2x4 ou de 2x6 la plomberie. suivant l'information du plan de construction. Vérifier que le sol peut supporter le poids nécessaire et qu'il soit plat et nivelé. Installation dans une alcôve 1. Préparer le site AVERTISSEMENT : Risque d’endommagement du produit. - Page 9 Espacé à 2" (5,1 cm) lit de ciment ou de mortier. Appliquer de l'adhésif de construction aux blocs de support. Dégager des espaces pour les blocs de support. 3. Sécuriser la baignoire au sol ATTENTION : Risque d’endommagement du produit. Ne pas soulever la baignoire par le rebord. Choisir l’option d’installation qui s’applique le mieux à...
-
Page 10: Installer La Plomberie
Percer un trou Clouer des pilote sur la planchettes de collerette à 1/4" (6 mm) chaque montant. d'épaisseur sur les montants. Montant Utiliser des clous galvanisés Nº 6 à large tête pour fixer la collerette de cloutage aux montants. 4. Sécuriser la baignoire au montants du cadrage Percer un petit trou-pilote à... -
Page 11: Compléter L'installation
Encadrement Matériaux hydrorésistant du mur Mur fini Poser un ruban de silicone sur le Baignoire joint entre la baignoire et le mur fini. 6. Compléter l’installation REMARQUE : Les modèles avec un bandeau intégré sont conçus de manière à ce que le matériau du mur fini de 1-1/2″... -
Page 12: Guía De Instalación
Guía de instalación Bañera acrílica con reborde y faldón integral Herramientas y materiales Cinta Lentes de Más: Lápiz métrica Nivel Sellador seguridad • Clavos grandes galvanizados del nº 6 • Herramientas y materiales convencionales para trabajar la madera • Lona para el piso •... -
Page 13: Preparación Del Sitio
Construya una estructura de Coloque postes de 2x4 o las tuberías de 2x6 conforme al plomería. diagrama de instalación. Verifique que el subpiso proporcione suficiente soporte y que esté plano y nivelado. Instalación empotrada en la pared 1. Preparación del sitio ADVERTENCIA: Riesgo de daños al producto. - Page 14 Extienda una capa de cemento o mortero de 2" (5,1 cm). Aplique adhesivo de construcción en los bloques de soporte. Suministre espacio para los bloques de soporte. 3. Fije la bañera al subpiso PRECAUCIÓN: Riesgo de daños al producto. No apoye la bañera por los bordes. Elija la opción de instalación más apropiada para su instalación en particular.
-
Page 15: Instale La Plomería
Perfore un Clave listones pequeño orificio de empotrar de a través del 1/4" (6 mm) en reborde de los postes. clavado a la altura de cada poste. Poste Utilice clavos grandes galvanizados del n˚ 6 para fijar el reborde de clavado a los postes. - Page 16 Estructura Material de pared resistente al agua. Pared acabada Aplique sellador de silicona a la Bañera junta de unión entre la bañera y la pared acabada. 6. Termine la instalación NOTA: Los modelos con el faldón integrado están diseñados de manera que el revestimiento de la pared [1-1/2″...
- Page 17 1014139-2-...
- Page 18 1014139-2-...
- Page 19 1014139-2-...
- Page 20 USA: 1-800-4-KOHLER Canada: 1-800-964-5590 México: 001-877-680-1310 kohler.com ©2005 Kohler Co. 1014139-2-C...


Need help?
Do you have a question about the K-1108 and is the answer not in the manual?
Questions and answers