Sony MZ-NH900 Operating Instructions Manual
Minidisc & dat walkman®: portable minidisc recorder
Hide thumbs
Also See for MZ-NH900:
- Operating instructions manual (173 pages) ,
- Setup manual (18 pages) ,
- Specifications (2 pages)
Table of Contents
Advertisement
Portable
MiniDisc Recorder
Operating Instructions
Recorder Operation ______________________________
Software Operation ______________________________
"WALKMAN" is a registered trademark of Sony Corporation to
represent Headphone Stereo products.
trademark of Sony Corporation.
MZ-NH900
© 2004 Sony Corporation
3-266-536-11(1)
page 12
page 106
is a
Advertisement
Table of Contents
Troubleshooting

Related Manuals for Sony MZ-NH900


Summary of Contents for Sony MZ-NH900
- Page 1 Portable MiniDisc Recorder Operating Instructions Recorder Operation ______________________________ Software Operation ______________________________ “WALKMAN” is a registered trademark of Sony Corporation to represent Headphone Stereo products. trademark of Sony Corporation. MZ-NH900 © 2004 Sony Corporation 3-266-536-11(1) page 12 page 106 is a...
- Page 2 Record the serial number in the space provided below. Refer to them whenever you call upon your Sony dealer regarding this product. Model No. MZ-NH900 Serial No.
- Page 3 Declaration of Conformity Trade Name: SONY Model No.: MZ-NH900 Responsible Party: Sony Electronics Inc. Address: 16450 W. Bernardo Dr, San Diego, CA 92127 USA Telephone No.: 858-942-2230 This device complies with Part 15 of the FCC Rules. Operation is subject to...
-
Page 4: Notice For Users
• In no event will SONY be liable for any financial damage, or loss of profits, including claims made by third parties, arising out of the use of the software supplied with this recorder. -
Page 6: Table Of Contents
Table of contents About available functions and supplied manuals ... 10 Recorder Operation Looking at controls ... 13 Getting started ... 17 Recording a disc right away! ... 21 Playing a disc right away! ... 25 Using menus ... 27 How to use the menu items ...27 List of menus ...29 Various ways of recording ... - Page 7 Various ways of playback ... 43 Viewing various information ...43 Selecting the play mode ...45 Searching for a track (Search) ...52 Adjusting the sound (Virtual-Surround • 6-Band Equalizer) ...53 Changing playback speed (Speed Control) ...56 Connecting to a stereo system (LINE OUT) ...57 Editing recorded tracks ...
- Page 8 Additional information ... 84 Precautions ...84 Specifications ...86 Troubleshooting and explanations ... 88 Troubleshooting ...88 Messages ...96 Explanations ...100...
- Page 9 Software Operation What you can do with MD Simple Burner/ SonicStage ... 106 Installing ... 108 Providing the required system environment ...108 Installing the software onto your computer ...109 Using MD Simple Burner ... 111 Before using MD Simple Burner ...111 Recording using MD Walkman operations (Simple mode) ...112 Recording by computer operations (Standard mode) ...113 Using SonicStage ...
-
Page 10: About Available Functions And Supplied Manuals
About available functions and supplied manuals This section explains the functions of this portable MiniDisc recorder and the manuals that have been supplied with it. Please refer to the manual that applies to each use of the recorder. Learning more about Hi-MD “Hi-MD”... - Page 11 Using the recorder while it is connected to a computer The supplied SonicStage software allows you to transfer audio data between the recorder and the computer. The supplied MD Simple Burner software allows you to record audio data to the recorder. Audio CDs Internet Music files...
-
Page 12: Checking The Supplied Accessories
Checking the supplied accessories AC power adaptor (1) Headphones (USA model only) (1) NH-10WM Nickel metal hydride rechargeable battery (1) Optical cable (1) CD-ROM (SonicStage/MD Simple Burner) (1)* Carrying pouch (except USA model) (1) * Do not play a CD-ROM on an audio CD player. Note When using this unit, remember to follow the precautions below in order to avoid warping the cabinet or causing the unit to malfunction. -
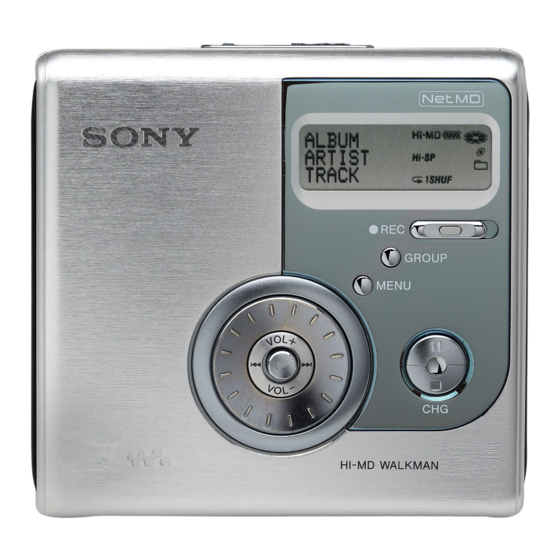
Page 13: Looking At Controls
Looking at controls The recorder A •NAVI/ MENU button Press lightly to go to the NAVI (navigation) setting mode (page 48). Press for 2 seconds or more to go to MENU setting mode (page 27). B Battery compartment C Jog dial D 5-way control key Operation Function... -
Page 14: The Display Window Of The Recorder
L OPEN switch M Display window N T MARK button USB cable connecting jack P LINE IN (OPT) jack Q MIC (PLUG IN POWER) jack There is a tactile dot beside the MIC (PLUG IN POWER) jack. The display window of the recorder A Character information display Displays the disc and track names, date, error messages, track numbers,... -
Page 15: The Headphones/Earphones With A Remote Control
The headphones/earphones with a remote control A Volume Control (VOL +, –) Turn to adjust the volume. B x (stop) button C Jog lever (NX/ENT, ., >) Operation Function Press /ENT play, pause, enter Press towards find the beginning of the previous track, rewind Press towards... -
Page 16: The Display Window Of The Remote Control
Using the clip for the remote control It may be hard for you to read the indications in the display if the remote control is attached upside down with the clip in its current position. In this case, attach the clip in the opposite direction as shown below. -
Page 17: Getting Started
Getting started Charge the rechargeable battery before using. Insert the rechargeable battery. Slide OPEN to open the battery compartment lid. Charging the rechargeable battery. Connect the AC power adaptor to the battery charging stand and the AC power adaptor to a wall outlet. To a wall outlet Battery charging stand... - Page 18 Full charging of a completely discharged rechargeable battery takes about 2.5 hours. Charging time may vary depending on the battery condition. Using the dry battery 1 Attach the dry battery case to the recorder. Rear of the recorder Insert a LR6 (size AA) alkaline dry battery. To operate the recorder for the longest possible time, use the dry battery together with a fully charged rechargeable battery.
- Page 19 You can also charge the rechargeable battery by connecting the AC power adaptor directly to the recorder. Connect the AC power adaptor to DC IN 3V on the recorder, and then press x • CANCEL/ CHG while the recorder is stopped. For models supplied with the AC plug adaptor If the AC power adaptor does not fit the wall...
- Page 20 Measured in accordance with the JEITA (Japan Electronics and Information Technology Industries Association) standard. When using a 100% fully charged nickel metal hydride rechargeable battery When using a Sony LR6 (size AA) “STAMINA” alkaline dry battery (produced in Japan) When recording continuously in MD mode Disc type...
-
Page 21: Recording A Disc Right Away
Recording a disc right away! This section explains the basic procedure for making digital recordings using an optical cable connected to a CD player, Digital TV or other digital equipment. Make sure to use the optical cable. Make connections. the appropriate jacks.) Connect the AC power adaptor to the recorder and a house current. - Page 22 Insert a recordable disc. Slide OPEN to open the lid. Confirm the operation mode. This recorder has two operation modes, “Hi-MD mode” and “MD mode”. The operation mode is automatically recognized whenever the disc is inserted. After you insert a disc, check the operation mode on the display window of the recorder.
- Page 23 Record a disc. Select and pause the sound source to be recorded. Connected component While the recorder is stopped, press and slide zREC on the recorder. “REC” lights up and recording starts. zREC Stop Pause Remove the disc A track mark is added at the point where you press the remainder of the track will be counted as a new track.
- Page 24 If the recording does not start • Make sure the recorder is not locked (pages 14, 18). • Make sure the disc is not record-protected (pages 22, 85). • Premastered discs cannot be recorded over. Notes • When you record on a 1GB Hi-MD disc, connect the AC power adaptor to the recorder, charge the rechargeable battery fully (battery level indication shows...
-
Page 25: Playing A Disc Right Away
Playing a disc right away! Insert a recorded disc. Slide OPEN to open the lid. Play a disc. Press the 5-way control key (NENT) on the recorder. Press the jog lever (NX/ENT) on the remote control. A short beep sounds in the headphones/ earphones when you operate. - Page 26 Stop Pause Select a track directly viewing track number or name Find the beginning of the current track Find the beginning of the next track Go backwards or forward while playing Search for a point in a track while viewing the elapsed time (Time search) Search for a specific...
-
Page 27: Using Menus
Using menus How to use the menu items The recorder has many menus with useful functions for recording, playback, editing, etc. To set the menu items, do the following procedure. If you are doing a menu operation for the first time after purchasing the recorder, “Menu Mode”... -
Page 28: On The Recorder
On the recorder Press and hold NAVI/MENU for 2 seconds or more to enter the menu. Turn the jog dial to select the item. Press the 5-way control key (NENT) to enter the selection. Repeat steps 2 and 3. The setting will be entered when you press the 5-way control key (NENT) at the last. To return the preceding setting Press x. -
Page 29: List Of Menus
List of menus The following table shows the menu items that you can select. Some items can be set with both the recorder and the remote control, and some can be set with either the recorder or the remote control. Items listed under “Menu 1”... - Page 30 Menu 1 Menu 2 Option Menu Mode AVLS* Beep* Backlight Disc Mem* QuickMode* Disc Mode Menus of the recorder Menu 1 Menu 2 Edit Title* : Set* : Release* Move* Erase Format* Display Lap Time RecRemain (while recording and stopped)/ 1 Remain (while playing) AllRemain...
- Page 31 Menu 1 Menu 2 Sound Normal V-SUR Sound EQ Useful* Search* SpeedCtrl* Audio Out* REC Set REC Mode RECVolume* MIC AGC* MIC Sens* Time Mark* :REC* SYNC REC* Option Menu Mode AVLS* Beep* Disc Mem* QuickMode* Disc Mode Contrast* Jog Dial* Function Customizes the surround or equalizer mode settings.
-
Page 32: Various Ways Of Recording
Various ways of recording Before recording Selecting the operation mode This recorder has two operation modes, “Hi-MD mode” and “MD mode”. The operation mode is automatically recognized whenever the disc is inserted. After you insert a disc, check the operation mode on the display window of the recorder. -
Page 33: Viewing Various Information
Viewing various information You can check the remaining time, track number, etc. when recording or during stop. Press DISPLAY repeatedly. Each time you press the button, the display changes as follows. Display window on the remote control The indications have the following meanings: : Disc name : Track name... - Page 34 On the recorder Jog dial 5-way control key (NENT) Enter the menu and select “Display”. Turn the jog dial until the information you want appears in the display, and then press NENT to enter the selection. Each turn changes the display as follows.
-
Page 35: Recording From A Microphone
While recording C/D/ Group Elapsed time Level meter number and track number Group Remaining number and time for track recording. number • Disc name • Group and artist name and name (Hi- album name (Hi- • Disc name (MD) • Group name (MD) Track number appears if the currently selected... - Page 36 Turn the jog dial until “Sens High” or “Sens Low” appears in the display, and then press NENT to enter the selection. Sens High: When recording a soft sound or a sound with a normal volume. Sens Low: When recording with a loud or close-range sounds, such as those during an oral recording or a music concert.
-
Page 37: Recording From A Tv Or Radio (Analog Recording)
Recording from a TV or radio (Analog Recording) This section explains how to record from equipment with analog output, such as a cassette recorder, radio, or TV. This operation can be done on the recorder only. TV, cassette recorder, etc. To LINE OUT jacks, etc. -
Page 38: Adjusting The Recording Level Manually
Recording Display mode Hi-SP Hi-SP stereo Hi-LP Hi-LP stereo When recording on a disc used in MD mode Recording Display mode SP stereo LP2 stereo LP4 stereo Monaural MONO For better sound quality, record in normal stereo (SP or LP2 stereo mode. If you record a stereo source in monaural, the sounds from left and right will be mixed. -
Page 39: Adding Track Marks While Recording
While observing the level meter in the display, adjust the recording level by turning the jog dial. Set the level so that the meter segments light up around –12dB segment. If a high sound level causes the level meter to reach the OVER segment, lower the recording level. -
Page 40: Using The Group Function When Recording
To cancel Time Mark Select “Off” in step 1. Using Time Mark to add track marks while recording When the elapsed recording time exceeds the time interval for Time Mark: The recorder adds track marks at the point you set the time interval and from that point the recorder adds a track mark whenever the time interval has elapsed. - Page 41 Note It will not be possible to make a group setting if the tracks, groups and disc name on a disc exceed the maximum number that can be input (in MD mode only). NAVI/MENU Jog dial 5-way control key (NENT) To create a new group automatically when recording...
-
Page 42: To Start/Stop Recording In Sync With The Sound Source (Synchro-Recording)
To start/stop recording in sync with the sound source (Synchro-recording) During synchro-recording, the starting and stopping of recording occurs are synchronized with the sound source. This simplifies digital recordings (e.g., from a CD player) since the need to operate the recorder or the sound source is eliminated. -
Page 43: Various Ways Of Playback
Various ways of playback Viewing various information You can check the track name, disc name, etc. during playback. While playing, press DISPLAY. Each time you press DISPLAY, the display changes as follows. Display window on the remote control The indications have the following meanings: : Disc name : Track name... - Page 44 Turn the jog dial until the information you want appears in the display, and then press NENT to enter the selection. Each turn changes the display as follows. Lap Time t 1 Remain t AllRemain t Title1/Title2 (Hi-MD) t Sound t Codec (Hi-MD)/ TrackMode (MD) When you press NENT, the selected information appears at C, D and E.
-
Page 45: Selecting The Play Mode
Selecting the play mode You can listen to tracks in various play modes. The play mode can consist of a combination of Main play mode, Sub play mode and Repeat play. • Main play mode: selects the playback unit, such as tracks or groups •... - Page 46 Press + or – to select a desired artist. The recorder plays the tracks by the same artist on the disc, from the first track to the last track, in recorded order. Listening to tracks of a selected album (Album Play) (in Hi-MD mode only) If the track data includes the album name, you can listen to tracks of a selected...
-
Page 47: Playing Tracks Repeatedly (Repeat Play)
Playing tracks in Sub play mode By specifying Sub play modes, you can listen to tracks selected in Main play mode in various ways. For example, by selecting “Group” in Main play mode and “SHUF” in Sub play mode, the recorder will play the tracks in the selected group in random order. - Page 48 To cancel Repeat Play Press P-MODE/ for 2 seconds or more until disappears in the display. On the recorder Jog dial 5-way control key (., >, NENT) Playing tracks in Main play mode While playing, press NAVI/MENU. The recorder enters navigation mode and the Main play mode display appears.
- Page 49 Turn the jog dial until the desired group appears in the display, and then press NENT to enter. A list of the tracks in the selected group appears. Turn the jog dial until the desired track appears in the display, and then press NENT to enter the selection.
- Page 50 Listening to selected tracks only (Bookmark Play) To bookmark the tracks While playing the track you want to bookmark, press NENT for 2 seconds or more. Bookmark flashes. Repeat step 1 to bookmark the other tracks. To play the bookmarked tracks Do step 1 and select “Bookmark”...
- Page 51 Playing tracks in Sub play mode/Repeat Play Enter the menu and select “SubPMode”. Turn the jog dial to select the desired play mode, and then press NENT to enter the selection. Each time you turn the jog dial, A changes as follows. When you press NENT, B appears in the display.
-
Page 52: Searching For A Track (Search)
Searching for a track (Search) You can easily search for a track by track name, group name, artist name, or album name. Artist names and album names can be viewed in the case of discs used in Hi- MD mode only. This operation can be done on the recorder only. -
Page 53: Adjusting The Sound (Virtual-Surround • 6-Band Equalizer)
Adjusting the sound (Virtual-Surround • 6- Band Equalizer) You can vary the virtual sound to create different acoustics, or modify the sound to suit your taste and store it for later use. The following two effect can be selected. V-SUR (Virtual-Surround VPT Acoustic Engine) Provides 4 kinds of virtual surround conditions. - Page 54 To modify and store the sound You can modify the sound and store the results in “Custom1” and “Custom2”. Do steps 1 to 3 of “Selecting the sound quality (6-Band Equalizer)” (page 53), and slide the jog lever until “Custom1” or “Custom2” appears. Press the jog lever.
- Page 55 Selecting the sound quality (6- Band Equalizer) While playing, enter the menu and select “Sound” - “Sound EQ”. Turn the jog dial repeatedly to select the sound mode and then press NENT to enter the selection. Level of the each frequency (100 Hz - 10 kHz) Each time you turn the jog dial, A changes as follows.
-
Page 56: Changing Playback Speed (Speed Control)
Changing playback speed (Speed Control) The speed control function is useful for language study and other purpose. This function changes the playback speed without changing the playback pitch. The playback speed can be varied from +100% to –50% the normal speed, in 13 steps. -
Page 57: Connecting To A Stereo System (Line Out)
Connecting to a stereo system (LINE OUT) You can listen to the playback sound from connected component. Connect the i/ LINE OUT jack of the recorder to the LINE IN jacks of an amplifier or a tape player with a line cable. Stereo System, etc. -
Page 58: Editing Recorded Tracks
Editing recorded tracks Before editing You can edit your recordings by adding/ erasing track marks or labeling tracks and discs. Notes • When you edit the contents of a 1GB Hi-MD disc, connect the AC power adaptor to the recorder, charge the rechargeable battery fully (battery level indication shows new alkaline dry battery (battery level indication shows... - Page 59 Note If you enter the symbol “//” between the characters in disc names such as “abc//def”, you may be unable to use the group function (in MD mode only). Volume control Jog lever (NX/ ENT, ., >) Labeling You can label a track, group, or disc while the recorder is stopped, recording or playing.
- Page 60 Note When the recording is stopped or the recording moves on to the next track while labeling titles during recording, the input at that point is entered automatically. Re-labeling You can change the track name, artist name, album name, group name, or disc name by doing the procedure for “Labeling”...
- Page 61 Letter input area The cursor flashes. Character palette Since only a part of the character palette is visible on the display, use the controls or buttons to move the cursor and enter characters. Labeling Enter the menu and select “Edit” - “Title”.
-
Page 62: Assigning Tracks Or Groups As A New Group (Group Set)
Functions Operations To insert a blank Press GROUP and space. press the 5-way control key towards > at the same time. To delete a letter. Press GROUP and press the control key towards . at the same time. Press x for 2 seconds To cancel labeling. - Page 63 Notes • When the total number of characters in the titles on a disc exceed the maximum that can be input: —If the disc is being used in Hi-MD mode, you can make a group setting, but cannot add a group name in step 4. —If the disc is being used in MD mode, you cannot make a group setting.
-
Page 64: Releasing A Group Setting (Group Release)
Releasing a group setting (Group Release) Select a group you want to release and check the contents (see “Playing tracks in a group (Group Play)” (page 45)). Jog lever Select a group that you want to release and check the contents (see page 45). -
Page 65: Moving A Track In A Disc With Group Setting
While playing the track you want to move, enter the menu and select “Edit” - “Move” - “ : Move”. The selected track number appears in the display. Slide the jog lever repeatedly until the destination track number flashes in the display. -
Page 66: Changing The Order Of A Group On A Disc
Slide the jog lever repeatedly until the destination track number appears in the display, and then press the jog lever to enter the selection. Example: When moving the track to the track number “03” in the second group (GP02). Changing the order of a group on a disc While playing a track within a group whose order you want to change,... - Page 67 Moving a track in a disc with group settings Do step 1 of “Changing the order of a track on a disc” (page 66). When moving a track out of a group, skip this step. When moving a track to a different group, turn the jog dial until the destination group appears in the display, and then press NENT.
-
Page 68: Erasing Tracks And The Entire Disc (Erase)
Erasing tracks and the entire disc (Erase) You can erase unnecessary tracks or all tracks on a disc. When erasing tracks that have been transferred from the computer If you erased tracks that have been transferred from the computer, the transfer authorization of the tracks will be as follows. -
Page 69: To Erase The Whole Disc
Press the jog lever to erase the group. The group is erased. To erase the whole disc You can quickly erase all the tracks and data of the disc at the same time. Note that once a recording has been erased, you cannot retrieve it. Be sure to check the contents of the disc before you erase it. -
Page 70: Dividing A Track (Divide)
To erase the whole disc Play the disc you want to erase to check the contents. Press x. Enter the menu and select “Edit” - “Erase” - “AllErase”. “ALL TRACK Erase OK?” and “PUSH YES:ENTER NO:CANCEL” appear in the display. If the disc contains tracks that have been transferred from the computer, “TrkFromPC Erase OK?”... -
Page 71: Dividing A Track Directly
Dividing a track directly While playing or pausing, press T MARK on the recorder at the point you want to mark. “MARK ON” appears in the display, and a track mark is added. The track number will increase by one. Adjusting the dividing point before dividing a track (Divide Rehearsal) -
Page 72: Combining Tracks (Combine)
Combining tracks (Combine) When you record with analog (line) input, unnecessary track marks may be recorded where recording level is low. You can erase a track mark to combine the tracks before and after the track mark. The track numbers will change as follows. This operation can be done on the recorder only. -
Page 73: Formatting The Disc (Format)
Formatting the disc (Format) When using a disc in Hi-MD mode, you can use the Format function to restore a disc to the condition it was in at the time of purchase. You can use this function only when using a disc in Hi-MD mode. -
Page 74: Other Operations
Other operations Changing the displayed menu items (Menu Mode) You can specify the display of all items in the menu (Advanced mode) or only basic items (Simple mode). Refer to “List of menus” (page 29) to check the menu items that cannot be displayed. -
Page 75: Turning Off The Beep Sound
Turn the jog dial until “AVLS On” appears in the display, and then press NENT to enter the selection. Turning off the beep sound You can turn off/on the beep sound on the recorder and the remote control. Jog lever Enter the menu and select “Option”... -
Page 76: Storing The Settings For Individual Discs (Disc Memory)
Storing the settings for individual discs (Disc Memory) The recorder is factory set to automatically store settings for each disc. The recorder automatically stores the settings for a disc and retrieves them whenever the disc is inserted. The following setting can be stored: •... -
Page 77: Starting The Playback Quickly (Quick Mode)
Starting the playback quickly (Quick Mode) The recorder is factory set to quickly start playback after the playback button is pressed. You can check the setting as follows. Jog lever While the recorder is stopped or playing, enter the menu and select “Option”... -
Page 78: Selecting The Disc Mode (Disc Mode)
Selecting the disc mode (Disc Mode) When you insert a 60/74/80-minute standard disc (blank) into the recorder, you can use this function to specify use of the disc in Hi-MD mode or MD mode. If you want to use the disc recorded on this unit on another component that does not support Hi-MD, record the disc with “Disc Mode”... -
Page 79: Adjusting The Contrast Of The Display Window (Contrast Adjustment)
Adjusting the contrast of the display window (Contrast Adjustment) You can adjust the contrast of the display window on the recorder. This function can be set with the recorder only. Jog dial 5-way control key (NENT) While the recorder is stopped, enter the menu and select “Option”... -
Page 80: Using The Recorder With A Computer
Using the recorder with a computer What you can do through connection with a computer To use the recorder connected to a computer, you must install the software from the supplied CD-ROM. For details on the installation procedure, refer to the “Software Operation”... - Page 81 Computer To the USB port Dedicated USB cable To the connecting jack Insert a recordable disc into the recorder. Make connections as follows. 1 Connect the dedicated USB cable to the recorder and to the computer. 2 Make sure the recorder is stopped and HOLD is released.
-
Page 82: Storing Non-Audio Data To A Disc
• We do not ensure trouble-free operation on all computers that satisfy the system requirements. Storing non-audio data to a disc If you connect the recorder to a computer with a disc in Hi-MD mode inserted, the disc is recognized as storage media by the Windows Explorer, allowing you to store non-audio data such as text data or image data. - Page 83 The storage space for each disc (formatted with the recorder/the SonicStage software) Disc type Total size 60-minute 219 MB standard disc (229,965,824 bytes) 74-minute 270 MB standard disc (283,312,128 bytes) 80-minute 291 MB standard disc (305,856,512 bytes) Hi-MD disc 964 MB (1,011,613,696 bytes) This is space that is used for managing the files on the disc.
-
Page 84: Additional Information
Additional information Precautions On safety Do not put any foreign objects in the DC IN 3V jack. On power sources • Use house current, nickel metal hydride rechargeable battery, or LR6 (size AA) battery. • For use in your house: For the supplied battery charging stand, use the AC power adaptor supplied with this recorder. - Page 85 • Because of the battery’s characteristics, the capacity of the rechargeable battery may be smaller than normal when it is used for the first time or after a long period of disuse. In this case, charge and discharge the battery several times.
-
Page 86: Specifications
Sony dealer. (If a trouble occurred when the disc was in the recorder, we recommend that the disc be left in the recorder when you consult your Sony dealer so that the cause of trouble may be better understood.) Specifications... - Page 87 3 mW + 3 mW (16 ) (European models) 5 mW + 5 mW (16 ) (Other models) Power requirements Sony AC Power Adaptor connected at the DC IN 3V jack: 120 V AC, 60 Hz (Models for USA, Canada,...
-
Page 88: Troubleshooting And Explanations
Check to see if the problem is listed in, “Troubleshooting” (page 88). Check “Messages” (page 96) for the problem as well. If after step 1 you still cannot solve the problem, consult your nearest Sony dealer. While charging Symptom... -
Page 89: While Recording
While recording Symptom Cause/Remedy “NotENOUGH • Recording is not possible when using a 1GB Hi-MD disc even when POWER TO REC” the battery level indication shows enough power remaining while appears and recording the recorder is stopped or playing. This is because of a mechanism cannot be done on a that disables recording when the remaining battery power is 1GB Hi-MD disc. - Page 90 Symptom Stereo sound is heard in the headphones/ earphones while recording in monaural. Momentary noise is heard when recording. The lid does not open after recording. “TRACK FULL” appears even before the disc has reached the maximum recording time and the recording cannot be done.
-
Page 91: While Playing
While playing Symptom Cause/Remedy A disc is not played • Repeat play is selected. , Press P-MODE/ normally. • Playback mode is changed. , Enter the Main play mode or Sub play mode to change back to A disc is not played •... -
Page 92: While Editing
Symptom The recorder skips to the next or previous group (or skips several tracks ahead or behind) when you press the 5-way control key towards . or >. The edited tracks may exhibit sound dropout during search operations. There is no R-channel sound output when playing a track recorded from a... -
Page 93: While Using Group Function
Symptom Cause/Remedy Tracks cannot be • This is due to the MiniDisc system limitations. When the tracks are combined. scattered and the length of each track is short*, you may not be able to combine the tracks. * Combining tracks of the following lengths may not be possible. Hi-MD mode MD mode •... - Page 94 Symptom Cause/Remedy Even though the • A USB hub is used. recorder is recognized by the computer, it does • You are using the recorder at a place with vibration. not operate normally. The recorder cannot • The SonicStage or MD Simple Burner software is active. be used as a storage device.
- Page 95 Symptom Cause/Remedy The recorder does • No disc is inserted. , Insert a recorded disc. not work or works poorly. • The HOLD function is turned on (“HOLD” appears in the display when you press an operation button on the recorder). , On the recorder, disable HOLD by sliding the HOLD switch to the opposite direction of the arrow •...
-
Page 96: Messages
Messages If the following messages flash in the display window on the recorder, check the chart below. Message Meaning/Remedy AVLS NO • AVLS is set to “AVLS On” and so the volume cannot rise higher. , Set AVLS to “AVLS Off” (page 74). VOLUME OPERATION BLANKDISC... - Page 97 • There is an internal malfunction in the system. , Restart the operation by doing steps 1 to 3 on page 95. If the message appears again, please consult your nearest Sony dealer. FORMAT • A disc with a format that the recorder does not support was inserted.
- Page 98 Message Meaning/Remedy NO DIGITAL • You tried to make a copy from a disc that is protected by the Serial Copy COPY Management System. You cannot make copies from a digitally connected source which was itself recorded using digital connection. , Use analog connection instead (page 37).
- Page 99 Message Meaning/Remedy PC – –MD • The recorder is connected to the computer. PROTECTED • You tried to record or edit on a disc with the tab in the record-protect DISC position. , Slide the tab back (page 85). PUSH STOP •...
-
Page 100: Explanations
Explanations About Hi-MD “Hi-MD” is a new MiniDisc format. Incorporating the new ATRAC3plus audio compression technology, Hi-MD is a new recording format that delivers longer recording times than ordinary MDs. Hi-MD discs can also be used as a computer storage medium for non-audio data such as text and images. For more details on Hi-MD, refer to the supplied flyer “What you can do with the Hi-MD Walkman”. - Page 101 List of the recording time for each disc When using a disc in Hi-MD mode When recording on the recorder Recording Codec/ mode on Bit rate the recorder Linear PCM/ 1.4Mbps Hi-SP ATRAC3plus/ 256kbps Hi-LP ATRAC3plus/ 64kbps When transferring from the computer Codec/Bit rate Linear PCM/1.4Mbps...
- Page 102 When using a disc in MD mode When recording on the recorder Recording Codec/ mode on the Bit rate recorder ATRAC/292kbps ATRAC3/ 132kbps ATRAC3/66kbps MONO Monaural (monaural) When transferring from the computer Codec/Bit rate ATRAC3/132kbps ATRAC3/105kbps ATRAC3/66kbps Approximate time When transferring 5-minute tracks Recording time 80-minute 74-minute...
- Page 103 About the DSP TYPE-S for ATRAC/ATRAC3 This recorder supports DSP TYPE-S, a specification for high-level Sony MiniDisc decks equipped with digital signal processors (DSP). This specification allows the recorder to produce high-quality sound from tracks recorded in MDLP mode.
- Page 104 Difference between digital (optical) and analog (line) inputs The input jack of this recorder works as both digital and analog input jacks. Connect the recorder to a CD player or a cassette recorder using either digital (optical) input or analog (line) input.
-
Page 106: What You Can Do With Md Simple Burner/Sonicstage
What you can do with MD Simple Burner/SonicStage What you can do with MD Simple Burner MD Simple Burner allows you to record music tracks from an audio CD in the CD drive of your computer to an MD Walkman, without first recording the music tracks to the computer. -
Page 107: Basic Operational Flow Using An Md Walkman
Basic operational flow using an MD Walkman MD Simple Burner Providing the required system environment (page 108) Installing the software onto your computer (page 109) Connecting an MD walkman to your computer (see “Recorder Operation”) Recording music tracks from an audio CD in the CD drive of your computer (page 111) SonicStage... -
Page 108: Installing
Installing Providing the required system environment System requirements The following system environment is required in order to use the SonicStage/MD Simple Burner software for the MD Walkman. Computer IBM PC/AT or Compatible • CPU: Pentium II 400 MHz or higher (Pentium III 450 MHz or higher is recommended.) •... -
Page 109: Installing The Software Onto Your Computer
Installing the software onto your computer Before installing the software • Make sure to close any virus-check software, as such software usually demands a large amount of system resources. • When you use the MD Walkman, make sure to install the software with the supplied CD- ROM. - Page 110 Click [Install SonicStage and MD Simple Burner] and then follow the displayed instructions. Read the instructions carefully. Depending on your region, the buttons other than [Install SonicStage and MD Simple Burner] may differ from those in the illustration above. The installation may take 20 to 30 minutes, depending on your system environment. Make sure to restart your computer only after the installation is completed.
-
Page 111: Using Md Simple Burner
Using MD Simple Burner Before using MD Simple Burner MD Simple Burner allows you to record music tracks from an audio CD in the CD drive of your computer to the MD Walkman. There are two ways to record from an audio CD. -
Page 112: Recording Using Md Walkman Operations (Simple Mode)
Recording using MD Walkman operations (Simple mode) Insert a recordable disc into the MD Walkman Walkman to the computer. For details about connections, see the “Recorder Operation” section. Do not disconnect the power source or the dedicated USB cable before the transfer has completed. -
Page 113: Recording By Computer Operations (Standard Mode)
Recording by computer operations (Standard mode) To start MD Simple Burner, click [Start] Simple Burner]. [Programs] in the case of Windows 2000 Professional/Windows Millennium Edition/Windows 98 Second Edition There are other ways to start up MD Simple Burner as follows: •... -
Page 114: The Window For Recording Selected Tracks From An Audio Cd
The window for recording selected tracks from an audio CD Track information (CD) Total time of the Artist name selected tracks of CD Album Title [Get CD info] Information of an audio CD (album name, track title, etc.) will be reflected in the track list. -
Page 115: Using Sonicstage
Using SonicStage Importing audio data This section explains how to record and store audio data from an audio CD to My Library of SonicStage on the hard disk drive of your computer. You can record or import music from other sources such as the Internet and your computer’s hard disk. - Page 116 If necessary, click If you unchecked a box by mistake, click it again to restore the check. To check all boxes, click To uncheck all boxes, click If necessary, change the format and bit rate for audio CD recording. When you click [Format/Bit Rate] on the right side of the screen, “CD Recording Format [My library]”...
-
Page 117: Transferring Audio Data From Your Computer To The Md Walkman
Transferring audio data from your computer to the MD Walkman Audio data stored in My Library of SonicStage can be transferred to your MD Walkman an infinite number of times. The My Library list Connect your MD Walkman to the computer. After making the connections, “Hi-MD”... - Page 118 If necessary, change the transfer mode. As the default setting, tracks in the OpenMG (LPCM/ATRAC3/ATRAC3plus) format will be transferred in the same format and bit rate (normal transfer). If the device connected to the computer does not support the above format, the format and bit rate will be converted to those of the device.
-
Page 119: Transferring Back Audio Data From The Md Walkman To Your Computer
Transferring back audio data from the MD Walkman to your computer The My Library list Transferring from the MD Walkman back to your computer Audio data that has been transferred from your computer and stored on the MD can be transferred back to My Library of SonicStage on your computer. - Page 120 To stop transferring Click Note Tracks transferred to the MD Walkman from another computer cannot be transferred back to My Library on your computer. Importing tracks recorded on a Hi-MD Walkman* to your computer Tracks that have been recorded on a Hi-MD Walkman* can be imported to My Library of SonicStage on your computer only once.
- Page 121 To stop importing Click Note Notes • You cannot import tracks that were recorded in a Net MD mode to your computer, or tracks that have been recorded on a device that does not support Hi-MD mode. • Before importing tracks recorded on the Hi-MD Walkman to the computer, click [Properties] on the right side of the screen to confirm the status of the [Import Settings] check box (it is checked by default).
-
Page 122: Using Sonicstage Help
Using SonicStage Help SonicStage Help provides further details on how to use SonicStage. SonicStage Help allows you to search easily for information from a list of operations, such as “Importing audio data” or “Transferring audio data”, or from large list of keywords, or by typing in words that might lead you to the appropriate explanations. -
Page 123: Understanding Sonicstage Help
Understanding SonicStage Help The left side frame 1 Double click [Overview] in the left-side frame. 2 Click [About This Help File]. The explanation will appear in the right-side frame. 3 Read the text. Scroll the display if necessary. Click underlined words to jump to their explanations. Searching for a word inside an explanation [Search] “Type in the keyword... -
Page 124: Referring To Sonicstage Help
Referring to SonicStage Help Click [Contents] on the left side of the Help window to view a list of items for each operation. Click on any items for details. Importing audio data to the computer Import audio data from the Internet Import audio files on the computer in SonicStage... -
Page 125: Backing Up Audio Data
Backing up audio data We recommend that you back up your music data as a precaution against hard disk crashes or computer replacement. Back up audio data in My Library Look up about SonicStage backup Troubleshooting Look up troubleshooting procedure When you want to know Look up unknown words Look up the kinds of audio data... -
Page 126: Other Information
Other information Uninstalling SonicStage/MD Simple Burner To uninstall SonicStage/MD Simple Burner, follow the procedures below. Click [Start]–[Control Panel]*. [Settings]–[Control Panel] in the case of Windows 2000 Professional/Windows Millennium Edition/Windows 98 Second Edition Double-click [Add/Remove Programs]. Click [SonicStage 2.x.xx] or [MD Simple Burner 2.0.xx] in the “Currently Installed Programs”... -
Page 127: On Copyright Protection
On copyright protection The OpenMG technology allows you to enjoy digital music, while maintaining the copyrights of its holders. SonicStage encrypts audio files in OpenMG format and stores them on the hard disk of your computer to prevent unauthorized distribution. Restrictions on audio content High-quality digital audio content is widely available through music distribution services on the Internet. -
Page 128: Troubleshooting
1 Check the symptoms in this “Troubleshooting” section. 2 Check the symptoms in SonicStage Help when you use SonicStage. 3 If the problem cannot be solved after checking the above references. Check the following table and then consult your nearest Sony dealer. Computer • Manufacturer: •... -
Page 129: The Software Cannot Be Installed Onto Your Computer
The software cannot be installed onto your computer Problem The installation was not successful. The installation appears to have stopped before it has completed. The progress bar on the display is not moving. The access lamp has not lit for a few minutes. Cause/Remedy You are using an OS that does not support this software. -
Page 130: Using A Md Walkman Connected To The Computer
Using a MD Walkman connected to the computer Problem Your computer does not recognize the MD Walkman. Even though the dedicated USB cable is used to connect the MD Walkman to the computer, the display on the MD Walkman does not indicate it is connected. -
Page 131: Index
Index Numerics 6-Band Equalizer Accessories optional supplied ATRAC3plus AVLS Backlight Battery battery life dry battery rechargeable battery BEEP Bookmark play CD drive CDDB CD-ROM Charging Checking playing position remaining time Cleaning Combining tracks Connecting analog computer digital when charging Contrast Copyright protection Data storage Disc memory... - Page 132 Play mode Main Play Mode Repeat Play Sub Play Mode Quick mode Recording adding track marks analog digital from microphone level mode (Hi-MD/MDLP) Recording mode Recording mode (Bit rate) Relabeling Search Simple Mode SonicStage SonicStage Help Speed Control Start (software) MD Simple Burner SonicStage Synchro-recording...
- Page 135 This warranty is valid only in Canada.
- Page 136 This warranty is valid only in the United States. * 3 2 6 6 5 3 6 1 1 Printed in Malaysia...
Need help?
Do you have a question about the MZ-NH900 and is the answer not in the manual?
Questions and answers