Table of Contents
Advertisement
Quick Links
Advertisement
Table of Contents

Subscribe to Our Youtube Channel
Related Manuals for FLOS WALLFLOWER


Summary of Contents for FLOS WALLFLOWER
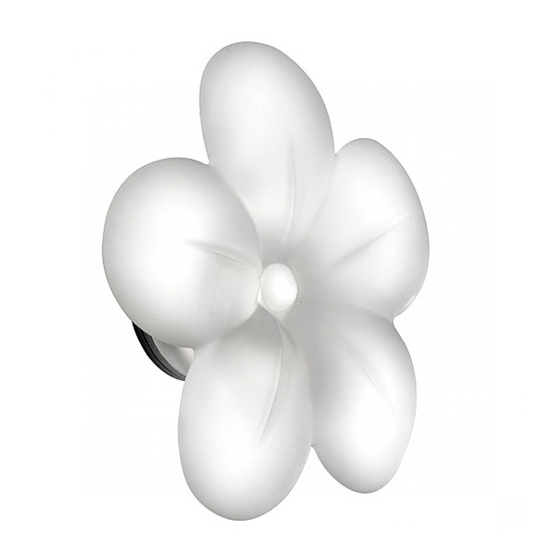
- Page 1 WALLFLOWER DESIGN BY MARCEL WANDERS...
-
Page 2: Cleaning Instructions
- L’apparecchio non può essere in alcun modo modificato with, any modification may compromise safety causing o manomesso, ogni modifica ne può compromettere la the appliance to become dangerous. FLOS declines all sicurezza rendendo lo stesso pericoloso. FLOS declina responsibility for products that are modified. - Page 3 - Der Apparat darf auf keinen Fall veraendert oder unerlaubt que ce soit, toute modification peut compromettre la sécurité geoeffnet werden, jede Veraenderung desselben kann die de celui-ci en le rendant dangereux. FLOS décline toute Sicherheit in Frage stellen und somit gefaehrlich werden. responsabilité pour les produits modifiés.
- Page 4 - El aparato no puede ser en ningùn caso modificado o forzado, cualquier modificaciòn puede comprometer la a segurança tornando o aparelho perigoso. FLOS declina seguridad haciéndolo peligroso. FLOS declina cualquier toda e qualquer responsabilidade pelos produtos responsabilidad por los productos modificados.
- Page 5 работ с устройством, убедиться в снятии напряжения питания. - Устройство не может изменяться или разбираться, любые изменения могут нарушить надёжность, делая его опасным. FLOS не несёт ответственность за измененную продукцию. - Устройство должно монтироваться только на стенку или на пол. В случае напольной установки, только...
- Page 6 Fig. 1 <IT> Fig.1 Separare il corpo (A) dal diffusore (B) svitandolo; Fig.2 INSTALLAZIONE A PARETE/PAVIMENTO - Fissare il corpo (A) alla parete/pavimento tramite viti e tasselli ad espansione; NOTA BENE: La testa delle viti non deve sporgere dalle sedi del corpo (A); NOTA BENE: Scegliere viti e tasselli idonei alla superficie destinata al montaggio.
- Page 7 Fig. 2 Effectuer les raccordements d’alimentation en prenant soin de respecter parfaitement les polarités des câbles (ROUGE = POSITIF - NOIR = NEGATIF). <ES> Fig.1 Separe el cuerpo (A) del difusor (B) desenroscándolo; Fig.2 INSTALACIÓN PARED/SUELO - Fijar el cuerpo (A) a la pared/suelo mediante tornillos y tacos de expansión; ATENCION: La cabeza de los tornillos no debe sobresalir de su alojamiento (A);...
- Page 8 Fig. 3 <IT> Fig.3 INSTALLAZIONE A PARETE/PAVIMENTO Rimontare il diffusore (B) avvitandolo al corpo (A). <GB> Fig.3 WALL/FLOOR ASSEMBLY - Reassemble the diffusor (B) screwing it onto the body (A). <DE> Abb.3 BEFESTIGUNG AN DER WAND/FUSSBODEN - Blendschutz (B) durch Anschrauben wieder am Körper (A) anbringen. Fig.3 INSTALLATION AU MUR/SOL - Remonter le diffuseur (B) en le vissant au corps (A).
- Page 9 Fig. 4 Fig.4 INSTALLAZIONE CON CASSAFORMA - Svitare il grano (C); estrarre la scatola di connessione (D) sganciandola <IT> dal corpo cassaforma (E) con una rotazione in senso antiorario. <GB> Fig.4 INSTALLATION WITH CASING - Unscrew the dowel (C); remove the connection box (D) unhooking it from the casing body (E) by turning it anti-clockwise.
- Page 10 Ø 70 mm Ø 65 mm 2x (H05RN-F) Fig. 5...
- Page 11 Fig.5 INSTALLAZIONE CON CASSAFORMA - Cementare/interrare la cassaforma come indicato in figura avendo <IT> cura di far passare il cavo di alimentazione dall’apposita spaccatura inferiore. <GB> Fig.5 INSTALLATION WITH CASING - Cement / bury the casing as shown in the figure taking care to pass the feed cable through the appropriate lower slot.
- Page 12 Fig. 7 Fig. 6 <IT> Fig.6 INSTALLAZIONE CON CASSAFORMA - Far passare il cavo di alimentazione attraverso il passacavo (E) della scatola di connessione; Fig.7 INSTALLAZIONE CON CASSAFORMA - Effettuare i collegamenti elettrici nella morsettiera (F) rispettando la corretta polarità (L=LINEA - N=NEUTRO). <GB> Fig.6 INSTALLATION WITH CASING - Pass the feed cable through the fairlead (E) of the connection box;...
- Page 13 <PT> Fig.6 INSTALAÇÃO COM COFRAGEM - Passar o cabo de alimentação através do passa-fios (E) da caixa de conexão; Fig.7 INSTALAÇÃO COM COFRAGEM - Efectuar as ligações eléctricas no painel de bornes (F) respeitando a correcta polaridade (L=LINHA - N=NEUTRO). Рис.6 УСТАНОВКА С ОПАлУБКОЙ - Провести кабель питания через кабельный зажим (E) <RUS>...
- Page 14 Fig. 8 <IT> Fig.8 INSTALLAZIONE CON CASSAFORMA - Rimontare la scatola di connessione (D) facendo coincidere le asole (G) con le viti (H) poste nella parte interna della cassaforma , ruotarla quindi in senso orario e bloccarla avvitando il grano (C). <GB> Fig.8 INSTALLATION WITH CASING - Reassemble the connection box (D) making the slots (G) align with the screws (H) in the internal part of the casing, then turn it clockwise and lock it by tightening the dowel (C).
- Page 15 <PT> Fig.8 INSTALAÇÃO COM COFRAGEM - Remontar a caixa de conexão (D) coincidindo os furos (G) com os parafusos (H) colocados na parte interna da cofragem, girar então no sentido horário e bloquear apertando o parafuso (C). Рис.8 УСТАНОВКА С ОПАлУБКОЙ - Вновь монтировать соединительную коробку (D), <RUS>...
- Page 16 Fig. 9 <IT> Fig.9 INSTALLAZIONE CON CASSAFORMA - Far passare i cavi di alimentazione attraverso il foro centrale della guarnizione (L); Effettuare i collegamenti alla morsettiera (I) facendo attenzione a rispettare le esatte polarità dei cavi (ROSSO=POSITIVO - NERO=NEGATIVO); Montare il corpo (A) con la guarnizione (L) alla cassaforma avvitando le viti (M).
- Page 17 (ROUGE = POSITIF - NOIR = NEGATIF. Revisser le corps (A) et le joint (L) au boitier d’encastrement (M). ATTENTION: La tête des vis ne doit pas dépasser de leur logement sur le corps (A). <ES> Fig.9 INSTALACIÓN CON CAJA DE EMPOTRAMIENTO - Pasar los cables de alimentación a través del orificio central de la junta (L);...
- Page 18 Fig. 10...
- Page 19 <IT> Fig.10 INSTALLAZIONE CON CASSAFORMA - Rimontare il diffusore (B) avvitandolo al corpo (A). <GB> Fig.10 INSTALLATION WITH CASING – Reassemble the diffusor (B) screwing it into the body (A). <DE> Abb.10 BEFESTIGUNG MIT SCHALUNG Blendschutz (B) durch Anschrauben wieder am Körper (A) anbringen. Fig.10 INSTALLATION AVEC BOITIER D’ENCASTREMENT - Remonter le diffuseur (B) en le vissant au corps (A). <FR>...
-
Page 20: Dati Tecnici
All’atto dell’installazione ed ogni volta che si interviene sull’apparecchio , assicurarsi che sia stata tolta la tensione di alimentazione. Installare rispettando le vigenti normative in materia di installazione. Utilizzare trasformatori protetti da cortocircuiti di tipo SELV. WALLFLOWER Tipologia trasformatori: - Uso INTERNO: - Trasformatori 350mA di tipo indipendente. -
Page 21: Technische Daten
Bei allen Installationsarbeiten und bei jedem Eingriff auf das Gerät ist zu prüfen, dass die Versorgungsspannung unterbrochen ist. Bei der Installation sind die geltenden Vorschriften in Sachen Installation zu beachten. WALLFLOWER Es sind kurzschlussgeschützte Netzgeräte vom Typ SELV zu verwenden. Typologie der Netzgeräte: - Für INNEN: - Tunabhängige Netzgeräte 350mA. -
Page 22: Datos Tecnicos
Instalar respetando las normas vigentes en materia de instalaciones eléctricas. Utilizar alimentadores de corriente con protección ante cortocircuitos del tipo SELV. Tipos de alimentadores de corriente: WALLFLOWER - Para uso en interior: - alimentadores 350mA de tipo independiente. - Para uso en exterior: - alimentadores 350mA de tipo independiente con grado de protección IP67. -
Page 23: Технические Данные
в коробки, с классом защиты IP67 и соответствующие анкерные устройства. КАРКАС FLOS С Питание сети с кабелем 2 x (H05RN-F) ВСТРОЕННЫМ БлОКОМ При монтаже и каждый раз при проведении вмешательств в ПИТАНИЯ устройство, убедиться в отключении напряжения питания. Произвести монтаж в соответствии с действующими нормативами... - Page 24 www.flos.com...
Need help?
Do you have a question about the WALLFLOWER and is the answer not in the manual?
Questions and answers