Table of Contents
Advertisement
Quick Links
Advertisement
Table of Contents

Related Manuals for Elo TouchSystems 1729L


Summary of Contents for Elo TouchSystems 1729L
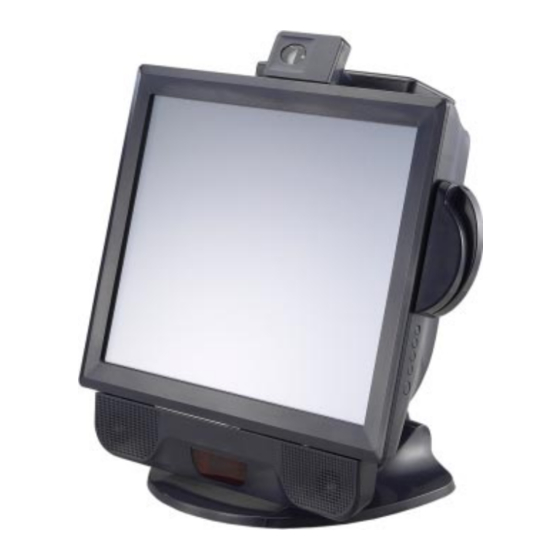
- Page 1 *shown with optional Magnetic Stripe Reader Speaker Bar/ Barcode Scanner and Fingerprint Reader (optional Customer Display also available) Touchmonitor User Guide 1729L 17¨ LCD Desktop Touchmonitor (Optional Magnetic Stripe Reader, Customet Display, Barcode Scanner and Fingerprint Reader available)
-
Page 2: User Guide
Elo TouchSystemsTouchmonitor User Guide 17" LCD Desktop 1729L Revision C P/N E488297 Elo TouchSystems. 1-800-557-1458 www.elotouch.com... -
Page 3: Trademark Acknowledgments
Elo TouchSystems reserves the right to revise this publication and to make changes from time to time in the content hereof without obligation of Elo TouchSystems to notify any person of such revisions or changes. -
Page 4: Table Of Contents
T T T T T a a a a a b b b b b le of le of le of le of Contents le of Chapter 1 Introduction Product Description ... 1 Detailed LCD Display Performance Requirements ... 2 Customer Display ... - Page 5 Appendix C Technical Specifications Touchmonitor Specifications ... 40 AccuTouch Touchscreen Specifications ... 41 IntelliTouch Touchscreen Specifications ... 42 Infrared Touchscreen Specifications ... 43 Acoustic Pulse Recognition Specifications ... 44 17” LCD Touchmonitor (1729L-XXXA-1-XX-G) Dimension ... 45 Regulatory Information Warranty Index...
-
Page 7: Product Description
NTRODUCTION Product Description The 1729L consists of a 17.0” LCD main display with a touchscreen and the following optional peripherals: customer display, vacuum fluorescent display (VFD), fingerprint reader, barcode scanner, magnetic stripe reader (MSR), speaker bar and a 6 port USB (USB version only) Hub. -
Page 8: Detailed Lcd Display Performance Requirements
AccuTouch IntelliTouch CarrollTouch Surface Capacitive Acoustic Pulse Recognition Response Time Display Color Vertical Viewing Angle Horizontal Viewing Angle 1-2 Elo Touchmonitor User Guide 1280 x 1024 337.92mm(H) x 270.336mm(V) 0.264mm(H) x 0.264mm(V) 800:1 typical 300 cd/m (Typical) 240 cd/m (Typical) -
Page 9: Fingerprint Reader
MTBF Fingerprint Reader The fingerprint reader will be ELO part number E728123 (DigitalPersona U.are.U 4000B). The fingerprint reader is powered by the USB bus. The reader optically scans the fingerprint when the user touches the glowing window. Optical technology gives the highest quality fingerprint scans and reliability. -
Page 10: One-Dimensional Scanner Specifications
The MSR is powered from the USB port; no external power is needed. Here are its specifications: • ELO part number: E579977 • Power source: from USB port • Message format: ASCII •... -
Page 11: External Power Supply
The hub also supplies two USB ports to the outside of the back of the 1729L for external use. The hub is only used by the USB version of the 1729L. The hub meets the following specifications: 1) Full compliance with USB specification 1.0, 1.1 and HID Class Definition... - Page 12 1-6 Elo Touchmonitor User Guide...
-
Page 13: Unpacking Your Touchmonitor
C H A P T E R NSTALLATION AND ETUP This chapter discusses how to install your LCD touchmonitor and how to install Elo TouchSystems driver software. Unpacking Your Touchmonitor Check that the following items are present and in good condition:... -
Page 14: Product Overview
Product Overview Main Unit Note: Shown with optional peripherals Rear View 2-8 Elo Touchmonitor User Guide... -
Page 15: Base Bottom View
Side View Base Bottom View... - Page 16 2-10 Elo Touchmonitor User Guide...
- Page 17 2-11...
- Page 18 Kensington Lock The Kensington lock is a security device that prevents theft. To find out more about this security device, go to http://www.kensington.com. 2-12 Elo Touchmonitor User Guide...
-
Page 19: Usb Interface Connection
To set up the display, please refer to the following figures and procedures: Remove the Cable Cover The cables are connected at the back of the monitor. To remove the cover, grasp the lip of the cover and pull towards you until it snaps. - Page 20 Before connecting the cables to your touchmonitor and PC, be sure that the computer and touchmonitor are turned off. Before connecting the cables to the touchmonitor, route all the cables through the hole in the second as shown in the picture above. 2-14 Elo Touchmonitor User Guide...
- Page 21 CONNECTIONS ON UNDERSIDE POWER POWER POWER CABLE Connect one end of the power cord to the monitor and the other end to wall. Connect the power cable to the power port in the monitor. 2-15...
- Page 22 Connect one end of the video cable to the rear side of computer and the other to the LCD. Tighten by turning the two thumb screws clockwise to ensure proper grounding. You can select DVI video cable or D-SUB15 video cable. 2-16 Elo Touchmonitor User Guide VIDEO PORT VIDEO CABLE...
- Page 23 CONNECTIONS ON UNDERSIDE SPEAKER PORT SPEAKER CABLE Connect one end of the speaker cable to the speaker port in the computer and the other end to the port in the monitor. 2-17...
- Page 24 The USB cable is for optional touch, MSR, CD and Finger Print Reader. Only one USB cable is needed because the device contains a self powered USB 1.1 Hub. Two self powered ports are available for running other USB devices. For touch only, no USB Hub is present. 2-18 Elo Touchmonitor User Guide...
-
Page 25: Replace The Cable Cover
Replace the Cable Cover Then you have attached all the cables to the monitor, gently bring all the cables toward the standard so they fit under the cover lip. Snap the Cable cover in place over the connections. 2-19... -
Page 26: Installing The Peripheral Device Drivers
Installing the Peripheral Device Drivers Finger Print Reader Driver Installation: 1. Insert your Elo TouchTools CD 2. On the CD, browse to Touch Monitor Peripherals\Fingerprint Reader\Fingerprint Reader 1729 17A2\Drivers 3. Once in this folder, click on the executable file named Setup and follow the necessary prompts to complete the driver installation. -
Page 27: Testing The Usb Msr Keyboard Emulation
2 Open the Readme.txt and follow instructions to test the unit. Converting MSR from HID to Keyboard Emulation 1. On the CD, browse to Touch Monitor Peripherals\Magnetic Stripe Card Reader (MSR) \HID to KB Converter. 2. Open up the program named MSR Change Mode 3. -
Page 28: Driver Installation
Devices section. Next click on Reinstall Driver. 6. Now your Windows operating system should guide you through the rest of the instal lation process. If any files are requested, please provide the following pathname in your Elo TouchTools CD: Touch Monitor Peripherals\Barcode Scanner Startup\Drivers. Test Applications: 1. -
Page 29: Enable 2-D Scanning
The Scan Engine turns on the laser and is able to scan and decode barcodes con- tinuouslywithout the user having to press the trigger (momentary switch). When the Host Appli-cation software detects the DSR input HIGH (HE Switch is OFF), it sends a ‘LevelTrigger’... -
Page 30: Driver Installation
Customer Display Driver Installation: 1. Insert your Elo TouchTools CD. 2. On the CD, browse to Touch Monitor Peripherals\Rear Facing Customer Display\Drivers\USB Drivers. Click on the folder that has the name of your operating system for the necessary drivers. 3. Once in this folder, open up the zip file and open the install text file for further driver installation instructions. -
Page 31: Installing The Touch Driver Software
• MS DOS • OS/2 Additional drivers and driver information for other operating systems (including Macintosh and Linux) are available on the Elo TouchSystems web site at www.elotouch. com. Your Elo USB touchmonitor is plug-and-play compliant. Information on the video capa- bilities of your touchmonitor is sent to your video display adapter when Windows starts. -
Page 32: Installing The Usb Touch Driver
For Windows XP and Windows 2000 you must have administrator access rights to install the driver. 1 Insert the Elo CD-ROM in your computer’s CD-ROM drive. If the AutoStart feature for your CD-ROM drive is active, the system automatically detects the CD and starts the setup program. -
Page 33: About Touchmonitor Adjustments
C H A P T E R PERATION About Touchmonitor Adjustments Your touchmonitor will unlikely require adjustment. Variations in video output and ap- plication may require adjustments to your touchmonitor to optimize the quality of the display. For best performance, your touchmonitor should be operating in native resolution, that is 1280 x 1024 at 60-75 Hz. -
Page 34: Lcd Function Key
17” LCD Function Key Controls Power Switch Select Menu 3-28 Elo Touchmonitor User Guide User Control Function Turns the display system power on or off. Displays the OSD menus on the screen and used to select (“Clockwise” and “Counter-clockwise” direction) the OSD control options on the screen. -
Page 35: Controls And Adjustment
Controls and Adjustment OSD Lock/Unlock You are able to lock and unlock the OSD feature. The monitor is shipped in the unlocked position. To lock the OSD: 1 Press the Menu button and appear displaying “OSD Unlock”. Continue to hold the buttons down for another 2 seconds and the window toggles to “OSD Lock”. -
Page 36: Osd Control Options
• Select the language used for the OSD menu from among English, France, Deutsch, Spanish and Japanese. Input Select • Selection of the input signal: DSUB analog or DVI digital. 3-30 Elo Touchmonitor User Guide to select 9300, 6500, 5500, 7500 and user. Only when selecting user... -
Page 37: Power Led Display & Power Saving
Sleep Tested with the USB cable unplugged. We recommend switching the monitor off when it is not in use for a long period of time. Display Angle For viewing clarity, you can tilt the LCD forward up 67 to 90 degrees. - Page 38 CAUTION In order to protect the LCD, be sure to hold the base when adjusting the LCD, and take care not to touch the screen. 3-32 Elo Touchmonitor User Guide...
-
Page 39: Solutions To Common Problems
If you are experiencing trouble with your touchmonitor, refer to the following table. If the problem persists, please contact your local dealer or our service center. Elo Techni- cal Support numbers are listed on the last page of this manual. - Page 40 4-34 Elo Touchmonitor User Guide...
-
Page 41: Native Resolution
The native resolution of a monitor is the resolution level at which the LCD panel is designed to perform best. For the Elo LCD touchmonitor, the native resolution is 1280 x 1024 for the SXGA-17 inch size. In almost all cases, screen images look best when viewed at their native resolution. - Page 42 LCD pixels using algorithms contained on its controller. The accuracy of the algorithms determines the fidelity of conversion of video pixels to LCD pixels. Poor fidelity con- version can result in artifacts in the LCD displayed image such as varying width characters. A-36 Elo Touchmonitor User Guide...
-
Page 43: Information
Do not attempt to fit the plug into an outlet that has not been configured for this purpose. Do not use a damaged power cord. Use only the power cord that comes with your Elo TouchSystems Touchmonitor. Use of an unauthorized power cord may invalidate your warranty. -
Page 44: Care And Handling Of Your Touchmonitor
Care and Handling of Your Touchmonitor The following tips will help keep your Elo touchmonitor functioning at the optimal level. • To avoid risk of electric shock, do not disassemble the brick supply or display unit cabinet. The unit is not user serviceable. Remember to unplug the display unit from the power outlet before cleaning. -
Page 45: Display Modes
Display Modes Your Elo touchmonitor is compatible with the following standard video modes: Item Resolution 640 x 350 720 x 400 640 x 480 640 x 480 640 x 480 640 x 480 800 x 600 800 x 600 800 x 600... -
Page 46: Touchmonitor Specifications
Operating Conditions Temp Humidity Dimensions (HxWxD) Weight (Net) Certifications C-40 Elo Touchmonitor User Guide 1729L 17.0” TFT Active Matrix Panel 337.92(H) x 270.336(V) mm 0.264(H) x 0.2647(V) mm VGA 640 x 350 (70 Hz) VGA 720 x 400 (70 Hz) -
Page 47: Power Supply Specification
Power Supply Specification The Touchcomputer shall be powered by 12VDC from a universal type power supply brick with the following characteristics: Input voltage 100 to 240 V~ Input frequency 50/60 Hz Output voltage 12 V Output line and load regulation +/- 5% Output current=10 Amps maf... -
Page 48: Accutouch Touchscreen Specifications
Inside: Transparent conductive coating. Bottom: Glass substrate with uniform resistive coating. Top and bottom layers separated by Elo-patented separator dots. Positional Accuracy Standard deviation of error is less than 0.080 in. (2.03 mm). This equates to less than ±1%. -
Page 49: Intellitouch Touchscreen Specifications
ENVIRONMENT Chemical Resistance Electrostatic Protection (per EN 61 000-4-2, 1995) C-42 Elo Touchmonitor User Guide Standard deviation of error is less than 0.080 in. (2.03 mm). Equates to less than ±1%. More than 100,000 touchpoints/in2 (15,500 touchpoints/cm2). Typically less than 3 ounces (85 grams). -
Page 50: Infrared Touchscreen Specifications
Infrared Touchscreen Specifications MECHANICAL Input Method Electrical Positional Accuracy Resolution Touch Activation Force Controller OPTICAL Light Transmission Chemical Resistance Durability Surface Durability Input Method Finger or gloved hand activation Typical centroid accuracy: 2 mm with 1 mm STD error Touchpoint density is based on controller resolution of 4096 x 4096 No minimum touch activation force is required Board: USB 1.1... -
Page 51: Acoustic Pulse Recognition Specifications
Chemical resistance DURABILITY Surface durability Expected life C-44 Elo Touchmonitor User Guide Finger, finger nail, gloved hand, or stylus activation 1% max. error Touchpoint density is based on controller resolution of 4096 x 4096 Typically 2 to 3 ounces (55 to 85 grams) Board: USB 1.1... -
Page 52: 17" Lcd Touchmonitor
17” LCD Touchmonitor(ET1729L-XXXA-1-XX-XX-G) Dimensions 17” LCD Touchmonitor(ET1729L-XXXA-1-XX-G) Dimensions C-45... -
Page 53: Regulatory Information
I. Electrical Safety Information: A) Compliance is required with respect to the voltage, frequency, and current require- ments indicated on the manufacturer’s label. Connection to a different power source than those specified herein will likely result in improper operation, damage to the equip- ment or pose a fire hazard if the limitations are not followed. - Page 54 If you need additional help, consult your dealer, manufacturer, or an experienced radio or television technician. 48 Elo Touchmonitor User Guide a) Use only the provided I/O cables to connect this digital device with any computer. b) To ensure compliance, use only the provided manufacturer’s approved line cord.
- Page 55 "The application of this monitor is restricted to special controlled luminous environments.The screen surface trend to reflect annoying light of lamps and sunlight. To avoid these reflections the monitor should not be positioned in front of a window or directed to luminaries. The monitor is in compliance with Reflection Class III according to ISO 13406-2"...
- Page 56 50 Elo Touchmonitor User Guide...
-
Page 57: Warranty
ARRANTY Except as otherwise stated herein or in an order acknowledgment delivered to Buyer, Seller warrants to Buyer that the Product shall be free of defects in materials and workmanship. With the exception of the negotiated warranty periods; the warranty for the touchmonitor and components of the product is 2 years. - Page 58 Products made or authorized by Buyer. Buyer will indemnify Seller and hold Seller harmless from any liability, claims, loss, cost, or expenses (including reasonable attorney’s fees) attributable to Buyer’s products or representations or warranties concerning same. 52 Elo Touchmonitor User Guide...
-
Page 59: Installation And Setup
Numerics 17.0" LCD Touchmonitor (1729L-XXWA-1-XX-G) Dimensions, 45 About Touchmonitor Adjustments, 27 AccuTouch Touchscreen Specifications, 41 Acoustic Pulse Recognition Specification, 44 Auto Adjust, 30 Barcode Scanner, 4,24 Base Bottom View, 9 Brightness, 30 Care and Handling of Your Touchmonitor, 38 Chemical Resistance, IntelliTouch, 42... -
Page 60: Omni-Dimensional Scanner Specifications
One-Dimensional scanner specifications, 4 Omni-Dimensional scanner specifications, 4 Optical, AccuTouch, 41 Optical, IntelliTouch, 42 Optical, IR, 43 Optimizing the LCD Display, 20 OSD Control Options, 30, 34 OSD Lock/Unlock, 29 OSD Menu Functions, 29 OSD Position, 30 OSD Timeout, 30 Phase, 30 Positional Accuracy, AccuTouch, 41 Positional Accuracy, IntelliTouch, 42... -
Page 61: Product Information
• Press release • Software drivers • Touchmonitor Newsletter Getting in Touch with Elo To find out more about Elo’s extensive range of touch solutions, visit our Web site at www.elotouch.com or simply call the office nearest you: North America Germany...
Need help?
Do you have a question about the 1729L and is the answer not in the manual?
Questions and answers