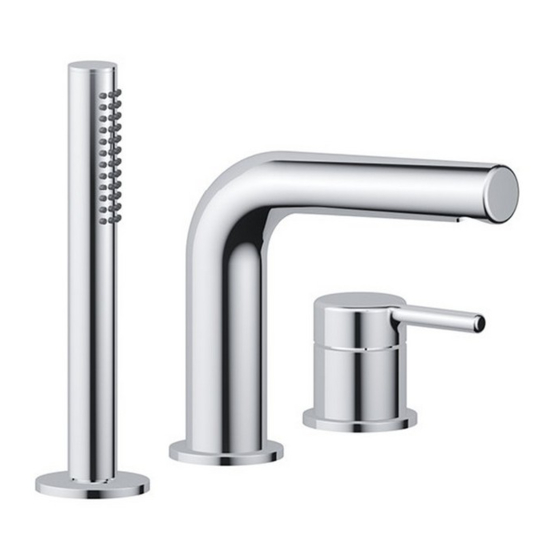
Summary of Contents for Excellent PI AREX.1233CR
- Page 1 BATERIA NAWANNOWA 3 -OTWOROWA 3-HOLE DECK MOUNTED BATH MIXER Instrukcja montażu Installation instructions AREX.1233CR | AREX.1233BL | AREX.1233WH | AREX.1233GL...
- Page 3 PL: Nazwa części EN: Parts name Słuchawka prysznicowa Hand shower Kątowy uchwyt słuchawki prysznicowej Angle shover and adapter Mocowanie na słuchawkę prysznicową Hand shower base Wylewka Spout Φ36 Kontroler mieszacza Mixer controler Φ45 Φ36 Φ36 Wąż pleciony - czerwony Red braided hose Φ45 Φ45 Wąż...
- Page 4 Nawiercić 3 otwory zgodnie z ponizszym rysunkiem. Wylewkę można zainstalować w 2 opcjonalnych pozycjach. Uwaga: średnice otworów są różne, najpierw należy zdecydować o sposobie montażu. Przy planowaniu instalacji należy wziąć pod uwagę iż zaistalowanie wylewki bezpośredni nad uchwytem mieszacza możę powodować kapanie małej ilości wody bezpośrednio na pokrętło.
- Page 5 Przed montażem zdjąć nakrętki mocujące, podkładki, pierścienie gumowe ze wszystkich elementów baterii (w razie potrzeby można użyć śrubokręta) Before assembly, remove the fastening nuts, washers and rubber rings from all elements of mixer (if necessary screwdriver can be used) Przed przystąpieniem do montażu wylewki należy najpierw przytrzymać gwintowaną część pod wylewką, obrócić...
- Page 6 Montujemy wylewke wannową do wcześniej przygo- towanych otworów. Należy sprawdzić prawidłowe umiejscowienie wylewki. Następnie dokręcamy elemn- ty montażowe od wewnętrznej strony rantu wanny Install the bath spout to the previously prepared holes. Check the correct positioning of the spout. Then tighten the assembly element from the inside of the bathtub rim Kolejnym krokiem jest zamontowanie mieszacza...
- Page 7 M/OUT Następnie przystęujemy do montażu załączonych do zestawu węży w oplocie - zgodnie z rysunkiem obok Install the braided hoses (included in the set)according to indications. Należy zainstalować wężyki sanitarne zgodnie ze wzkaniazami na rysunku. Install the 2 red+blue braided hoses according to indications.
- Page 8 Następnie montujemy wąż słuchawki prusznicowej, uchwyt na słuchawkę oraz słuchawkę prysznicową. Wąż prysznicowy należ podłączyć do węza w oplo- cie czerwono-niebieskim wychodzącym z wylewki (woda zmieszana) Install hand shower hose, adapter and hand shower. Connect the hose to the red+blue braided hose (mixed water) UWAGA: do zestawu dołączone jest dodatkowy-ką- towy uchwyt na słuchawkę...
- Page 9 Po skończonej instalacji należy sprawdzić poprawność działania mieszacza wody oraz wylewki prysznicowej będącej przełączni- kiem. Należy sprawdzić również szczelność montażu poszczegól- nych elementów. After completing the installation, check the correct operation of the water mixer and the shower spout being also a diverter. Check the tightness of each mounted elements Wylewka prysznicowa jest równocześnie prze- łącznikiem funkcji i może być...
- Page 10 Instrukcja montażu i użytkowania Ważne ! Ciśnienie! Ciśnienie pracy baterii wynosi 3 Bar, dodatkowo różnice ciśnień miedzy przyłączami zimnej i ciepłej wody uniemożliwiają poprawną pracę mieszacza wody, dlatego ciśnienie wody musi zostać wyrównane przed podłączeniem baterii. Stosowanie armatury w instalacjach zasilanych przepływowymi podgrzewaczami wody i tzw.
- Page 11 • Należy stosować do wszystkich powierzchni miękką ściereczkę (z mikrofazy) oraz łagodne • środki myjące (typu mydło) a następnie obficie spłukać czystą wodą i wysuszyć miękką ście- reczką. Osad wapienny należy usuwać środkami do mycia naczyń. • Należy zachować ostrożność w trakcie używania baterii, nie uderzać jej innymi przedmiotami. •...
- Page 12 • Brak okresowej pielęgnacji, przeglądów oraz dbałości o produkt i jego funkcjonowanie poprzez jego odpowiednią konserwację. Brak dbałości o produkt w czasie jego nieużywania (przykła- dem tego typu jest pozostawienie w nieużytkowanej instalacji wodnej napełnionych wodą prze- wodów doprowadzających wodę w czasie zbyt niskich temperatur) oraz użytkowania (przy- kładem tego typu działań...
- Page 13 Instructions for installation and use lmportant ! Pressure! System operating pressure is 3 Bar; additionally, pressure differences between the cold and hot water connections prevent the correct functioning of the water mixer; therefore, water pres- sure must be leveled prior to connecting the kit. Using valves in water flow systems that use tankless water flow heaters or the so-called boilers does not ensure proper functioning of the kit.
- Page 14 • Use caution when using the shower - avoid hitting it with other objects. • Regularly clean the pressure regulator (aerator) with a solution of vinegar (1:3 ratio of 10% vinegar and water; soak for approx. 2-3 hours); for deposit-resistant rubber elements, rub them to remove the sediment.
- Page 15 • Lack of periodic maintenance, inspection and care of the product and its operation through proper maintenance.Lack of proper care for the product when it is not used (e.g., leaving water in the pipes during very low temperatures when the system is not used) or when it is used (e.g., connecting the product to the water supply lines where the pressure is not standard or where water hardness or purity deviates from the standard).
- Page 16 Excellent S.A. 32-003 Podłęże 662, Polska Tel.: 12 657 18 87 e-mail: lazienki@excellent.com.pl www.excellent.com.pl...


Need help?
Do you have a question about the PI AREX.1233CR and is the answer not in the manual?
Questions and answers