Table of Contents
Advertisement
Quick Links
Advertisement
Table of Contents

Related Manuals for Holux FunTrek 132


Summary of Contents for Holux FunTrek 132
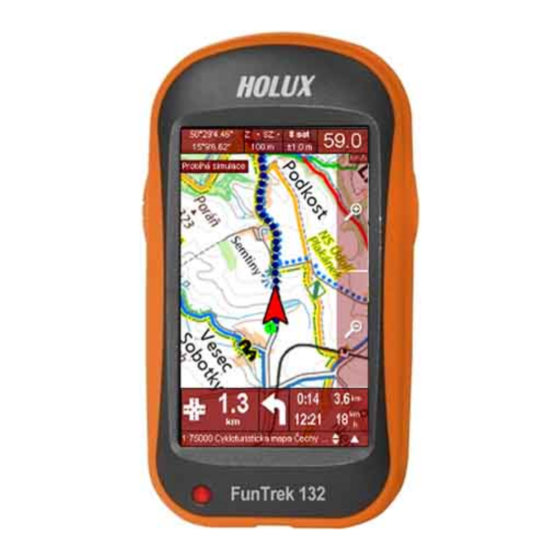
- Page 1 HOLUX FunTrek 132 FunTrek 132 User Manual Holux Technology Inc.
-
Page 2: Software Copyright
All other trademarks belong to registered companies. The contents of this manual will be modified without further notice. Without the written consent of HOLUX Technology, Inc, this manual may not be translated or copied. Copyright HOLUX Technology, Inc. All rights reserved. -
Page 3: Product Caution
HOLUX FunTrek 132 Product Caution About operation environment The operating temperature for the product is between -10℃~60℃. Operating or recharging in an environment with a temperature over 45℃ might cause the system malfunction. However, this should be considered a normal phenomenon. Please do not operate under extreme temperatures. - Page 4 3. The battery should only be used in this device. Normal care and maintenance FunTrek 132 is a product of superior design and craftsmanship and should be treated with care. The following suggestions will help you protect your warranty coverage.
-
Page 5: Product Introduction
40 Trip Computer. It also displays the changes on altitude maps information chart. Support Map: : : : Support all kinds of navigation maps that were developed for FunTrek 132. Outdoor function: Alert setting: : : :... - Page 6 FunTrek 132 has a variety of GPS applications, not only hiking, bike, also a best partner for car driving to outdoor, which is a convenient tool for the measurement work that is truly full-function handheld product.
-
Page 7: Table Of Contents
HOLUX FunTrek 132 Table of Contents Copyright Declaration............................ii Software Copyright..............................ii Product Caution..............................iii Product introduction ............................. v Table of Contents ..............................vii Product Spec ................................ 1 Main program spec ............................1 Hardware spec .............................. 2 Unit Overview..............................3 Basic Operation..............................4 Power on and off ............................4 Charging Battery ............................ - Page 8 HOLUX FunTrek 132 Geocaching ..............................34 Calendar..............................36 Alarm clock..............................36 Calculator ..............................37 Stopwatch..............................37 Unit Conversion ............................38 Health................................38 Emer. (Emergency info) ..........................38 Tips................................38 Waypoints..............................39 Routes................................. 45 Settings................................49 Personal ..............................49 Sensors ............................... 52 System ................................
-
Page 9: Product Spec
HOLUX FunTrek 132 Product Spec Main program spec Item Spec parameter Operation interface Simplified Chinese/ Traditional Chinese/ English/ Czech switching operation Support external program The numbers of waypoints 2000 The numbers of routes 1000 Waypoints of every route 1000 Track log... -
Page 10: Hardware Spec
HOLUX FunTrek 132 Hardware spec GPS chip Battery High Sensitivity (-165dBm) GPS Chip. Up to 15 hrs (Backlight off) Removable & Rechargeable, Li-Ion 1150mAh Memory 128M mobile DDR SDRAM Waterproof Internal 4GB Flash. IPX-6 Support microSD card up to 32GB... -
Page 11: Unit Overview
HOLUX FunTrek 132 Unit Overview Component Function Description: (Front View) Item Description Touch Screen LCD The device is using the touch-screen control. Right button When the device is powered off, press the right button for 3 seconds to turn on this device. -
Page 12: Basic Operation
USB cable interface in order to charge the device. Charging mode Connect FunTrek 132 to the PC with an USB cable. When the device is power off and connect to the PC, enter charging mode. Install/ Remove microSD card Step: Open the battery lid and remove the battery. -
Page 13: Power On And Positioning
HOLUX FunTrek 132 Power on and Positioning First positioning Please take the device out of the room, and turn on the device. Then enter into the satellite status page to displays the position status. When searching satellite signal will display “Acquiring”. “2D Fixed” means the positioning status mode. -
Page 14: Right Button
Click the button to increase/decrease the backlight brightness. Auto Light FunTrek 132 is equipped with a sensor that automatically detects the ambient light level and adjusts the backlight brightness to save power. Step: Press the right button once to enter the operation page. - Page 15 HOLUX FunTrek 132 notes, and view sport modes. Press the button to save the track log, and start to record. Press the button to pause recording; press the button to start/continue recording. Press the button to stop recording, and save the track data.
- Page 16 HOLUX FunTrek 132 New waypoint Step: Press the right button once to enter the operation page. The bottom of page is the area to mark waypoints . Press the button to enter the waypoint edit page. You can edit waypoint name, select waypoint symbol, add notes, edit waypoint coordinates location and input waypoint altitude.
-
Page 17: Left Button
HOLUX FunTrek 132 Left button Trip Computer Step: Press the left button once to enter the Trip Computer. In the Trip Computer page, you can view travel distance, travel time, current speed and altitude, and the other 40 Trip Computer. - Page 18 : displays 8 items of Trip Computer on screen. View statistical curve FunTrek 132 can record the height, speed, pressure, time and distance curve for the user to view the analysis. Step: Press the left button once to enter the Trip Computer.
-
Page 19: Lock/ Unlock The Screen
HOLUX FunTrek 132 Compass Step: Press the left button once to enter the Trip Computer. Press the button to enter compass page. On the compass page, you can view current direction, azimuth and compass. Compass which has not done with its calibration can not accurately show the direction. Press the button to calibrate the compass. -
Page 20: Screenshot
Screenshot FunTrek 132 can take a screenshot and save as a picture. Press both the left and right buttons at once to take a screenshot. If screenshot is successful, a prompt will appear. When the FunTrek 132 is connected to a PC in storage mode, the saved screenshot can be accessed in the "sc"... -
Page 21: Main Menu List
HOLUX FunTrek 132 Main menu list When the device turned is on, the status bar is displayed on the top of main menu. The six icons are function lists in below of main menu. Status Main Menu Status bar Satellite information... - Page 22 HOLUX FunTrek 132 Heart rate monitor (HRM) Icon Description Operation HRM sensor is turned on. Please refer to Heart Rate Monitor HRM sensor is turned off. Please refer to Heart Rate Monitor Cadence Icon Description Operation Cadence sensor is turned on.
-
Page 23: Follow Course
HOLUX FunTrek 132 Follow Course With Follow Course function, it can guide you to your pre-defined destination. The available options are “By track”, “By route” and “G-Finder”. By Track When selecting the saved track, you can set several locations as ”Starting”, “Ending” or “Check point”... -
Page 24: By Route
HOLUX FunTrek 132 By Route When selecting the saved track, you can set two waypoints as “Start point” or “End point”. The selected track can be set as the destination of designated waypoints, and these two waypoints location can be switched. -
Page 25: G-Finder
HOLUX FunTrek 132 G-Finder The G-Finder enables users to mark their starting points. It helps you get the current position and distance from where you started. This helps guide you to return to the starting point. Step: On the main menu page, click “Follow Course”. -
Page 26: View Map
HOLUX FunTrek 132 View Map With the map view, user can browse the tracks, waypoints, routes and areas. Following are the map features: Press the button to zoom in/out on the map. Adding marker on the map: Press the button to mark the location on the map. Press the button again to locate the position in the middle of the screen which makes it easier to browse. -
Page 27: Create Map
HOLUX FunTrek 132 Create Map FunTrek 132 supports the Convert Tool to transfer smf map file, which enables user to create a new smf map to be added in the device. Steps: Use Convert Tool to convert bmp, jpg, and other map images into smf map. Please refer to the Convert Tool’s user manual. -
Page 28: Tracks
HOLUX FunTrek 132 Tracks With Track management, you view, edit, or copy the track, or get the detail information of each track log. You can also search for a particular track. Notes: The recording log will automatically stop when the recording time or distance reaches its maximum limit. -
Page 29: Altitude/ Speed Plot
HOLUX FunTrek 132 Note: If you edit sport mode, press the button to refresh the track information. Altitude/ Speed Plot With Altitude map, you can playback the track record to view the changes of the altitude. Step: On the main menu page, click “Tracks” to enter the track list. -
Page 30: Edit Track
HOLUX FunTrek 132 Press the button and click the location on the map to mark a point. Press the button to move the point to center of the screen. Edit track Step: On the main menu page, click “Tracks” to enter the track list. -
Page 31: Copy To New
Select one of the tracks, you can still view multiple tracks on the map. Note: The FunTrek 132 stores one track per GPX file. If a GPX file with multiple tracks is downloaded from the Internet, FunTrek 132 will display them as one single track. -
Page 32: Mass Storage
HOLUX FunTrek 132 Mass Storage Read the microSD card data Connect FunTrek 132 to the PC with a USB cable and turn on the device. On the main menu, click “Mass Storage” icon to enter the storage mode. Folders In Storage mode you will be able to see the folders in the memory card. -
Page 33: Application
HOLUX FunTrek 132 Application Application contains all main functions of FunTrek 132. Shortcut All functions in application page can be set as shortcuts on the main page. Step: On the main menu page, click “Application”. Press the button to enter function list. - Page 34 To start using the application, launch SmartMaps on the “Main menu/Programs”. : Note Basically, user can execute the exe program and PNG images on any storage location on FunTrek 132. Be sure that the inf file contains the correct path for name, icon, and exec. Inf file information: “...
-
Page 35: Training
0409 is 4-digit language ID that represents American English, 0804 represent Simplified Chinese, 0404 represents Traditional Chinese. Training Connect your FunTrek 132 with the follow ANT+ sensors: heart rate, bike cadence, bike speed and/ or combined bike speed and cadence.. Note: Before you use the Training function, please do the positioning first. - Page 36 HOLUX FunTrek 132 ANT+ Heart Rate Monitor, ANT+ Bike Cadence Sensor and ANT+ Bike Speed Sensors sections. After connected, it starts to receive the data. Click “Training” button to enter the training page. “HR Grade”: Before you set the HR grade, please read the message that appears on the screen. Press button to enter HR Grade list and select the appropriate heart rate range.
- Page 37 The sensor is connected and the poor signal lasts more than 1 minute, the cadence, speed and heart rate are displayed as “---”. FunTrek 132 training information range is: Heart rate 30-220bmp, Cadence 20-255rpm, Speed 2.4-244km/h. Cadence, speed and heart rate data which are higher than the maximum value, the display will continue to show the maximum value.
-
Page 38: Area Calculation
HOLUX FunTrek 132 Area calculation Area calculation can immediately measure the area, and the routes can be saved as a track log. Available options are “By track”, “By vertices”, and “By fixed-width”. By track The track size is measured by the track length. To calculate the length, trace the route of the track log until the end and return back to the starting point. - Page 39 HOLUX FunTrek 132 Click “Price of length” or “price of area” button and input price of length/area. You can view the total price of length/area on the track log display page. Press the button to save the track, and press the “OK” button to save the track log.
- Page 40 HOLUX FunTrek 132 On the length/area unit page, press the button to change the unit of length/area. Click “Unit of length” or “Unit of area” button to enter the unit list. Users can click one of the unit buttons to “Move down”, “Insert before”, “Insert behind”...
- Page 41 HOLUX FunTrek 132 Press button to enter track display page. Press button to enter again “Width” and “Unit”. When completed, press the button to display the measure of the track area. Press button to complete and save the result. On the length/area unit page, press the button to change the unit of length/area.
-
Page 42: Geocaching
Click the “Geocaching” icon. The cache that has been found will be marked as , contrarily, it is marked Click Geocaching to view the information. Note: The FunTrek 132 can store up to 500 cache locations. GeoRadar Step: On the GeoRadar page, press the button to view the GeoRadar information. - Page 43 HOLUX FunTrek 132 Press the button to mark not found. Add Geocaching Notes Step: On the Compass page, press the button to mark found and add notes. After adding the comments, it returns to the GeoRadar page.
-
Page 44: Calendar
HOLUX FunTrek 132 Calendar Step: On the main menu page, click “Applications” icon to enter the Program menu. Click “Calendar” icon to view the calendar page. Use the button to change month. Alarm clock Step: On the main menu page, click “Applications” icon to enter the Program menu. -
Page 45: Calculator
HOLUX FunTrek 132 Calculator Step: On the main menu page, click “Applications” icon to enter the Program menu. Click “Calculator” icon to enter the Calculator page. Note: Input with up to 13 digits can be entered into the calculator. If the result exceeds 13 places, it will be displayed using scientific notation. -
Page 46: Unit Conversion
On the main menu page, click the “Applications” icon to enter the Applications menu. Click the “Emer.” icon to enter browser page. Tips Tips function can help user to understand FunTrek 132 and GPS knowledge. The default is displayed at power on. Users can view all tips content in application function. Step: On the main menu page, click the “Applications”... -
Page 47: Waypoints
HOLUX FunTrek 132 Waypoints Search waypoints There are plenty of destinations that you can choose. Use the search function to quickly find the desired destination. Step: On the main menu page, click the “Applications” icon to enter the Program menu. - Page 48 HOLUX FunTrek 132 View map Step: On the main menu page, click the “Applications” icon to enter the Program menu. Click the “Waypoints” icon. Select the point that you will operate, click to enter the Waypoints menu. Select "Browse”, the screen will display the waypoint position.
- Page 49 HOLUX FunTrek 132 Edit waypoints Step: On the main menu page, click the “Applications” icon to enter the Program menu. Click the “Waypoints” icon. Select the point that you will operate, click to enter the Waypoints menu. Select “Edit” to enter the waypoint edit page. You can edit waypoint name, select waypoint symbol, add notes, edit waypoint coordinates location, and input waypoint altitude.
- Page 50 HOLUX FunTrek 132 Reposition With reposition, you can use the current point to replace the original coordinates with the updated waypoints coordinates. Step: On the main menu page, click the “Applications” icon to enter the Program menu. Click the “Waypoints” icon.
- Page 51 HOLUX FunTrek 132 waypoints’ coordinates value are replaced with the average coordinates value. On the edit page, press button to save the waypoint information. Press the button to calibrate altimeter by average altitude. On the Location map of 10 meters, 20 meters or 30 meters radius, when the sampling point is focused on the center, the average coordinate value is closely paralleled the true value.
- Page 52 HOLUX FunTrek 132 Select “Project to new” and enter the distance and bearing. Press the button to save. Enter a new waypoint edit page, a confirmed coordinates and altitude information. Press the button to create a project waypoint.
-
Page 53: Routes
HOLUX FunTrek 132 Routes You can use waypoints to build routes, and edit routes name, description, and points. New routes Step: On the main menu page, click the “Applications” icon to enter the Program menu. Click the “Routes” icon. Press the button to enter a new routes page. - Page 54 HOLUX FunTrek 132 Details The details information contains name, length and area. Step: On the main menu page, click the “Applications” icon to enter the Program menu. Click the “Routes” icon. Select the route that you will operate, click to enter the Routes Menu.
- Page 55 HOLUX FunTrek 132 Edit Step: On the main menu page, click the “Applications” icon to enter the Program menu. Click the “Routes” icon. Select the route that you will operate, click to enter the Routes menu. Select “Edit” to enter the route edit page. You can edit route name, add notes, edit route points.
- Page 56 HOLUX FunTrek 132 Copy to new Step: On the main menu page, click the “Applications” icon to enter the Program menu. Click the “Routes” icon. Select the route that you will operate, click to enter the Routes menu. Select “Copy a new”, you can copy a new route name, description, and points.
-
Page 57: Settings
HOLUX FunTrek 132 Settings Personal The Profile function contains “Odometer”, “Track Log”, “Age & Weight”, and “Background”. Odometer You can save trip information in ODO1 or ODO2. Step: On the main menu page, click Settings. Select “Personal” to enter you personal settings list. - Page 58 HOLUX FunTrek 132 Track Record Manually/ Automatically record track User can set the track record mode, select start tracking manually or automatically, and track the interval recording time. Step: On the main menu page, click Settings. Select “Personal” to enter your personal settings list.
- Page 59 Select “Background” to enter the “Background” menu. You can add pictures to the list by loading the picture files to the “bg” file folder. Note: FunTrek 132 only supports the “bmp” file format and the best resolution is 240×400 pixels.
-
Page 60: Sensors
HOLUX FunTrek 132 Sensors Sensors contain “ANT+ Heart Rate Monitor”, “ANT+ Bike Cadence Sensor”, “ANT+ Bike Speed Sensor”, “Compass”, “Altitude” and “Screen”. Screen When you touch the screen, you can adjust the screen calibration if there is a difference on the response location. - Page 61 HOLUX FunTrek 132 Search heart rate monitor sensor, the steps are: On the main menu page, click Settings. Select “Sensor” to enter the sensor settings menu. Select “Heart Rate Monitor”, and press the “Search” button. After searching match heart rate monitor sensor, the device will display the list.
- Page 62 HOLUX FunTrek 132 The details page displays the sensor’s information, such as Serial number; manufacture ID, model number, hardware version and software version. The model number of Cadence sensor is 20. ANT+ Bike Speed Sensors (optional) Step: On the main menu page, click Settings.
- Page 63 HOLUX FunTrek 132 hardware version and software version. The model number of Speedometer sensor is 30. Compass To use the compass for the first time, the compass reading is not accurate; please calibrate the compass. Step: On the main menu page, click Settings.
-
Page 64: System
HOLUX FunTrek 132 System Left key- Info pages Use the “Left key- Info pages” to set the project displayed on Trip information and the auto-flip. Select pages You can select 1 ~5 information page to set the shortcuts for the “Left key- Info pages”. - Page 65 GPS to measure the altitude. If both cases happened at the same time, the default is barometer. Speed mode FunTrek 132 provides speed display including speedometer and GPS. Step: On the main menu page, click “Settings” icon to enter the settings page. Select “System Settings”.
- Page 66 Select “Auto Power Off” to set the auto power off setting. Note: If FunTrek 132 fails to acquire a fix within the set time, it will automatically power off. If a satellite fix is acquired within the set time, the timer will be reset.
- Page 67 HOLUX FunTrek 132 Coordinates Setup Coordinates Format User can choose the appropriate format for their use. Step: On the main menu page, click “Settings” icon to enter the settings page. Select “System Settings”. Select “Set Coordinate” to view the coordinate lists.
- Page 68 HOLUX FunTrek 132 Coordinate Datum Step: On the main menu page, click “Settings” icon to enter the settings page. Select “System Settings”. Select “Set Coordinate” to view the coordinate lists. Select “Coordinate Datum” to set the coordinates. If you select “Beijing1954” or “Xian80” datum, you have to input the parameter. “a” and “1/f” cannot be edited.
- Page 69 HOLUX FunTrek 132 Units Users can set the units of Speed/ Distance. Step: On the main menu page, click “Settings” icon to enter the settings page. Select “System Settings”. Select “Units” to enter the options list. Select “Metric” or “Imperial” units.
- Page 70 HOLUX FunTrek 132 Select “Storage media”. Select “Holux Internal Memory” or “SD card”. When completed, a “Change will not take effect until the device restarts. Restart it right now?” message appears on the screen. User can restart the device to complete the setting.
- Page 71 HOLUX FunTrek 132 MSAS/WAAS/EGNOS Enable the function to improve the GPS positioning accuracy. Step: On the main menu page, click “Settings” icon to enter the settings page. Select “System Settings”. Select “MSAS/WAAS/EGNO”. Click “Open” to enable the MSAS/WAAS/EGNO function. Show tips at start Step: On the main menu page, click “Settings”...
-
Page 72: Alerts
HOLUX FunTrek 132 Alerts Step: On the main menu page, click “Settings” icon to enter the settings page. Select “System Settings”. Select “Alert” to enter the alert lists. Select “Distance”, “BAR Altitude”, “Speed” or “Time” button to set the alert. -
Page 73: Profiles
HOLUX FunTrek 132 Profiles Step: On the main menu page, click “Settings” icon to enter the settings page. Click “Profiles” icon to select “Current settings” or “Factory defaults”. Click “Factory defaults” to restore the factory default settings. Notes: the device can storage 10 settings. -
Page 74: Eztour Plus Installation
To download the recorded track log and view it on your computer, first, you will need to install the bundled ezTour Plus. Insert the bundled installation CD into the computer’s CD drive to install ezTour Plus. For details, please refer to the included ezTour Plus user manual. End of Holux FunTrek 132’s user manual Wish you a pleasant use... - Page 75 HOLUX FunTrek 132 Website: www.holux.com...
Need help?
Do you have a question about the FunTrek 132 and is the answer not in the manual?
Questions and answers