Table of Contents
Advertisement
Quick Links
Download this manual
See also:
Quick Manual
Advertisement
Table of Contents

Related Manuals for Holux GR-239


Summary of Contents for Holux GR-239
- Page 1 GR-239 User Manual Bluetooth GPS Receiver...
- Page 3 About This Manual Thank you for choosing Holux GR-239 Bluetooth GPS Receiver. This manual helps you to familiarize yourself with this product to best suit your needs. Keep this manual for future reference. Warranty The GPR-239 Bluetooth GPS Receiver is warranted to be free from defects in material and functions for a period of one year from the date of purchase.
-
Page 4: Table Of Contents
Table of Contents Product Overview...1 Package Contents ...2 Main Features ...3 Getting Started ...4 4.1. Hardware Overview ...4 4.2. Using the GR-239 ...5 4.3. Data Port...6 4.4. Connecting the Antenna ...7 4.5. Bluetooth Installation ...7 4.6. Installing the Testing Program... 10 4.7. -
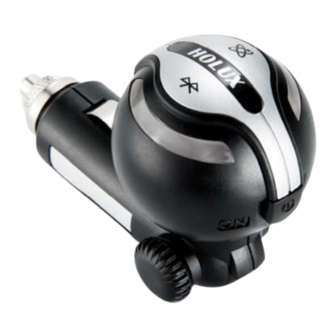
Page 5: Product Overview
GR-239 Bluetooth GPS Receiver is a complete GPS solution featuring Bluetooth and UART interface for high sensitivity to tracking signals. The GR-239 design is based on SiRF Star III Single Chip Architecture and is powered directly from a cigarette lighter, which saves the trouble of charging the device. -
Page 6: Package Contents
Holux dealer or distributor for a replacement. GR-239 Bluetooth Warranty card Tool CD GPS Receiver MMCX Active antenna (optional) USB data cable (optional) * USB data cable can be used for data transfer between GR-239 and Notebook / PC. -
Page 7: Main Features
Designed with SiRF Star III Single Chip architecture which draws power from car battery; no power adapter required. • Function as a G-Mouse GPS receiver through a USB data cable to deliver satellite signals to device directly. • Features MMCX Active antenna for getting better satellites signal. -
Page 8: Getting Started
This section describes the driver installation procedure, gives a brief introduction of the hardware and software, and covers the installation of testing program. Read this section carefully to learn more about your Bluetooth GPS receiver. 4.1. Hardware Overview 4.1.1 Front View... -
Page 9: Using The Gr-239
Move the receiver head to the required position. • Screw the locking screw back tightly. 2. Insert the Receiver. • Insert the GR-239 into the lighter slot of your car. • Adjust the receiver head vertically by 90 degrees. 3. Switch on the Power. -
Page 10: Data Port
WARNING: Do not place the GR-239 under strong sunlight for a long time. Do not place it in a high temperature environment, or near heat radiating devices such as a stove or radiator. Doing so will cause the device to malfunction. -
Page 11: Connecting The Antenna
Connect the MMCX Active antenna to the antenna connector as shown. 4.5. Bluetooth Installation Follow the instructions below to link your GR-239 Bluetooth GPS Receiver to a PDA (Personal Digital Assistant). 1. Activate “Bluetooth Manager” on your pocket PC. Tap New,... - Page 12 2. Search Bluetooth device “Holux GR-239”. Select Explore a Bluetooth device, and tap Next. 3. Search for the Bluetooth device. Tap Next, and then select Holux GR-239.
- Page 13 4. To establish Bluetooth link, select Connect to SPP Slave, tap Next and then Finish. 5. Tap Holux GR-239: SPP slave, and select Connect from the dropdown menu. The installation has been completed.
-
Page 14: Installing The Testing Program
To install Microsoft Active Sync to your PC, refer to your Pocket PC manual for installation procedures. 1. Connect your Pocket PC cradle to the UART port on your PC. The Microsoft ActiveSync will detect your Pocket PC automatically. 2. Double-click the GPSViewer.exe on your PC. The Holux GPSViewer.exe program will install automatically. - Page 15 3. Click Start, Programs, GPSViewer on your PDA.
- Page 16 4. The following screen appears after GPSViewer is opened. 5. Set Baud rate to 38400. Click the Scan button to scan for COM Port. Select your COM Port (COM1~COM10), and click Open GPS.
- Page 17 6. Select GPS Status to view the satellite diagrams as shown below.
-
Page 18: Connecting To A Notebook
4.7. Connecting to a Notebook Connect your GR-239 Bluetooth GPS Receiver to your Notebook for data transfer as shown below. -
Page 19: Driver Installation
Your computer will detect a plug & play device and start installation automatically. After the software installation has been completed, confirm the COM Port generated by your computer for the GR-239 USB device. 1. Click <Start> <Settings> <Control Panel>. 2. In Control Panel, select <System> to display the System Properties window. - Page 20 For further information, refer to the user’s manual in the supplied CD-ROM. GR-239 passkey: 0000 (For security purpose, some PDAs will prompt users for the GR-239 passkey.)
-
Page 21: Troubleshooting
239 Bluetooth Receiver. Methods Connect an external antenna (optional) to the connector on top of your GR-239, and then run the GPSViewer with cold start again. Go to an open space and run GPSViewer Cold start function and try again, or... -
Page 22: Specifications
0.1 sec. averaged 1 sec. averaged 38 sec. averaged 42 sec. averaged 5-25 m CEP without SA 0.1 m/sec. 1 µ sec. sync. GPS Time 18,000 meters (60,000 feet) max. 736 m/s (1000 knots) max ±4G max. 20 m/s max. - Page 23 Operating humidity 5% to 95% non condensing Protocol and NMEA output protocol: V2.2 interface Standard Baud rate Data bit Parity Stop bit Format Optional Format Interface Compatible with Bluetooth device with Serial Port Profile (SPP) Bluetooth™ version 1.2 compliant Bluetooth™ Class 2 operation (10 meters) Frequency: 2.400 to 2.480 GHz Modulation: FHSS/ GFSK RF channels: 79...
Need help?
Do you have a question about the GR-239 and is the answer not in the manual?
Questions and answers