
Subscribe to Our Youtube Channel
Related Manuals for cecotec Conga 6090


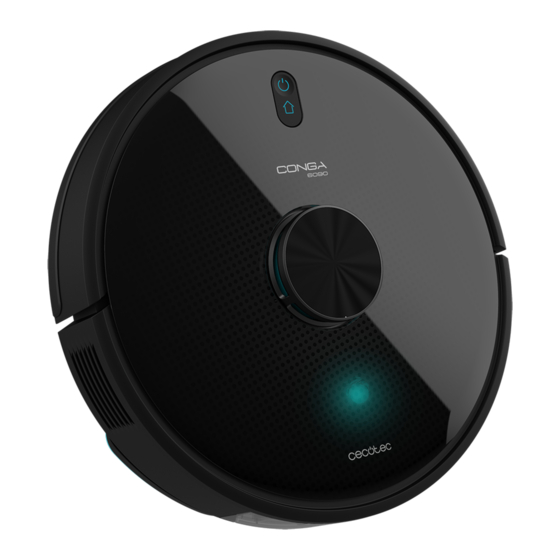
Summary of Contents for cecotec Conga 6090
- Page 1 CONGA Conga 6090 Robotstøvsuger/ Robot vacuum cleaner 6090 Brugermanual Instruction manual...
- Page 2 DANSK 2 | CONGA 6090...
-
Page 3: Table Of Contents
3. Before use 4. Installation 5. Operation 6. Mobile App and Wi-fi connection 7. Cleaning and maintenance 8. Battery replacement and charging 9. Troubleshooting 10. Technical specifications 11. Disposal of old electrical appliances 12. Technical support and warranty CONGA 6090 | 3... - Page 4 DANSK 4 | CONGA 6090...
- Page 5 DANSK CONGA 6090 | 5...
- Page 6 DANSK 6 | CONGA 6090...
- Page 7 DANSK CONGA 6090 | 7...
- Page 8 DANSK 8 | CONGA 6090...
- Page 9 DANSK CONGA 6090 | 9...
- Page 10 DANSK 10 | CONGA 6090...
- Page 11 DANSK CONGA 6090 | 11...
-
Page 12: Sikkerhedsinstruktioner
Brug ikke enheden til at støvsuge brændbare eller brændende genstande såsom cigaretter, tændstikker eller aske. Før du betjener robotten, skal du fjerne alle objekter fra gulvet som tøj, papirer, ledninger eller andre genstande, der kan blo- kere enheden. 12 | CONGA 6090... -
Page 13: Dele Og Komponenter
12. Hovedbørste: Til at rense alle typer overflader 13. Venstre hjul 14. Højre hjul 15. Silikonebørste: Specielt til husdyr 16. Jalisco børste: Specielt til hårdt gulv 17. Optisksensor: Forhindrer robotten i at bumpe ind i noget Tør og våd tank Fig. 3. Vandrum CONGA 6090 | 13... -
Page 14: Før Brug
Tag produktet ud af æsken og fjern alt emballagen. Sørg for at alle dele og komponenter er inkluderet og intakte. Hvis der ob- serveres tegn på synlig skade, skal du straks kontakte den officielle tekni- ske supportafdelingen hos Cecotec. 3. INSTALLATION 14 | CONGA 6090... - Page 15 Tryk manuelt på begge sider af våd- og tørtankklemmerne og skub den til dens korrekte position. Du vil hør et klik, når den er ordentlig fastgjort. Anbefalinger: Brug ikke skrubbefunktionen når robotten ikke er under opsyn. CONGA 6090 | 15...
-
Page 16: Betjening
Robotten kan ikke betjene med lav batteri. Anbefalinger: Fjern alle kabler og forhindringer fra gulvet før robotten ope- rerer for at undgå ulykker og skader. Robotknapper Fig. 5 Autotilstand (Auto Mode) Tryk på tænd/sluk-knappen på fjernbetjeningen for, at den skal rengøre 16 | CONGA 6090... - Page 17 Når en rengøringscyklus er fuldendt eller robottens batteri er lavt, kører ro- botten, takket være dens Total Surface 3.0 teknologi, tilbage til opladnings- basen for ikke at løbe tør for strøm. Når robotten er færdig med at oplade, vender den tilbage slutpunktet og fortsætter rengøringen. CONGA 6090 | 17...
- Page 18 Hold tidsknappen nede i 3 sekunder. De første 2 cifre, som indikerer tiden, vil starte med at blinke. Brug op- og nedknapperne for at sætte den nuværende tid. Brug derefter højre- og venstreknapperne for at skifte fra timer til minutter og gentag 18 | CONGA 6090...
-
Page 19: Mobilapp Og Wifi Forbindelse
Fejl: Rødt lys blinker hurtigt 5. MOBIL APP OG WIFI-FORBINDELSE For at adgang til robotten uanset, hvor du er, anbefales det at downloade Conga 6090 appen. Du vil kunne kontrollere robotten på den mest effektive måde og nyde rengøringen. App fordele: Kontrollere din robot på... - Page 20 *Denne model er kompatibel med stemmeassistenter, Google assistent og Alexa. Konfiguration Fig. 24. Download Conga 6090 appen fra App store eller Play store. Opret et login med din e-mail og adgangskode. Bekræft login. Tilføj din Conga robot. Forbind til Wi-Fi.
- Page 21 Begrænset område tilstand (Restricted area mode): Vælg denne tilstand og afgræns specifikke områder på kortet, hvor du ikke vil have robotten til at rense. Du kan vælge mere end et begrænset område ad gangen på kortet. CONGA 6090 | 21...
-
Page 22: Rengøring Og Vedligeholdelse
For at rense Jalisco børsten skal du følge instrukserne i den tidligere sektion for at tage den ud og rense den med vand. Tør den grundigt af før du samler den igen for at sikre en effektiv drift. 22 | CONGA 6090... - Page 23 Anbefaling: For at sikre en perfekt rengøring er det foreslået at udskifte si- debørsterne hver 3. måned afhængigt at hyppigheden og type af brug. Frifaldssensor Fig. 32. Rengør frifaldssensorrene regelmæssigt med en klud. Advarsel: Transporterer altid produktet slukket og i den originale emballa- CONGA 6090 | 23...
-
Page 24: Batteriudskiftning Og Opladning
DANSK 7. BATTERIUDSKIFTNING OG OPLADNING Brug ikke en andet batteri, strømadapter eller opladningsbase end det, der er officielt leveret af Cecotec. Brug ikke ikke-genopladelige batterier. Fjern ikke, demontér eller forsøg på at reparere batteriet eller opladnings- basen. Placér ikke opladningsbasen tæt på varmekilder. - Page 25 10. Sørg for at robotten er succesfuldt forbundet til netværket og altid in- denfor det område, der er dækket af Wi-Fi signalet. 11. Sørg for at robotten og opladningsbasen er i et område med god Wi-Fi signal, nulstil routeren og prøv at forbinde dem igen. CONGA 6090 | 25...
-
Page 26: Tekniske Specifikationer
DANSK 9. TEKNISKE SPECIFIKATIONER Model: Conga 6090 Ultra Produktreference: 05554 100-240 V – 50/60 Hz Batteri: 14,8 V, 6400 mAh Frekvensbånd: 2.412 – 2.472 GHz 5.150 – 5.250 5.250 – 5.350 GHz 5.470 – 5.725 GHz Maksimal transmissionskraft: 16 dBm Fremstillet i Kina | Designet i Spanien 11. -
Page 27: Safety Instructions
Keep this instruction manual for future reference or new users. This product must be used in accordance with the directions in this instruction manual. Cecotec cannot be held liable or re- sponsible for any damages or injuries caused by improper use. ... -
Page 28: Parts And Components
Robot and sensors Fig.2. 1. Laser sensor 2. Top cover 3. Back home/Power/Autocleaning mode 4. Infrared receiver sensor 5. Anti-collision sensor 6. Omnidirectional wheel 7. Charging terminals 8. Battery 9. Side brush 10. Bumper 11. Motor cover 28 | CONGA 6090... - Page 29 4. Dust tank cover Charging base Fig.6. 1. Signal transmission area 2. Charging terminal 3. Charge indicator 4. Cable slot 5. Charging terminal Mop bracket and cloth Fig.7. 1. Mop 2. Mop bracket 3. Velcro 4. Tab CONGA 6090 | 29...
-
Page 30: Before Use
Take the product out of the box and remove all packaging materials. Make sure all parts and components are included and in good conditions. If any sign of visible damage is observed, contact immediately with the offi- cial Technical Support Service of Cecotec. 3. INSTALLATION Robot and charging base installation Fig.8. - Page 31 The robot keeps on mapping constantly, therefore it adapts independently to each house’s features and continuous- ly improves previous maps. CONGA 6090 | 31...
-
Page 32: Operation
When a cleaning cycle has been completed or the robot’s battery is low, thanks to its Total Surface 3.0 technology, the robot will also return to the charging base to avoid running out of battery. Once the robot has recharged, 32 | CONGA 6090... - Page 33 Edge mode and then another cycle in and organized zigzag motion, recognizing which areas it has cleaned and which ones it has not. The robot will automatically plan the cleaning route as it is CONGA 6090 | 33...
- Page 34 Warnings: Remove the Wet & dry tank from the robot before charging it. Make sure there are no obstacles in the room being cleaned to ensure the 34 | CONGA 6090...
- Page 35 Current time Fig.20. Hold down the time button for 3 seconds. The first 2 digits, indicating the hour, will start blinking. Use the up and down direction buttons to set the current time. Then, use CONGA 6090 | 35...
-
Page 36: Mobile App And Wi-Fi Connection
In order to access all the robot’s functions from wherever you are, it is sug- gested to download the Conga 6090 App. You will be able to control the ro- bot in the most efficient way, enjoying the excellence of cleaning. - Page 37 *This model is compatible with voice virtual assistants Google Assistant and Alexa Configuration: Fig.24. Download the Conga 6090 App from App Store or Play Store. Create an account with your e-mail and password. Confirm login. Add your Conga robot. Connect to Wi-Fi.
- Page 38 Restricted Area mode: Select this mode and delimit in the map specific ar- eas where you do not want the robot to clean. You can set more than 1 re- stricted area at the same time on the map. 38 | CONGA 6090...
-
Page 39: Cleaning And Maintenance
Jalisco brush Fig.27. To clean the Jalisco brush, follow the previous section’s steps to take it out and clean it with water. Dry it thoroughly before assembling it back in order to ensure efficient operation. CONGA 6090 | 39... - Page 40 3 months, depending on the frequency and type of use. Free-fall sensors Fig.32. Clean the free-fall sensors with a soft cloth regularly. Warning: Always transport the product turned off and in its original pack- age. 40 | CONGA 6090...
-
Page 41: Battery Replacement And Charging
2.1. There are too many obstacles near the charging base, relocate the charging base to an area free of obstacles. 2.2. Clean the charging terminals. 2.3. Make sure the power switch is turned on. CONGA 6090 | 41... - Page 42 10. Make sure the robot is successfully connected to the network and al- ways in the range covered by the Wi-Fi signal. 11. Make sure the robot and the charging base are in an area with good Wi- Fi signal, reset the router and try connecting them again. 42 | CONGA 6090...
-
Page 43: Technical Specifications
The product has been disassembled, modified, or repaired by persons, not authorised by the official Technical Support Service of Cecotec. Faults deriving from the normal wear and tear of its parts, due to use. - Page 44 www.cecotecnordic.com cecotecnordic . info@cecotecnordic.com...
Need help?
Do you have a question about the Conga 6090 and is the answer not in the manual?
Questions and answers