LIVARNO LUX HG00108A Assembly, Operating And Safety Instructions
Led spotlight 8.5w
Hide thumbs
Also See for HG00108A:
- Assembly, operating and safety instructions (56 pages) ,
- Assembly, operating and safety instructions (48 pages) ,
- Assembly, operating and safety instructions (63 pages)
Table of Contents
Advertisement
Available languages
Available languages
Quick Links
REFLECTOR LED 8,5 W
FARO A LED DA 8,5 W PER ESTERNI
REFLECTOR LED 8,5 W
Instrucciones de montaje, de uso y de seguridad
REFLETOR LED 8,5 W
Indicações de montagem, utilização e segurança
LED-AUSSENSTRAHLER 8,5 W
Montage-, Bedienungs- und Sicherheitshinweise
IAN 270250
FARO A LED DA 8,5 W PER ESTERNI
Istruzioni di montaggio, d'uso e di sicurezza
LED SPOTLIGHT 8.5 W
Assembly, operating and safety instructions
Advertisement
Chapters
Table of Contents

Related Manuals for LIVARNO LUX HG00108A


Summary of Contents for LIVARNO LUX HG00108A
- Page 1 REFLECTOR LED 8,5 W FARO A LED DA 8,5 W PER ESTERNI REFLECTOR LED 8,5 W FARO A LED DA 8,5 W PER ESTERNI Instrucciones de montaje, de uso y de seguridad Istruzioni di montaggio, d’uso e di sicurezza REFLETOR LED 8,5 W LED SPOTLIGHT 8.5 W Indicações de montagem, utilização e segurança Assembly, operating and safety instructions...
- Page 2 Instrucciones de montaje, de uso y de seguridad Página IT / MT Istruzioni di montaggio, d’uso e di sicurezza Pagina 14 Indicações de montagem, utilização e segurança Página 23 GB / MT Assembly, operating and safety instructions Page DE / AT / CH Montage-, Bedienungs- und Sicherheitshinweise Seite...
- Page 4 2.5 m...
-
Page 5: Table Of Contents
Uso adecuado ..............Página Descripción de las piezas ......... Página Características técnicas ..........Página Contenido ................Página Indicaciones generales de seguridad ... Página Antes del montaje ............Página Montaje .................. Página Puesta en funcionamiento Cómo instalar el sensor de movimiento ........Página 10 Ajustar el tiempo de iluminación .......... -
Page 6: Uso Adecuado
Reflector LED 8,5 W Características técnicas Uso adecuado Tensión de funcionamiento: 230 V∼ 50 Hz, El foco LED con sensor de movimiento máx. 8,5 W está diseñado para una iluminación LEDs: 12 x LED de automática en zonas exteriores. El 0,5 W (los aparato está... - Page 7 Contenido E ste producto puede ser utili- zado por niños mayores de 1 foco LED con sensor de 8 años, así como por personas movimiento con capacidades físicas, sen- 2 tacos (Ø 6 mm) soriales o mentales reducidas 2 tornillos o que cuenten con poca expe- 1 manual de instrucciones riencia y/o falta de conocimien-...
-
Page 8: Antes Del Montaje
Antes del montaje necesaria de la lámpara (230 V∼ 50 Hz). No monte la Importante: encargue la instala- lámpara si no se cumple lo anterior. ción eléctrica a un electricista cua- ¡CUIDADO! ¡RIESGO DE lificado o a una persona formada QUEMADURAS! Antes de especialmente en instalaciones tocar la lámpara, asegúrese... -
Page 9: Montaje
Montaje H aga ahora los agujeros con el taladro (Ø 6 mm) e introduzca Al elegir el lugar de montaje, los tacos en los agujeros (fig. A). tenga en cuenta lo siguiente: F ije el soporte de montaje con A segúrese de que el foco los tornillos suministrados. -
Page 10: Puesta En Funcionamiento
Ajustar el tiempo la articulación giratoria para de iluminación garantizar un soporte más seguro. G ire el regulador giratorio Vuelva a insertar el fusible o a conec- TIME en el sentido de las tar el interruptor automático. La agujas del reloj para aumentar lámpara está... -
Page 11: Ajustar El Nivel De Luz Diurna
Ajustar el nivel de C amine por el área de detec- luz diurna ción hasta quedar satisfecho con el comportamiento de G ire el regulador giratorio conexión del detector de movi- en el sentido de las miento. Modifique para ello la agujas del reloj para aumentar posición del regulador girato- el nivel de luz diurna. -
Page 12: Limpieza Y Cuidado
Limpieza y cuidado Garantía Antes de la limpieza, retire el El aparato ha sido fabricado cui- fusible o desconecte el interrup- dadosamente siguiendo exigentes tor automático en la caja de normas de calidad y ha sido fusibles. probado antes de su entrega. En N unca sumerja el producto en caso de defecto del producto, us- agua u otros líquidos. - Page 13 resulta dañado o es utilizado o mantenido de forma inadecuada. La garantía cubre defectos de materiales o de fabricación. Esta garantía no cubre aquellos compo- nentes del producto sometidos a un desgaste normal y que, por ello, puedan considerarse piezas de desgaste (por ej.
- Page 14 Utilizzo secondo la destinazione d’uso ..Pagina 15 Descrizione dei componenti ........Pagina 15 Dati tecnici ................Pagina 15 Contenuto della confezione ........Pagina 16 Avvertenze generali di sicurezza ..... Pagina 16 Prima di eseguire il montaggio ......Pagina 17 Montaggio ................
-
Page 15: Utilizzo Secondo La Destinazione D'uso
Faro a LED da 8,5 W Regolatore rotativo LUX per esterni (sensibilità luminosa) Morsetto per lampadari Utilizzo secondo la destinazione d’uso Dati tecnici Il faretto a LED con sensore di Tensione movimento è destinato all‘illumina- di esercizio: 230 V∼ 50 Hz, zione automatica negli ambienti max. -
Page 16: Contenuto Della Confezione
C ontenuto della coli. Tenere i bambini confezione sempre a dovuta distanza dal prodotto. 1 Faretto a LED con rilevatore di Q uest‘apparecchio può essere movimento utilizzato da bambini di età 2 Tassello (Ø 6 mm) superiore agli 8 anni, da 2 Viti persone con capacità... -
Page 17: Prima Di Eseguire Il Montaggio
Prima di eseguire P rima del montaggio, assicu- il montaggio rarsi che la tensione di rete disponibile coincida con la Importante: il collegamento tensione di funzionamento necessaria della lampada elettrico deve essere eseguito da (230 V∼ 50 Hz). In caso con- un elettricista qualificato o da una trario non montare la lampada. -
Page 18: Montaggio
Montaggio F orare i buchi per il fissaggio (Ø 6 mm) e introduttore i Nella scelta del luogo di montag- tasselli nei fori (fig. A). gio della cella fotovoltaica, tenere F issare la staffa di montaggio in considerazione i seguenti punti: con le viti fornite in dotazione. -
Page 19: Messa In Funzione
Reinserire il fusibile oppure attivare la durata di illuminazione in un arco di tempo compreso tra ca nuovamente l‘interruttore di sicu- rezza nella scatola dei fusibili. La 10 secondi e 4 minuti. lampada è ora pronta per essere utilizzata. Impostazione della sensibilità... -
Page 20: Orientamento Del Rilevatore Di Movimento
aumentare il livello d‘illumina- SENS o l‘orientamento del sensore di movimento. zione diurna: nella posizione Nota: prestare attenzione al il sensore di movimento reagi- sce soltanto di notte (a ca. fatto che il sensore di movimento 10 lx). Nella posizione , il ri- registra prevalentemente movi- levatore di movimento reagisce... -
Page 21: Pulizia E Cura
Pulizia e cura Garanzia Prima di eseguire la pulizia L‘apparecchio è stato prodotto se- nella scatola dei fusibili, rimuo- condo severe direttive di qualità e vere il fusibile oppure disatti- controllato con premura prima de- vare l‘interruttore di sicurezza. lla consegna. In caso di difetti del N on immergere mai il prodotto prodotto, l‘acquirente può... - Page 22 del prodotto, di utilizzo o di manu- tenzione inadeguati. La prestazione di garanzia vale sia per difetti di materiale che per di- fetti di fabbricazione. La presente garanzia non si estende a parti del prodotto soggette a normale usura e che possono essere identificate, pertanto, come parti soggette a usura (p.
- Page 23 Utilização adequada ........... Página 24 Descrição das peças ............. Página 24 Dados técnicos ..............Página 24 Material fornecido ............Página 24 Indicações gerais de segurança ......Página 25 Antes da montagem ............ Página 26 Montagem ................Página 27 Colocação em funcionamento Regular o detector de movimentos ..........
-
Page 24: Utilização Adequada
Refletor LED 8,5 W Dados técnicos Tensão de Utilização serviço: 230 V∼ 50 Hz, adequada máx. 8,5 W LEDs: 12 x LED a O holofote com detector de movi- 0,5 W (LEDs não mentos é previsto para uma ilumi- substituíveis) nação automática no exterior. -
Page 25: Indicações Gerais De Segurança
1 Manual de montagem e de deficiências na experiência e conhecimento, se forem vigia- instruções das ou instruídas em relação ao uso seguro do aparelho e Indicações se compreenderem os perigos gerais de que daí possam resultar. As segurança crianças não devem brincar com o aparelho. -
Page 26: Antes Da Montagem
Antes da montagem CUIDADO! PERIGO DE QUEIMADURAS! Certifique- Importante: A instalação elétrica se que o candeeiro está desli- gado e arrefeça, no mínimo, deve ser efetuada por um eletricista durante 15 minutos antes de ou por uma pessoa especializada. tocar no mesmo. As lâmpadas Este deve ter suficiente conheci- podem produzir uma grande mento acerca das propriedades... -
Page 27: Montagem
Montagem F ure agora os furos de fixação (Ø 6 mm) e introduza as bu- Na seleção do local de montagem chas nus furos (Fig. A). tenha em consideração o seguinte: F ixe o suporte de montagem A ssegure-se de que o foco com os parafusos fornecidos. -
Page 28: Colocação Em Funcionamento
Coloque novamente o fusível ou iluminação entre cerca de 10 segundos a 4 minutos. ligue novamente o interruptor automático. O seu candeeiro encontra-se agora operacional. Configurar a sensibi- lidade do sensor Colocação em funcionamento R ode o regulador rotativo SENS no sentido dos pon- Regular o detector teiros do relógio, para aumen-... -
Page 29: Alinhar O Detector De Movimentos
movimentos reage só de noite efetuados de forma transversal (em aprox. 10 lx). Na posição em relação ao detector de o detector de movimentos movimentos. Se se aproximar reage também com luz solar, de frente ao detector de movi- desde que aprox. 20.000 lx mentos, este não pode detec- não sejam superados. -
Page 30: Eliminação
N unca mergulhe o produto em meticulosamente testado antes da sua distribuição. Em caso de fa- água ou outros líquidos. Caso contrário, o artigo poderá lhas deste aparelho, possui direitos ficar danificado. legais relativamente ao vendedor L impe o candeeiro com um do aparelho. - Page 31 Esta garantia não é extensível a componentes do produto que se desgastam com o uso e que, por isso, podem ser consideradas pe- ças de desgaste (por ex.º pilhas) ou a danos em peças frágeis, por ex.º interruptores, baterias ou peças de vidro.
- Page 32 Intended use ................Page 33 Parts description ..............Page 33 Technical Data ...............Page 33 Scope of delivery ..............Page 33 General safety instructions ........Page 34 Before installation .............Page 35 Installation ................Page 35 Start-up Adjusting the motion detector............Page 36 Setting the lighting duration ............Page 37 Adjusting the sensitivity of the sensor ...........Page 37 Setting the daylight level ..............Page 37 Aligning the motion detector ............Page 37...
-
Page 33: Intended Use
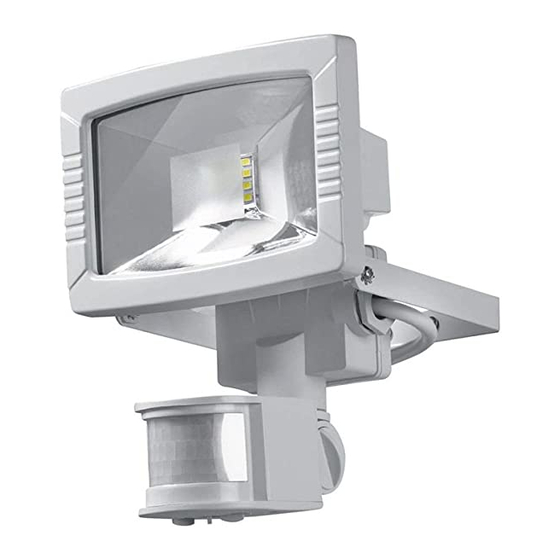
LED Spotlight 8.5 W Technical Data Operating voltage: 230 V∼ 50 Hz, Intended use max. 8.5 W LEDs: 12 x LED x The LED spotlight with motion 0.5 W (LEDs detector is intended for automatic non-replace- lighting in outdoor areas. This device able) is solely intended for private use. -
Page 34: General Safety Instructions
General safety risks. Children should not be instructions allowed to play with the appliance. Cleaning and user Before using the product, please maintenance should not be familiarise yourself with all of the performed by children without safety information and instructions supervision. -
Page 35: Before Installation
by the user. The LEDs cannot Use the voltage tester to verify be replaced. the de-energised status. The spotlight is only suited for The included mounting material use with the built-in LED control is suitable for ordinary solid gear. concrete or masonry construc- The product continues to draw tion. -
Page 36: Start-Up
During mounting, proceed as to slacken the screw of the hinge described below: joint . After alignment, tighten Hold the mounting bracket the screw of the hinge joint so that it is horizontal (possibly again, to ensure a secure hold. with a spirit level) against the wall and mark the fastening Reinsert the fuse or switch the circuit... -
Page 37: Setting The Lighting Duration
Setting the lighting Setting the daylight duration level Turn the rotary control TIME Turn the rotary control LUX clockwise to increase the dura- to increase the daylight level: tion of the illumination. The In the position, the motion lighting duration can be adjusted detector only reacts at night within a time window of approx. -
Page 38: Cleaning And Care
the position of the rotary control Never immerse the product in SENS or the orientation of the water or other liquids. Otherwise motion detector. the product can be damaged. Note: Please note that the Clean the spotlight with a motion detector primarily detects lint-free, slightly moist cloth and movements transverse to the mild cleaning agent. - Page 39 not limited in any way by our warranty detailed below. The warranty for this device is 3 years from the date of purchase. Should this device show any fault in materials or manufacture within 3 years from the date of purchase, we will repair or replace it –...
- Page 40 Bestimmungsgemäße Verwendung ....Seite 41 Teilebeschreibung ..............Seite 41 Technische Daten ..............Seite 41 Lieferumfang ................Seite 42 Allgemeine Sicherheitshinweise ......Seite 42 Vor der Montage ..............Seite 43 Montage ..................Seite 44 Inbetriebnahme Bewegungsmelder einstellen ............Seite 45 Leuchtdauer einstellen ..............Seite 45 Empfindlichkeit des Sensors einstellen .........Seite 45 Tageslichtniveau einstellen ............Seite 45 Bewegungsmelder ausrichten ............Seite 46 Reinigung und Pflege...
-
Page 41: Bestimmungsgemäße Verwendung
LED-Aussenstrahler Drehregler LUX 8,5 W (Lichtempfindlichkeit) Lüsterklemme Bestimmungsgemäße Verwendung Technische Daten Der LED-Strahler mit Bewegungs- Betriebsspannung: 230 V∼ 50 Hz, melder ist für eine automatische max. 8,5 W Beleuchtung im Außenbereich vor- LEDs: 12 x LED à gesehen. Das Gerät ist ausschließ- 0,5 W lich zur privaten Verwendung (LEDs nicht... -
Page 42: Lieferumfang
Lieferumfang die Gefahren. Halten Sie Kinder stets vom Produkt fern. 1 LED-Strahler mit Bewegungs- D ieses Gerät kann von Kindern melder ab 8 Jahren und darüber sowie 2 Dübel (Ø 6 mm) von Personen mit verringerten 2 Schrauben physischen, sensorischen oder 1 Montge- und Bedienungs- mentalen Fähigkeiten oder anleitung... -
Page 43: Vor Der Montage
Vor der Montage V ergewissern Sie sich vor der Montage, dass die vorhandene Wichtig: Der elektrische Anschluss Netzspannung mit der benötig- ten Betriebsspannung der muss durch einen ausgebildeten Leuchte übereinstimmt Elektriker oder eine für Elektro- (230 V∼ 50 Hz). Montieren installationen eingewiesene Person Sie die Leuchte nicht, wenn erfolgen. -
Page 44: Montage
Montage B ohren Sie nun die Befestigungs- löcher (Ø 6 mm) und führen Achten Sie bei der Auswahl des Sie die Dübel in die Bohrlöcher Montageortes auf folgende Dinge: ein (Abb. A). S tellen Sie sicher, dass der B efestigen Sie den Montage- Spot den gewünschten Be- bügel mit den beiliegenden... -
Page 45: Inbetriebnahme
Ziehen Sie nach dem Ausrichten Beleuchtungsdauer zu erhöhen. Die Beleuchtungsdauer können die Schraube des Drehgelenks wieder an, um einen sicheren Sie in einem Zeitfenster von Halt zu gewährleisten. ca. 10 Sekunden bis 4 Minuten Setzen Sie die Sicherung wieder ein einstellen. -
Page 46: Bewegungsmelder Ausrichten
In der Position reagiert der Hinweis: Beachten Sie, dass Bewegungsmelder nur bei Nacht der Bewegungsmelder vorwie- (bei ca. 10 lx). In der Position gend Bewegungen quer zum reagiert der Bewegungsmelder Bewegungsmelder erfasst. auch bei Tageslichtniveau, Wenn Sie sich geradewegs solange ca. 20.000 lx nicht auf den Bewegungsmelder zu überschritten werden. -
Page 47: Entsorgung
T auchen Sie das Produkt niemals Mängeln dieses Produkts stehen Ih- nen gegen den Verkäufer des Pro- in Wasser oder in andere Flüs- sigkeiten. Andernfalls kann das dukts gesetzliche Rechte zu. Diese Produkt beschädigt werden. gesetzlichen Rechte werden durch R einigen Sie die Leuchte mit unsere im Folgenden dargestellte einem fusselfreien, leicht ange- Garantie nicht eingeschränkt. - Page 48 angesehen werden können oder für Beschädigungen an zerbrechli- chen Teilen, z. B. Schalter, Akkus oder die aus Glas gefertigt sind. 48 DE/AT/CH...
- Page 49 OWIM GmbH & Co. KG Stiftsbergstraße 1 D-74167 Neckarsulm Model-No.: HG00108A, HG00108B Version: 09 / 2015 Estado de las informaciones · Versione delle informazioni · Estado das informações · Last Information Update · Stand der Informationen: 07 / 2015 · Ident.-No.: HG00108A/B072015-5 IAN 270250...
Need help?
Do you have a question about the HG00108A and is the answer not in the manual?
Questions and answers