
Related Manuals for Midea TJE17GS7-S00N0A


Summary of Contents for Midea TJE17GS7-S00N0A
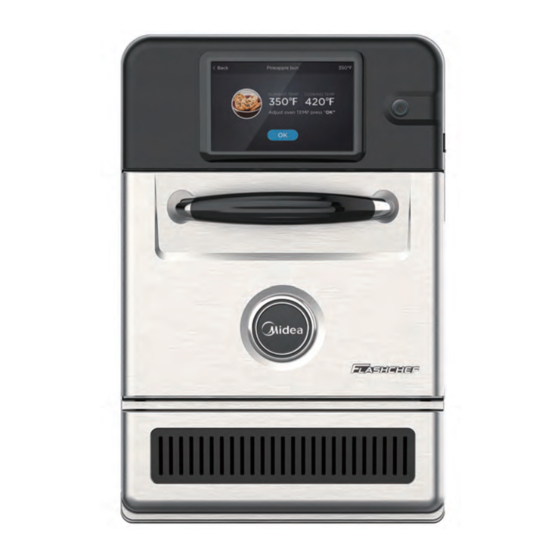
- Page 1 SERVICE MANUAL Commercial High Speed Oven TJE17GS7-S00N0A Oven Capacity: 18 Liter 208/240v~ 60hz, 6000w...
-
Page 2: Table Of Contents
CONTENTS 1. GENERAL INFORMATION................... 1 1.1 Purpose of this chapter........................1.2 Equipment details Generic........................ 1.3 Important Information......................... 1.4 Structure of technical documentation..................1.5 About this Service Manual......................... 2. HAZARDS AND SAFETY PRECAUTIONS........... 2.1 Hazards and safety precautions during installing..............2.2 Hazards and safety precautions during servicing and repair........... 2.3 Hazards and safety precautions when taking the appliance out of service.... -
Page 3: General Information
GENERAL INFORMATION 1.1 Purpose of this chapter This chapter shows you how to identify your Commercial High Speed Oven and provides guidance on using this manual. 1.2 Equipment details Generic Generic Model Number TJE17G-S00N0A Description Commercial High Speed Oven 1.3 Important Information Users are cautioned that repairs should be performed by a TJE17G-S00N0A authorized service agent using genuine TJE17G-S00N0A replacement parts. -
Page 4: Hazards And Safety Precautions
HAZARDS AND SAFETY PRECAUTIONS 2.1 Hazards and safety precautions during installing 2.1.1 Electrical Power Where or in what situations Danger Preventive action does the hazard arise? Work on the electrical system must only be performed by qualified electricians from an authorized service Under covers company. -
Page 5: Hazards And Safety Precautions During Servicing And Repair
2.2 Hazards and safety precautions during servicing and repair 2.2.1 Heat Where or in what situations Danger Preventive action does the hazard arise? Inside the entire cavity, Before starting cleaning including all parts that are tasks, wait until the or were inside during cavity has cooled to cooking, such as below 50°C/122°F or use... - Page 6 2.2.3 Mechanical parts of the appliance Where or in what situations Danger Preventive action does the hazard arise? Risk of cuts from During servicing work Exercise caution when sharp edges When handling sheet- performing this action metal parts Wear personal protective equipment Risk of body parts When the appliance is being...
-
Page 7: Hazards And Safety Precautions When Taking The Appliance Out Of Service
2.2.6 Smoke or fire Where or in what situations Danger Preventive action does the hazard arise? Risk of fire/smoke If one of the electrical Never use electrical spare from defective components is defect, for components which failed electrical com- example due to a short in a dedicated test or ponents or circuit, or if the internal... - Page 8 2.3.3 Mechanical parts of the appliance Where or in what situations Danger Preventive action does the hazard arise? Risk of body parts When the appliance is Always observe the being crushed if being moved e.g. to gain requirements for the the appliance tips better access to the supporting surface when...
-
Page 9: Diagnostics
DIAGNOSTICS This chapter contains information on checking various functions of your Commercial High Speed Oven. 3.1 Checking the condition of your appliance 3.1.1 Servicing procedure 1)Disconnect/isolate the appliance from the power supply. 2)Check the appliance is correctly installed. 3)Visually check the cleanliness/condition of the power supply/cable/gland, casing, cavity and door of the appliance for signs of wear, damage, distortion etc. - Page 10 Click “Defect Records” button to display “Error Logs”、“Oven Counters”、“Running Status”、“Reset”. 3.1.3 Functions of the Service Mode 1) Error Logs Check the "Error Log" for details of any logged appliance errors and refer to the error codes for more details. 2) Oven Counters Check the "Oven Counters"...
- Page 11 3.1) Magnetron/Power Invertor(L) When error code E-1, E-5, E-6 occur and the text description is “Magne- tron1_*”, the “1L” and ”4L” symbols get red. 3.1) Magnetron/Power Invertor(L) “1L” and”4L” are associated; they turn green or red at the same time. Clear the error by restarting the cooking.
-
Page 12: Fault Finding
3.3) Fan 3.3) Fan When error codes U02, U21, U22, U23, U25, U26 occur, the Fan symbol get red. 3.4) Heater 3.4) Heater When error code E01, E02, F11 occurs, the Heater symbol gets red. 3.2 Fault finding 3.2.1 Hardware control components Operations communication: The oven has 2 main parts being the QTS assembly (Keyboard, Screen, and Logic) and the SRB (Smart Relay Board to switch and monitor the required operation). - Page 13 Shutting down sequence When oven switch is turned OFF the screen displays ‘Shutdown & clean’ and the cooling fan operates until the cabinet temperature has been su ciently reduced (cavity temperature of 60°C / 140°F) or you can choose to long press the switch button (5S) to choose the forced shutdown.
- Page 14 Common Loss of Display error Breakdown communica- communica- screen/SRB message until tion can be tion between connection communica- made the TFT cable tion resumes between the screen and unplugged or TFT screen SRB more damaged. and SRB than 10 Faulty TFT second.
- Page 15 Magnetron Magnetron The current Shorted Display error 1/2_6 over current measured by magnetron message the current sensing transformer was outside of tolerance. Magnetron Magnetron The current Microwave Display error 1/2_8 current is too measured by Inverter is message the current operating sensing above...
- Page 16 The terminal Replug the Check the signal is loose terminal wires of the The signal of Driver Board Driver Board and SRB(CN10) is abnormal The Driver Board Replace the Driver is loose or SRB is bad Board or SRB The Driver Replace the Check the Board is bad...
- Page 17 The Interlock assembly is bad The Magnetron is bad Fuse 1 is bad Cooling Motor/ Lamp is bad The inverter is bad TFT screen or switch button is not bright Check Noise Filter/ Replace Noise EMI Filter is normal Filter/EMI Filter Check the signal wires Fuse 1 Replug...
-
Page 18: Safe Working When Testing Components
SAFE WORKING WHEN TESTING COMPONENTS Before starting oven tests, it is essential that you familiarize yourself with the rules and hazard warnings specified and follow the instructions given there. Only qualified personnel from an authorized service company are permitted to test components of the Commercial High Speed Oven. -
Page 19: Hot Surfaces
4.4 Hot surfaces DANGER Risk of burns from high temperatures inside the cavity and on the inside of the appliance door You may get burnt if you touch any of the interior parts of the cooking chamber, the inside of the appliance door or any parts that were inside the oven during cooking. Before starting servicing and repair work, wait until the cooking chamber has cooled to below 50°C / 122°F or put a cup of ice cube into the cavity to cool the cooking chamber. -
Page 20: Fire / Smoke In The Appliance
4.7 Fire / smoke in the appliance DANGER Risk of fire and/or smoke Flames and/or smoke may come out of the oven when switching it on after service/repair. This can be caused by a defective electrical component or electrical connections (wiring) that have been refitted incorrectly. -
Page 21: The Key Components (Casing Removed)
4.10 The key components (casing removed) Ensure the following requirements have been met before starting the test: The appliance has been disconnected from the power supply and protective measures have been taken to ensure the power cannot be switched on again. The appliance is cool. -
Page 22: Mains Voltage Components (Casing Removed)
Fuse Check for continuity of the Normal Abnormal fuse with an multi-meter. NOTE: If the fuse is blown by improper switch operation replace the defective switch and thefuse at the same time. Replace just the fuse if the switches operate normally. NOTE : A mircorwave leakege test must always be performed when the unit is serviced for any reason. - Page 23 Convection fan: motor and motor speed controller tests Ensure the following requirements have been met before starting the test: The appliance has been disconnected from the power supply and protective measures have been taken to ensure the power cannot be switched on again. The appliance is cool.
-
Page 24: Replacing Components
REPLACING COMPONENTS This chapter contains information on how to remove and fit components of the oven. 5.1 Safe working when replacing appliance parts Before starting service / repair work, it is essential that you familiarize yourself with the rules and hazard warnings specified and follow the instructions given there. Only qualified personnel from an authorized service company are permitted to remove and fit components of the microwave combination oven. - Page 25 Hot surfaces You may get burnt if you touch any of the interior parts of the cooking chamber, the inside of the appliance door or any parts that were inside the oven during cooking. Before starting servicing and repair work, wait until the cooking chamber has cooled to below 50°C / 122°F or use the ‘Cool-Down' function to cool the cooking chamber.
-
Page 26: Parts And Their Function
5.2 Parts and their function Item Name Function Used to turn the Commercial High Speed Oven on and o . Turning ON/OFF appliance switch this switch o does not isolate the appliance from the electricity supply. When the appliance is switched on control panel 8 inch the 8 inch TFT Screen illuminates TFT Screen... -
Page 27: Overview
5.3 Overview View---right hand side View---left hand side... - Page 28 View---Top side View---Baseplate side...
- Page 29 Component List Item Name Function The touchscreen and the QTS Front panel assembly. The fan for cooling down the temperature of PCB. The Microswitches/interlocks are connected to the door hinges and Interlock Assembly (Right) switch o the magnetron(s) when the oven door is opened. Lamp The lamp for lighting cavity.
-
Page 30: Removing / Fitting The Casing
Noise filter assembly reduces the transfer of electromagnetic noise Noise Filter Assembly between the inverter and the mains power supply. The inverter can transform the 50 Hz power frequency into the high Inverter frequency output of 10,000 Hz to 30,000 Hz. Tools required Sharp-nose pliers Long cross screwdriver... - Page 31 Remove top panel first. Unfasten four M4 screws at the back panel of the appliance attaching the top panel to the back panel. Slide the top panel towards the back of the appliance and remove it. Remove the side panels. Unfasten four M4 screws at the back panel of the appliance attaching the side panel to the back panel.
- Page 32 Requirements Check that the following requirements have been met: The appliance has been disconnected from the power supply and protective measures have been taken to ensure the power cannot be switched on again. The appliance is cool. The high voltage capacitors are discharged before commencing work. Anti-static precautions have been taken.
- Page 33 Removing a magnetron The magnetrons are located on top of the cavity. Remove the wire connecting the thermostat and the magnetron. Remove the four M4 screws on both side of magnetron. Fitting a magnetron Follow the steps in the reverse order to fit a magnetron. Ensure nothing becomes trapped under the magnetron mounting points (e.
- Page 34 NOTICE: If the electric connections have not been restored properly this may lead to malfunction /damage of the oven. 5.7 Replacing the power panel Requirements Check that the following requirements have been met: The appliance has been disconnected from the power supply and protective measures have been taken to ensure the power cannot be switched on again.
- Page 35 Check that the following requirements have been met: The appliance has been disconnected from the power supply and protective measures have been taken to ensure the power cannot be switched on again. The appliance is cool. The top, left and right panels of the casing of the appliance have been removed. The high voltage capacitors are discharged before commencing work.
- Page 36 Check that the following requirements have been met: The appliance has been disconnected from the power supply and protective measures have been taken to ensure the power cannot be switched on again. The appliance is cool. The top, left and right panels of the casing of the appliance have been removed. The high voltage capacitors are discharged before commencing work.
- Page 37 Remove the four M6 nut both side of baseplate assembly. Fitting the baseplate assembly Follow the steps in the reverse order to fit the baseplate assembly.
-
Page 38: Circuit Diagrams And Boards
CIRCUIT DIAGRAMS AND BOARDS 6.1 SRB / QTS circuit boards Weak-current Signal - drive signal, including PWM and UART. Drive - 12V or 5V. JTAG - Program burning interface. INPUT Item Code Name CN13 Oven Door TEMP Sensor Program JTAG CN14 Button Signal OUTPUT... - Page 39 Strong-current Relay –12V/ 208V/240V on or o . DM – Dial Motor for Microwave. INPUT Item Code Name Current Suply CN100 ( 208V/240V、60Hz ) Voltage conversion (12V-5V)Power supply for Voltage conversion (12V-5V)Power supply for Current Detection 13 14 OUTPUT Item Code Name RLY1...
-
Page 40: Tft Driver Board
6.2 TFT Driver Board 1) TFT Display Module Item Name glass lens Interlayer touch panel Bottom TFT-LCM flexible printed circuit LCM flexible printed circuit 2) TFT Driver Board--Connector Item Name USB connector TP connector LCM connector RTC connector used for capacitor power supply Speaker connector to drive 3W speaker... - Page 41 3) TFT Driver Board--Top Components Item Name DDR3 1GB CPU 4*A35 eMMC 8GB PMIC providing di erent voltages LED –if yellow, it is power on Surface mount fuse Power amplifier WIFI&BT module-not used 3) TFT Driver Board--Bottom Components Item Name Boost led driver- Providing backlight voltage for LCM...
-
Page 42: Circuit Diagrams
6.3 Circuit diagrams TJE17G-S00N0A wiring diagram 208V/240 60Hz... -
Page 43: Commissioning The Appliance
COMMISSIONING THE APPLIANCE 7.1 Recommission Test: Recommissioning the appliance after service/repair The Recommission Tests are performed following the completion of a service or repair to ensure that the appliance is working correctly before handing back to the customer. Some of the tests have a countdown timer where failing to carry out a test within the time limit will cause a test failure and the Recommission Test will have to be restarted. - Page 44 The display will appear to operate the microwave and heater output 2)Microwave Power Test NOTE: The appliance is enough cool The power output is also a ected by line voltage under load, so this test is an approximation only a)Fill a microwave safe container (Glass) with 1 liter of water at 20℃ (68F) b)Place the container into the center of cavity.
- Page 45 a)Place the beaker into the center of cavity. b)Place the water load into the microwave oven on the center of the load bearing surface. c)Close the oven door. d)The microwave oven is to be operated at 100 % power ( scroll the power level pad : “a”) e)Press start key (“b”) and operate for 5 minutes.
Need help?
Do you have a question about the TJE17GS7-S00N0A and is the answer not in the manual?
Questions and answers