Ruckus Wireless ZoneFlex P300 Mounting Manual
Wireless bridge
Hide thumbs
Also See for ZoneFlex P300:
- User manual (85 pages) ,
- Quick setup manual (4 pages) ,
- Mounting manual (4 pages)
Advertisement
Quick Links
ZoneFlex
P300 Wireless Bridge
TM
Mounting Guide
Note:
This Mounting Guide is designed to work with the ZoneFlex
P300 Wireless Bridge Quick Setup Guide. Complete the procedures
in the Quick Setup Guide before continuing with this document.
Note: The minimum software revision for the P300 is base image
100.1.0.9 or later. FlexMaster requires firmware 9.12 and later to
manage the P300.
This Mounting Guide provides information on how to configure the Ruckus
Wireless ZoneFlex P300 802.11ac point-to-point and point-to-multipoint
outdoor wireless bridge on the network. The ZoneFlex P300 can use its
internal 5GHz antennas, or can optionally use a two-port customer-
ordered external 5GHz antenna. After completing the steps described in
this Guide, you will be able to use the ZoneFlex P300 wireless bridge. The
rest of this guide refers to the ZoneFlex P300 wireless bridge as the
ZoneFlex P300, root bridge, or non-root bridge.
The ZoneFlex P300 can be ordered either as an unconfigured single
ZoneFlex P300, or as a pre-configured matched pair of ZoneFlex P300s.
These ZoneFlex P300s are almost always installed in pairs, where one is
configured as a root bridge and the other as a non-root bridge.
The ZoneFlex P300 can be deployed as a root bridge connected to the
Ethernet backhaul, or can be deployed as a non-root bridge connected to
the root bridge via the wireless link. The ZoneFlex P300 can be equipped
with customer-purchased external 5GHz antennas to increase the root
bridge-to-non-root bridge connectivity range, or to increase the number of
non-root bridges that a root bridge can communicate with.
Figure 1. ZoneFlex P300s deployed as root bridge and non-root bridge
root bridge
non-root bridge
Note 1: When deployed in the root bridge--non-root bridge -to- root
bridge--non-root bridge configuration, the two wireless links must use
different SSIDs.
Note 2: When two ZoneFlex P300s are mounted closely together (for
instance, on the same pole), make sure that the active antennas are
mounted at least one meter (39.3 inches) apart. When there is more
separation, it is less likely that either ZoneFlex P300 will experience
avoidable RF interference. If possible, the units should be on different
channels, but this separation should be maintained even when the
ZoneFlex P300s are using different channels.
Copyright © 2015 Ruckus Wireless, Inc.
Published 13 July 2015, Part Number 800-70937-001 Rev B
Before You Begin
Before deploying Ruckus Wireless products, please check for the latest
software and the release documentation.
•
User Guides and Release Notes are available at
http://support.ruckuswireless.com/documents
•
Software Upgrades are available at
http://support.ruckuswireless.com/software
•
Open Source information is available at
http://opensource.ruckuswireless.com
•
Software License and Limited Warranty are available at
http://support.ruckuswireless.com/warranty
Safety Warnings
•
WARNING!
install, replace, or service this equipment. The professional installer is
responsible for the proper installation and configuration of this
ZoneFlex P300. The ZoneFlex P300 installation must comply with local
regulatory requirements, especially with those regulating operation
near military and/or weather radar systems.
•
WARNING!
national electrical codes.
•
WARNING!
protection before mounting the ZoneFlex P300.
•
WARNING!
for indoor use only. Never mount the PoE injector outdoors with the
ZoneFlex P300.
•
CAUTION:
loop in any cable that is attached to the ZoneFlex P300 or the building.
This will prevent water from running along the cable and entering the
ZoneFlex P300 or the building where the cable terminates.
•
CAUTION:
and national electrical codes. For additional lightning protection, use
lightning rods and lightning arrestors.
•
NOTE: Allowable external antenna types and antenna gains may be
limited by local regulatory requirements.
Package Contents
Before deploying your ZoneFlex P300, verify that all items listed below are
included in the package. If any item is damaged or missing, notify your
authorized Ruckus Wireless sales representative.
One or two ZoneFlex P300 kits, depending on ordered part:
non-root bridge
•
901-P300-xx01, ZoneFlex P300, 802.11ac 5GHz point-to-point
wireless bridge, includes one ZoneFlex P300 kit
•
901-P300-xx02, ZoneFlex P300, 802.11ac 5GHz point-to-point
wireless bridge, pre-provisioned pair, includes two ZoneFlex P300 kits
non-root bridge
where 'xx' is a country-specific code.
Each ZoneFlex P300 kit contains:
root bridge
•
One ZoneFlex P300, which includes a 12mm stainless steel M6x1
Phillips earth ground screw with split lock and flat washers (A in
2)
•
One M25 data cable gland (B in
•
One green/yellow earth ground wire with ring terminal (C in
•
One wall- or pole-mounting bracket (D in
•
One U-joint bracket (E in
•
One linkage bracket with two serrated external-tooth lock washers (F
in
Figure
•
One ZoneFlex P300 bracket (G in
•
Two sets 50mm stainless steel M8x1.25 hex bolt with split lock and
flat washers (H in
Only trained and qualified personnel should be allowed to
Installation of this equipment must comply with local and
Ruckus Wireless strongly recommends that you wear eye
The Ruckus Wireless PoE injector (ordered separately) is
Make sure that you form a 80mm - 130mm (3"-5") drip
Be sure that grounding is available and that it meets local
Figure
2)
Figure
2)
Figure
2)
2)
Figure
2)
Figure
2)
•
Four SAE32-sized stainless steel clamps, 38.1mm to 63.5mm (1.5" to
2.5") inner diameter (I in
•
Four sets stainless steel 8mm M4x0.7 pan head Phillips screws with
split lock and flat washers (J in
•
Eight sets stainless steel 0.5-inch x 0.250-28 hex bolt with split lock
and flat washers (K in
Figure
•
Service Level Agreement/Limited Warranty Statement
•
Regulatory Statement
•
Declaration of Conformity, if required
•
ZoneFlex P300 Wireless Bridge Quick Setup Guide
•
This Mounting Guide
•
N-Type Connector Sealing Instructions
NOTE: This kit includes extra bolts, nuts and washers. You may use the
extras wherever required.
Figure 2. ZoneFlex P300 field-installation kit contents
A
B
H
I
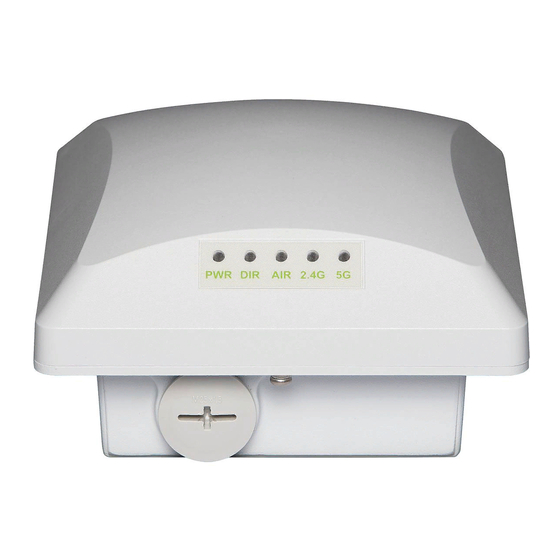
LEDs and Indications
The ZoneFlex P300 has five LEDs visible on the outside of the chassis. The
LEDs have two different operating modes, and the LEDs can be manually
turned on and off by the operator. Refer to
these LEDs and their operating modes.
Table 1. ZoneFlex P300 LED indications
LED
Normal Mode
PWR
• Red = booting
• Green = normal
operation
CTL
• Off = standalone
operation
• Other modes = to be
determined
ROOT • Off = non root bridge
Figure
• Solid green = root
bridge
Figure
2)
5G
• Off = radio down
• Solid green = radio
up & link up
• Flashing green =
radio up but no link
Figure
2)
Figure
2)
2)
C
D
E
F
G
J
K
Table 1
for a description of
Aiming Mode (all green)
Aiming Strength 4
• Solid: Min + 36 RSSI (RSSI >= 42)
• Blinking: Min + 32 RSSI
(42> RSSI >= 36)
Aiming Strength 3
• Solid: Min + 24 RSSI (36 > RSSI >= 30)
• Blinking: Min + 18 RSSI
(30 > RSSI >= 24)
Aiming Strength 2
• Solid: Min + 12 RSSI (24 > RSSI >= 18)
• Blinking: Min + 6 RSSI
(18 > RSSI >= 12)
Aiming Strength 1
• Solid: RSSI >= Configured Minimum
(12 > RSSI >= 6)
• Blinking: RSSI < Configured minimum
(Default: 6 which is configurable)
Page 1 of 4
Advertisement

Related Manuals for Ruckus Wireless ZoneFlex P300


Summary of Contents for Ruckus Wireless ZoneFlex P300
- Page 1 CAUTION: Make sure that you form a 80mm - 130mm (3”-5”) drip this Guide, you will be able to use the ZoneFlex P300 wireless bridge. The loop in any cable that is attached to the ZoneFlex P300 or the building.
- Page 2 P300s are mounted within line of sight of each other (see Figure 1). In If you are mounting the ZoneFlex P300 on a pipe or pole, then you will also general, Ruckus Wireless recommends installing ZoneFlex P300s need: away from obstructions and sources of interference.
- Page 3 Place the mounting bracket at the location on the flat surface where Using the adjustable wrench, remove the cable gland from the Zone- you want to mount the ZoneFlex P300. Use the holes on the mounting NOTE: Make sure that linkage bracket is installed with its serrated external- Flex P300.
- Page 4 Tighten the cable gland base into the ZoneFlex P300 chassis to 7 N.m P300, then make sure that the metal caps remain installed and securely Figure 11. P300 bracket and ZoneFlex P300 attached to the linkage bracket on pole or 62 in-lbs.
Need help?
Do you have a question about the ZoneFlex P300 and is the answer not in the manual?
Questions and answers