
Related Manuals for Grindex Mega INOX 8124.390


Summary of Contents for Grindex Mega INOX 8124.390
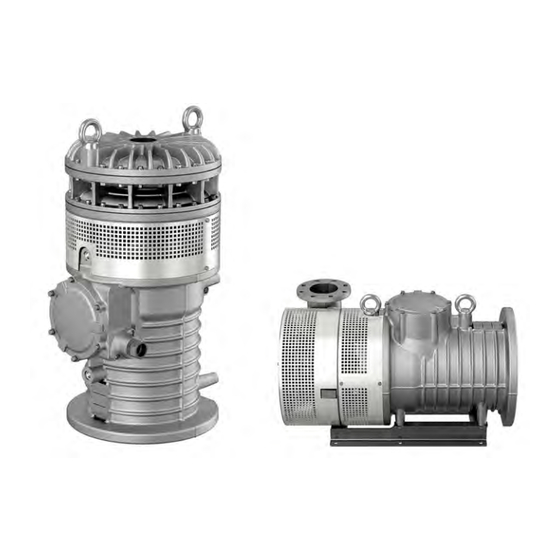
- Page 1 Installation, Operation, and Maintenance Manual 8124.390/.400 Mega...
-
Page 3: Table Of Contents
Table of Contents Table of Contents 1 Introduction and Safety..................... 3 1.1 Introduction..................3 1.2 Safety terminology and symbols............3 1.3 User safety..................4 1.4 Special hazards................4 1.4.1 Working in temporary installations..........4 1.4.2 Biological hazards............... 4 1.4.3 Wash the skin and eyes............... 5 1.5 Protecting the environment..............5 1.6 End of life product disposal.............. - Page 4 Table of Contents 6 Maintenance........................28 6.1 Precautions..................28 6.2 Torque values.................29 6.3 Service..................30 6.3.1 Inspection................30 6.3.2 Overhaul..................31 6.4 Change the oil................32 6.5 Replace the impeller............... 33 6.5.1 Remove the impeller: H............. 33 6.5.2 Remove the impeller: N............. 35 6.5.3 Install the impeller: H..............36 6.5.4 Install the impeller: N..............38 7 Troubleshooting.......................
-
Page 5: Introduction And Safety
This includes any modification to the equipment or use of parts not provided by Grindex. If there is a question regarding the intended use of the equipment, please contact a Grindex representative before proceeding. -
Page 6: User Safety
1 Introduction and Safety Special symbols Some hazard categories have specific symbols, as shown in the following table. Electrical hazard Magnetic fields hazard Electrical Hazard: CAUTION: 1.3 User safety All regulations, codes, and health and safety directives must be observed. The site •... -
Page 7: Wash The Skin And Eyes
• Clean-up of spills Exceptional sites CAUTION: Radiation Hazard Do NOT send the product to Grindex if it has been exposed to nuclear radiation, unless Grindex has been informed and appropriate actions have been agreed upon. 1.6 End of life product disposal Handle and dispose of all waste in compliance with local laws and regulations. -
Page 8: Spare Parts
1 Introduction and Safety 1.7 Spare parts CAUTION: Only use the manufacturer’s original spare parts to replace any worn or faulty components. The use of unsuitable spare parts may cause malfunctions, damage, and injuries as well as void the warranty. 1.8 Warranty For information about warranty, see the sales contract. -
Page 9: Transportation And Storage
2 Transportation and Storage 2 Transportation and Storage 2.1 Examine the delivery 2.1.1 Examine the package 1. Examine the package for damaged or missing items upon delivery. 2. Record any damaged or missing items on the receipt and freight bill. 3. -
Page 10: Temperature Ranges For Transportation, Handling And Storage
2 Transportation and Storage NOTICE: Never lift the unit by its cables or hose. 2.3 Temperature ranges for transportation, handling and storage Handling at freezing temperature At temperatures below freezing, the product and all installation equipment, including the lifting gear, must be handled with extreme care. Make sure that the product is warmed up to a temperature above the freezing point before starting up. - Page 11 2 Transportation and Storage • Before operating the unit after storage, it must be inspected. Special attention must be given to the seals and the cable entry. • The impeller or propeller must be rotated every other month to prevent the seals from sticking together.
-
Page 12: Product Description
3 Product Description 3 Product Description 3.1 Products included Pump model Standard Ex-proof MSHA Drainage Sludge Mega INOX 8124.390 Mega 8124.400 3.2 Pump design The pump is submersible, and driven by an electric motor. Intended use The product is intended for moving waste water, sludge, raw and clean water. Always follow the limits given in Technical Reference on page 46. -
Page 13: The Data Plate
3 Product Description • The stator incorporates thermal contacts connected in series that activate the alarm at overtemperature. • The thermal contacts open at 125°C (257°F) and close at 95°C (203°F). • The bearing temperature is also monitored by a Pt100 transducer sensor. 3.4 The data plate Introduction The data plate is a metal label located on the main body of the pump. -
Page 14: Installation
4 Installation 4 Installation 4.1 Precautions Before starting work, make sure that the safety instructions have been read and understood. DANGER: Electrical Hazard Before starting work on the unit, make sure that the unit and the control panel are isolated from the power supply and cannot be energized. This applies to the control circuit as well. -
Page 15: Install
4 Installation For more permanent installations with a heavily contaminated pumped liquid, a settling pump-sump is recommended. Figure 1: Settling pump-sump Fasteners • Only use fasteners of the correct size and material. • Replace all corroded or damaged fasteners. • Make sure that all the fasteners are correctly tightened and that there are no missing fasteners. -
Page 16: Make The Electrical Connections
4 Installation 4.4 Make the electrical connections 4.4.1 General precautions DANGER: Electrical Hazard Before starting work on the unit, make sure that the unit and the control panel are isolated from the power supply and cannot be energized. This applies to the control circuit as well. -
Page 17: Grounding (Earthing)
4 Installation It is important that the short-circuit protection is not over-dimensioned. Over- dimensioned fuses and motor protection breakers decrease the protection for the motor. • The fuse rating and the cables must be in accordance with the local rules and regulations. -
Page 18: Prepare The Subcab ™ Cables
4 Installation ™ 4.4.3 Prepare the SUBCAB cables This section applies to SUBCAB cables with twisted-pair control conductors. ™ The prepared SUBCAB cable The prepared screened SUBCAB cable, ™ ™ without cable lugs 1. T1+T2 twisted pairs in control element 2. -
Page 19: Mount The Steel Hose At The Cable Entry
4 Installation ™ 4. Prepare the ground (earth) conductor of the screened SUBCAB cable: a) Untwist the screens around the power conductors. b) Twist all power conductor screens together to create a ground (earth) conductor. c) Put a yellow-green shrink tube over the ground (earth) conductor. Leave a short piece uncovered. - Page 20 4 Installation 1. Union nut 2. Clamp ring 3. Use the outer thread fitting and the union nut to flatten the end of the hose: a) Place the steel hose so that the bottom rests on the upper surface of the outer thread fitting.
- Page 21 4 Installation c) Check that the inside rim of the hose has no sharp edges. 5. Mount the outer thread fitting: a) Apply Teflon to the threads. See the following figure. Teflon b) Mount the outer thread fitting over the cable. c) Fasten the outer thread fitting at the pump.
-
Page 22: Connect The Motor Cable To The Pump
4 Installation 1. Steel hose 2. Gasket 3. Outer thread fitting a) Mount a gasket on top of the outer thread fitting. b) Mount the steel hose over the cable. c) Tighten the union nut onto the outer thread fitting. 4.4.5 Connect the motor cable to the pump NOTICE: Leakage into the electrical parts can cause damaged equipment or a blown fuse. -
Page 23: Cable Charts
4 Installation DANGER: Explosion/Fire Hazard Special rules apply to installations in explosive or flammable atmospheres. Do not install the product or any auxiliary equipment in an explosive zone unless it is rated explosion-proof or intrinsically-safe. If the product is rated explosion- proof or intrinsically-safe, then see the specific explosion-proof information in the safety chapter before taking any further actions. - Page 24 4 Installation Crimp isolation Stator leads (U1, U2, U5, U6, V1, V2, V5, V6, W1, W2, W5, W6, Z1, Z5, Z6) Motor protector Current transformer Coil Terminal block Color code standard Code Description Brown Black White Orange Green GNYE Green-Yellow Grey Blue Yellow...
- Page 25 4 Installation View of terminal board and sensor connections 8124 Connection plate MAIN TERMINAL BOARD SENSOR TERMINALS SENSORS CONNECTION AT 4 LEADER PILOT CABLE THERMAL MAX 250v 8107 DETECTORS MAX 6A, cos =0,6 IN STATOR MAX 10A, cos =1 8108 THERMAL MAX 2,5V DETECTOR IN...
-
Page 26: Check The Impeller Rotation: Pumps Without Built-In Motor Protection
4 Installation Motor cable, stator leads and thermal contacts connection to terminal board SYMBOLS AND DENOMINATIONS =Terminal BN=Brown BK=Black =Screen WH=White 8107 OG=Orange 8108 =Ground GN=Green GNYE=Green-Yellow 8124 =Functional ground RD=Red GY=Grey =Connection BU=Blue YE=Yellow =Crimp isolation GC= Ground check A = Cable dimension in cable specification 51 675 01 Screen as ground conductor... - Page 27 4 Installation CAUTION: Crush Hazard The starting jerk can be powerful. Make sure nobody is close to the unit when it is started. Check the direction of rotation each time the cable has been re-connected and after phase or total supply failure. 1.
-
Page 28: Operation
5 Operation 5 Operation 5.1 Precautions Before taking the unit into operation, check the following: • All recommended safety devices are installed. • The cable and cable entry have not been damaged. • All debris and waste material has been removed. NOTICE: Never operate the pump with the discharge line blocked, or the discharge valve closed. -
Page 29: Clean The Pump
5 Operation CAUTION: Thermal Hazard The surfaces or parts of the unit may become hot during operation. Allow surfaces to cool before starting work, or wear heat-protective clothing. NOTICE: Make sure that the rotation of the impeller is correct. For more information, see Check the impeller rotation. -
Page 30: Maintenance
6 Maintenance 6 Maintenance 6.1 Precautions Before starting work, make sure that the safety instructions have been read and understood. DANGER: Crush Hazard Moving parts can entangle or crush. Always disconnect and lock out power before servicing to prevent unexpected startup. Failure to do so could result in death or serious injury. -
Page 31: Torque Values
6 Maintenance The reassembled drive unit must always be insulation-tested and the reassembled pump must always be test-run before normal operation. 6.2 Torque values All screws and nuts must be lubricated to achieve correct tightening torque. Screws that are screwed into stainless steel must have the threads coated with applicable lubricants to prevent seizing. -
Page 32: Service
6 Maintenance 6.3 Service Regular inspection and service of the pump ensures more reliable operation. Type of Purpose Inspection interval service Inspection To prevent operational interruptions 2,000 hours or 1 year, and machine breakdown. Measures whichever comes first. to secure performance and pump Applies to normal efficiency are defined and decided applications and operating... -
Page 33: Overhaul
6 Maintenance Service item Action Cable entry 1. Check that the following requirements are met: – The cable clamps must be properly tightened. – Standard pump version: The cable entry must be firmly tightened into its bottom-most position. – The seal sleeve and the washers must conform to the outside diameter of the cables. -
Page 34: Change The Oil
6 Maintenance 6.4 Change the oil A paraffin oil with viscosity close to ISO VG32 is recommended. The pump is delivered from the factory with this type of oil. Examples of suitable oil types are the following: ™ • Statoil MedicWay 32 ™... -
Page 35: Replace The Impeller
6 Maintenance 3. Replace the oil screw O-ring. 4. Put the oil screw back and tighten it. Tightening torque: 22 Nm (16 ft-lb). 6.5 Replace the impeller 6.5.1 Remove the impeller: H CAUTION: Cutting Hazard Worn parts can have sharp edges. Wear protective clothing. 1. - Page 36 6 Maintenance 4. Remove the diffuser: a) Remove the two strainer halves by undoing their fixing screws. b) Disconnect the bolted joint. c) Remove the lower diffuser. Use a sling. 5. If the diffuser disc must be removed, do as follows: The diffuser disc is located inside the lower diffuser.
-
Page 37: Remove The Impeller: N
6 Maintenance Use two crowbars. 8. Remove the key. 9. Lift off the bottom diffuser and the adjustment washers for the impeller. 6.5.2 Remove the impeller: N CAUTION: Cutting Hazard Worn parts can have sharp edges. Wear protective clothing. 1. Remove the strainers. 2. -
Page 38: Install The Impeller: H
6 Maintenance Use a three-shanked puller if necessary. 4. Remove the screws from the pump housing. 5. Remove the pump housing with the inner suction cover. 6. Detach the inner suction cover from the pump housing. 7. Proceed as for the H version, after the key has been removed. 6.5.3 Install the impeller: H 1. - Page 39 6 Maintenance If the material of the impeller is stainless steel, then use applicable lubricant to prevent seizing. b) Fit the lower impeller. c) Put the assembly sleeve over the shaft and firmly against the impeller. Use a torque wrench and tighten the impeller screw to 187 Nm (138 lbf·ft). The assembly sleeve is used to give the adjusting washers the right thrust.
-
Page 40: Install The Impeller: N
6 Maintenance 7. Install the upper impeller. Repeat the same procedure that is used for installing the other impellers without using the assembly sleeve. 8. Install the diffuser: a) When the fine adjustment is finished, fit the upper diffuser. b) Check the fine adjustment by using a socket, an extension bar, and a handle. - Page 41 6 Maintenance 2. Fit the inner suction cover onto the pump housing. Check that the O-ring is lubricated and in position. 3. Put the suction cover in the withdrawn position so that the outer nuts engage a few threads. 4. Fit the pump housing with its screws. 5.
- Page 42 6 Maintenance Check that the impeller is in the middle of the pump housing. Adjust if necessary with adjusting washers. c) Tighten the impeller by using a torque wrench. Tightening torque: 187 Nm (138 ft-Ibs) d) Finely adjust the inner suction cover against the impeller by using the nuts.
-
Page 43: Troubleshooting
7 Troubleshooting 7 Troubleshooting 7.1 General precautions Before starting work, make sure that the safety instructions have been read and understood. DANGER: Inhalation Hazard Before entering the work area, make sure that the atmosphere contains sufficient oxygen and no toxic gases. 7.2 Electrical troubleshooting DANGER: Electrical Hazard Troubleshooting a live control panel exposes personnel to hazardous voltages. -
Page 44: The Pump Does Not Stop When A Level Sensor Is Used
7 Troubleshooting Cause Remedy The pump does not start Check that: automatically, but can be • The start level regulator is functioning. Clean or started manually. replace if necessary. • All connections are intact. • The relay and contactor coils are intact. •... -
Page 45: The Pump Starts-Stops-Starts In Rapid Sequence
7 Troubleshooting Cause Remedy There is a malfunction in • Clean the level regulators. the level-sensing • Check the functioning of the level regulators. equipment. • Check the contactor and the control circuit. • Replace all defective items. The stop level is set too Raise the stop level. -
Page 46: The Pump Delivers Too Little Or No Water
7 Troubleshooting Cause Remedy The motor protection is Set the motor protection according to the data plate set too low. and if applicable the cable chart. The impeller is difficult to • Clean the impeller. rotate by hand. • Clean out the wet well. •... - Page 47 7 Troubleshooting Cause Remedy The impeller rotates in • If it is a 3-phase pump without SMART ™ , then the wrong direction. transpose two phase leads. For pumps with softstarter, transpose the leads at T1, T2, T3 on the softstarter. •...
-
Page 48: Technical Reference
8 Technical Reference 8 Technical Reference 8.1 Application limits Version code 390 Data Description Liquid temperature Maximum 40°C (104°F) pH of the pumped media WCCR seal 3–14 RSiC seal 2–10 Liquid density 1100 kg/m³ (9.2 lb per US gal) maximum Depth of immersion Maximum 75 m (250 ft) Other... -
Page 49: Specific Motor Data
8 Technical Reference Feature Description Voltage variation ±10%, if it does not run continuously at full load without overheating Voltage imbalance tolerance Stator insulation H (180°C [356°F]) class Motor encapsulation Motor encapsulation is in accordance with IP68. 8.3 Specific motor data Version code 390: 3-phase, 50 Hz Motor type: •... -
Page 50: Dimensions And Weights: Version Code 390/400, N
8 Technical Reference • 2,955 rpm • Rated output 90 kW (120 hp) • Maximum power consumption 95 kW (127 hp) Voltage (V) Rated current (A) Starting current (A) 1,170 146–154 1,255 1,075 1,140 117–118 107–108 1,000 59–60 Version code 400: 3-phase, 60 Hz Motor type: •... -
Page 51: Dimensions And Weights: Version Code 390/400, H
8 Technical Reference 22.5 Version code Weight without motor cable 8124.390 925 kg (2,039 lbs) 8124.400 900 kg (1,984 lbs) 8.5 Dimensions and weights: Version code 390/400, H All measurements in the illustrations are in millimeters. Dimensions, horizontal installation 1145 WS009729A 8124.390/.400 Mega Installation, Operation, and Maintenance Manual... -
Page 52: Performance Curves: Version Code 390
8 Technical Reference Dimensions, vertical installation View B-B, horizontal and vertical 22.5 22.5 UNC 3/4” Weights, horizontal and vertical Version code Weight without motor cable 8124.390 1,015 kg (2,238 lbs) 8124.400 985 kg (2,172 lbs) 8.6 Performance curves: Version code 390 Test standard Pumps are tested in accordance with ISO 9906:2012, HI 11.6:2012. -
Page 53: Performance Curves: Version Code 400
8 Technical Reference 50 Hz, version code 390 [kW] P [kW] H [m] Q [l/s] Q [l/s] WS009723B WS009724B Figure 4: N Figure 5: H 60 Hz, version code 390 120 140 1000 1500 2000 [l/s] / [USgpm] [l/s] / [USgpm] WS009727B WS009726B Figure 7: H... - Page 54 8 Technical Reference Curves, version code 400 P [kW] P [hp] / [kW] H, 243 N, 232 N, 231 H, 244 H [ft] / [m] H [m] H, 243 H, 244 N, 232 100 120 140 N, 231 1000 1500 2000 2500 Q [l/s] / [usgpm]...
- Page 56 Services AB 556782-9253 361 80 Emmaboda The original instruction is in English. All non-English www.grindex.com instructions are translations of the original instruction. Sweden Tel: +46-471-24 70 00 © 2021 Grindex Fax: +46-471-24 74 01 http://tpi.xyleminc.com 90020101_1.0_en-US_2021-04_IOM_8124.390/.400 Mega...
Need help?
Do you have a question about the Mega INOX 8124.390 and is the answer not in the manual?
Questions and answers