
Related Manuals for Grindex 8120.280 Sandy Inox


Summary of Contents for Grindex 8120.280 Sandy Inox
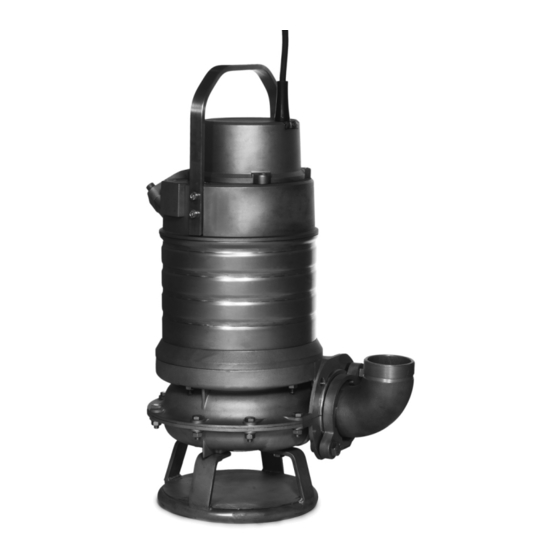
- Page 1 Installation, Operation, and Maintenance Manual 8120.280 Sandy Inox...
-
Page 3: Table Of Contents
4.4.6 Cable charts................19 4.5 Check the phase sequence: Pumps with built-in motor protection..21 5 Operation.......................... 24 5.1 Precautions..................24 5.2 Start the pump................24 5.3 Clean the pump................25 6 Maintenance........................26 6.1 Precautions..................26 8120.280 Sandy Inox Installation, Operation, and Maintenance Manual... - Page 4 7.4 The pump runs but the motor protection trips........34 7.5 The pump stops during operation............34 8 Technical Reference......................36 8.1 Application limits................36 8.2 Motor data..................36 8.3 Specific motor data.................36 8.4 Dimensions and weights..............37 8.5 Performance curves................ 38 8120.280 Sandy Inox Installation, Operation, and Maintenance Manual...
-
Page 5: Introduction And Safety
This includes any modification to the equipment or use of parts not provided by Grindex. If there is a question regarding the intended use of the equipment, please contact a Grindex representative before proceeding. -
Page 6: User Safety
• Visually inspect electrical equipment before use. Remove from service any equipment with exposed wires or visible damage. • Use ground-fault circuit interrupters on all receptacles, or have an assured equipment grounding conductor program. 8120.280 Sandy Inox Installation, Operation, and Maintenance Manual... -
Page 7: Biological Hazards
• Clean-up of spills Exceptional sites CAUTION: Radiation Hazard Do NOT send the product to Grindex if it has been exposed to nuclear radiation, unless Grindex has been informed and appropriate actions have been agreed upon. 1.6 End of life product disposal Handle and dispose of all waste in compliance with local laws and regulations. -
Page 8: Spare Parts
Only use the manufacturer’s original spare parts to replace any worn or faulty components. The use of unsuitable spare parts may cause malfunctions, damage, and injuries as well as void the warranty. 1.8 Warranty For information about warranty, see the sales contract. 8120.280 Sandy Inox Installation, Operation, and Maintenance Manual... -
Page 9: Transportation And Storage
Always lift the unit by its designated lifting points. Use suitable lifting equipment and ensure that the product is properly harnessed. Wear personal protective equipment. Stay clear of cables and suspended loads. 8120.280 Sandy Inox Installation, Operation, and Maintenance Manual... -
Page 10: Temperature Ranges For Transportation, Handling And Storage
Protect the product against humidity, heat sources, and mechanical damage. NOTICE: Do not place heavy weights on the packed product. Long-term storage If the unit is stored more than six months, then the following apply: 8120.280 Sandy Inox Installation, Operation, and Maintenance Manual... - Page 11 • Before operating the unit after storage, it must be inspected with special attention to the seals and the cable entry. • The impeller/propeller must be rotated every other month to prevent the seals from sticking together. 8120.280 Sandy Inox Installation, Operation, and Maintenance Manual...
-
Page 12: Product Description
• The thermal contacts open at 130°C (266°F) and close at 100°C (212°F). 3.4 The data plate Introduction The data plate is a metal label located on the main body of the pump. The data plate lists key product specifications. 8120.280 Sandy Inox Installation, Operation, and Maintenance Manual... - Page 13 12.Degree of protection 13.Maximum capacity 14.Rated current 15.Direction of the start reaction 16.Direction of the impeller rotation 17.Maximum head 18.Serial number The first two characters describe the production year. 19.Rated voltage 20.Pump model 8120.280 Sandy Inox Installation, Operation, and Maintenance Manual...
-
Page 14: Installation
Water + coarse gravel 4 (13) Water + gravel 3.5 (11) Water + sand, particle size <0.6 mm 2.5 (8.2) (0.024 in) Water + sand, particle size <0.1 mm 1.5 (4.9) (0.004 in) 8120.280 Sandy Inox Installation, Operation, and Maintenance Manual... -
Page 15: Install
Heavier pumps must be lifted and lowered down by crane. Suspend the pump by the lifting handle or the eye bolts with chains or wires. 4. Place the pump on the base and make sure it cannot fall over or sink. 8120.280 Sandy Inox Installation, Operation, and Maintenance Manual... -
Page 16: Make The Electrical Connections
These general requirements apply for the electrical installation: • If the pump will be connected to the public mains, then the supply authority must be notified before installing the pump. When the pump is connected to 8120.280 Sandy Inox Installation, Operation, and Maintenance Manual... -
Page 17: Grounding (Earthing)
Grounding (earthing) must be done in compliance with all local codes and regulations. DANGER: Electrical Hazard All electrical equipment must be grounded (earthed). Test the ground (earth) lead to verify that it is connected correctly and that the path to ground is continuous. 8120.280 Sandy Inox Installation, Operation, and Maintenance Manual... -
Page 18: Product-Specific Precautions
Table 1: DOL start Number of pumps driven by the Recommended maximum power same generator kVA values for the generator, as a multiple × the maximum power consumption for one pump 8120.280 Sandy Inox Installation, Operation, and Maintenance Manual... -
Page 19: Prepare The Subcab Cables
Peel the insulation sheath or plastic jacket. b) Peel the aluminum and textile layers. The aluminum foil is a conductive screen. Do not peel more than necessary, and remove the peeled foil. 8120.280 Sandy Inox Installation, Operation, and Maintenance Manual... -
Page 20: Connect The Motor Cable To The Pump
3. Make sure that the pump is correctly connected to ground (earth). 4. Tighten the cable entry into its bottom-most position. The seal sleeve and the washers must conform to the outside diameter of the cables. 8120.280 Sandy Inox Installation, Operation, and Maintenance Manual... -
Page 21: Cable Charts
Terminal board, terminal plate Crimp connection Leakage sensor Crimp isolation Stator leads (U1, U2, U5, U6, V1, V2, V5, V6, W1, W2, W5, W6, Z1, Z5, Z6) Motor protector Current transformer Coil Terminal block 8120.280 Sandy Inox Installation, Operation, and Maintenance Manual... - Page 22 STATOR LEADS Terminal plate U1,U5 U2,U6 V1,V5 V2,V6 W1,W5 W2,W6 T1,T2 WH/YE Motor cable and starter unit connection to the terminal board Old versions of SMART do not have pin 15 & 16. 8120.280 Sandy Inox Installation, Operation, and Maintenance Manual...
-
Page 23: Check The Phase Sequence: Pumps With Built-In Motor Protection
5 21 5 21 plate 6 22 6 22 4.5 Check the phase sequence: Pumps with built-in motor protection Follow this procedure if your product is equipped with the rotation control ™ SMART 8120.280 Sandy Inox Installation, Operation, and Maintenance Manual... - Page 24 The pump should start. If it does not, then continue to the next step. 2. If the pump does not start and the fuses are correct, then shift two phases: 8120.280 Sandy Inox Installation, Operation, and Maintenance Manual...
- Page 25 The pump should start. If it does not, then contact a certified electrician to check the mains and the junctions. 8120.280 Sandy Inox Installation, Operation, and Maintenance Manual...
-
Page 26: Operation
Dry running during service and inspection is only permitted for brief periods of time. Do not operate the pump without the strainer If the strainer is not attached, then the pump must not be operated. 5.2 Start the pump 8120.280 Sandy Inox Installation, Operation, and Maintenance Manual... -
Page 27: Clean The Pump
Let the pump run for a while in clean water, or flush it through the discharge connection. 8120.280 Sandy Inox Installation, Operation, and Maintenance Manual... -
Page 28: Maintenance
During the maintenance and before reassembly, always remember to perform these tasks: • Clean all parts thoroughly, particularly O-ring grooves. • Change all O-rings, gaskets, and seal washers. • Lubricate all springs, screws, O-rings with grease. 8120.280 Sandy Inox Installation, Operation, and Maintenance Manual... -
Page 29: Torque Values
For hexagon socket head screws with countersunk head, maximum torque for all property classes must be 80% of the values for property class 8.8 above. 6.3 Service Regular inspection and service of the pump ensures more reliable operation. 8120.280 Sandy Inox Installation, Operation, and Maintenance Manual... -
Page 30: Inspection
2. If the oil contains particles, then replace the mechanical seal. Contact an authorized service shop. Make sure that the volume is filled to the correct level. A smaller amount of water is not harmful for the mechanical seal. 8120.280 Sandy Inox Installation, Operation, and Maintenance Manual... -
Page 31: Overhaul
Replace with new seal units. Regardless of individual applications, the inspection volume should not be inspected less frequently than the intervals for normal applications and operating conditions at media (liquid) temperatures <40°C (104°F). 8120.280 Sandy Inox Installation, Operation, and Maintenance Manual... -
Page 32: Change The Oil
4. Put the oil screw back and tighten it. 6.5 Replace the impeller 6.5.1 Remove the impeller CAUTION: Cutting Hazard Worn parts can have sharp edges. Wear protective clothing. Remove the items in the image 8120.280 Sandy Inox Installation, Operation, and Maintenance Manual... -
Page 33: Install The Impeller
2. Slide the impeller carefully onto the shaft so that the key fits into the keyway in the impeller. 3. Place the washer on the impeller screw. 4. Fit the impeller onto the shaft. 5. Tighten the impeller screw. 8120.280 Sandy Inox Installation, Operation, and Maintenance Manual... -
Page 34: Troubleshooting
Hand the pump in for repair and fine adjustment. worn. If the problem persists, then contact a sales or authorized service representative. Always state the product number and the serial number of the pump, see Product Description on page 10. 8120.280 Sandy Inox Installation, Operation, and Maintenance Manual... -
Page 35: The Pump Does Not Start, For Pumps With Smart
If the problem persists, then contact a sales or authorized service representative. Always state the product number and the serial number of the pump, see Product Description on page 10. 8120.280 Sandy Inox Installation, Operation, and Maintenance Manual... -
Page 36: The Pump Runs But The Motor Protection Trips
The motor is overheated. Let the pump cool for a few minutes. Before you restart the pump, disconnect and reconnect the power. The motor has broken Hand the pump in to an authorized service shop. down. 8120.280 Sandy Inox Installation, Operation, and Maintenance Manual... - Page 37 7 Troubleshooting If the problem persists, then contact a sales or authorized service representative. Always state the product number and the serial number of the pump, see Product Description on page 10. 8120.280 Sandy Inox Installation, Operation, and Maintenance Manual...
-
Page 38: Technical Reference
Voltage imbalance tolerance Maximum ±3 Hz frequency variation (for pumps with SMART ™ Stator insulation F (155°C [311°F]) class Motor encapsulation Motor encapsulation is in accordance with IP68. 8.3 Specific motor data 8120.280 Sandy Inox Installation, Operation, and Maintenance Manual... -
Page 39: Dimensions And Weights
440 Y serial 460 Y serial 575 D 600 D 8.4 Dimensions and weights Sandy INOX 480 mm (18.9 in.) 1. Throughlet diameter 46 mm (1.8 in.) Weight: 86 kg (190 lbs) 8120.280 Sandy Inox Installation, Operation, and Maintenance Manual... -
Page 40: Performance Curves
Pumps are tested in accordance with ISO 9906:2012, HI 11.6:2012. Sandy INOX [kW] H [m] Q [l/s] Figure 6: 50 Hz [hp] / [kW] H [ft] / [m] Q [l/s] / [usgpm] Figure 7: 60 Hz 8120.280 Sandy Inox Installation, Operation, and Maintenance Manual... - Page 44 Services AB 361 80 Emmaboda The original instruction is in English. All non-English www.grindex.com instructions are translations of the original instruction. Sweden Tel: +46-471-24 70 00 © 2011 Grindex Fax: +46-471-24 74 01 http://tpi.xyleminc.com 898436_6.0_en-US_2019-12_IOM_8120.280 Sandy Inox...
Need help?
Do you have a question about the 8120.280 Sandy Inox and is the answer not in the manual?
Questions and answers