Table of Contents
Advertisement
Available languages
Available languages
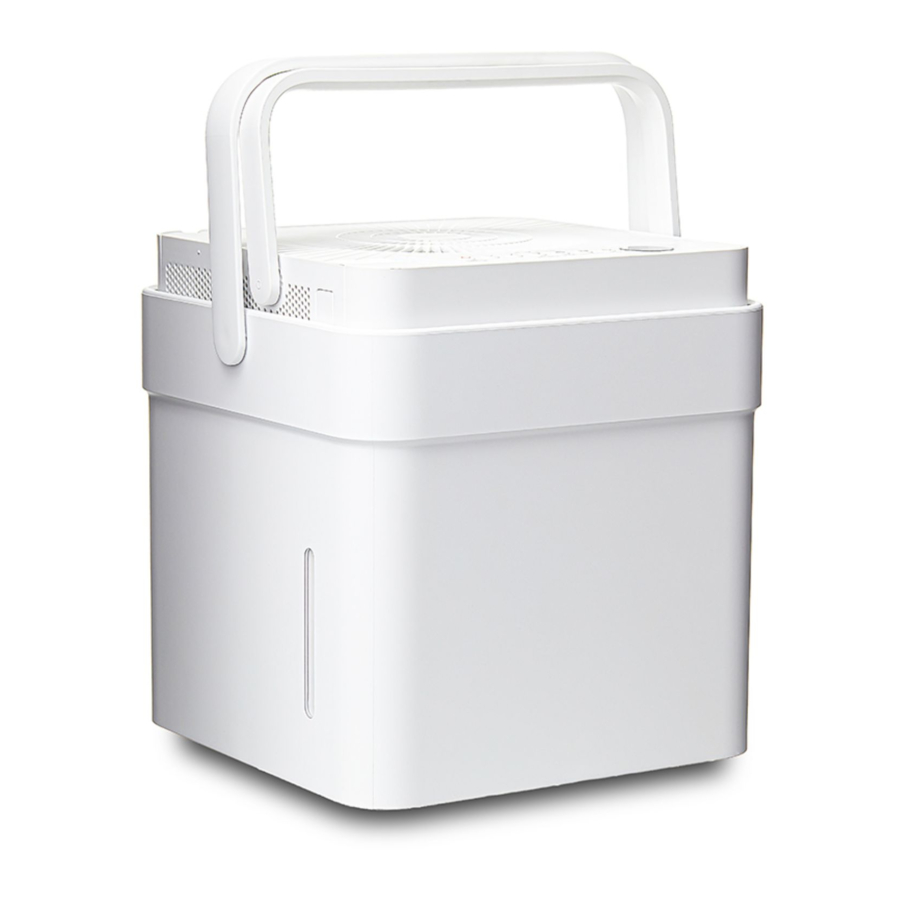
Cube Dehumidifier
MAD
Rated voltage: 115V
Frequency: 60Hz
Warning notices: Before using
this product, please read this
manual carefully and keep it
for future reference.
The design and specifications
are subject to change without
prior notice for product
improvement.
version A - 12 - 2020
version B - 03 - 2021
USER MANUAL
MAD20S1QWT
MAD35S1QWT
MAD50S1QWT
MAD50PS1QWT
MAD50PS1QGR
www.midea.com
en
Advertisement
Chapters
Table of Contents

Related Manuals for Midea MAD20S1QWT


Summary of Contents for Midea MAD20S1QWT
- Page 1 Rated voltage: 115V Frequency: 60Hz Warning notices: Before using this product, please read this manual carefully and keep it for future reference. The design and specifications MAD20S1QWT are subject to change without MAD35S1QWT prior notice for product MAD50S1QWT improvement. MAD50PS1QWT MAD50PS1QGR www.midea.com...
-
Page 2: Table Of Contents
Owner’s Manual Safety Precautions ..................3 Unit Specifications and Features ............6 Set Up Instructions ..................7 Installation Instructions ................8 Operating Instructions ................9 Care and Cleaning ..................15 Nesting and Storing Instructions ............16 Troubleshooting Tips ................17 App Instructions .................. -
Page 3: Safety Precautions
SAFETY PRECAUTIONS To prevent injury to the user or personal and property damage, these instructions must be followed. Incorrect operation due to ignoring of instructions may cause harm or damage. The level of risk is shown by the following indications. This symbol indicates a hazardous situation which, if not WARNING avoided, could result in death or serious injury. - Page 4 WARNING • Avoid fire hazard or electric shock. Do not use an extension cord or an adaptor plug. Do not remove any prongs from the power cord. • Plug in power plug properly. Otherwise, it may cause electric shock or fire due to excess heat generation. •...
- Page 5 CAUTION • Do not use in places where water may splash onto the unit. Water may enter the unit and degrade the insulation. It may cause an electric shock or fire. • Place the unit on a level, sturdy section of the floor. If the unit falls over, it may cause water to spill and damage belongings, or cause electrical shock or fire.
-
Page 6: Unit Specifications And Features
UNIT SPECIFICATIONS AND FEATURES Product overview Front Rear Front Panel Air Intake Power Cord Storage Channel Bucket Pump Hose Outlet Handle (some models) Garden Relief Holes Hose Outlet Bucket Water Level Window Bucket Fig. 1 Dehumidifier Bucket Lock tabs Control panel and Display Air Outlet Unit Handle... -
Page 7: Set Up Instructions
SET UP INSTRUCTIONS Step 1: Separate dehumidifier & bucket from the nested shipping/storage position. Remove all packaging materials from the unit. Fig. 3a Nested Shipping & Storage Position Fig. 3b Step 2: Rotate dehumidifier 90° and align the arrows on the two labels (one on the bucket and one on the dehumidifier) and carefully sit the dehumidifier down onto the bucket. -
Page 8: Installation Instructions
INSTALLATION INSTRUCTIONS Positioning the Unit The dehumidifier should be placed in the area where dehumidification is desired most. Adjacent rooms in which dehumidification is also desired should allow adequate airflow in and out of the space containing the dehumidifier. • Do not use outdoors. -
Page 9: Operating Instructions
OPERATING INSTRUCTIONS Key Pad Features Fill Level Pump Network Indicator Connection Power Button Pump Icon Button and (connect) (some models) Indicators (some models) Indicator Fan Button Timer Button Bucketless LED Display and Indicators and Indicator Indicator (reset filter) Up/Down Mode Button Filter Indicator Buttons and Indicators... - Page 10 (see fig. 6) and does not rise above Fill Models Models the connection point (see fig. 7). level MAD20S1QWT MAD35S1QWT To remove the unit from bucketless MAD50S1QWT mode, place the unit back on the bucket. MAD50PS1QWT MAD50PS1QGR 1.5 gallons...
- Page 11 Timer Button: 3 minute compressor operation delay protection Press this button to activate the Timer After the unit has stopped, it can not be function. The Timer LED will illuminate restarted in the first 3 minutes to protect indicating timer mode is being set. compressor operation.
- Page 12 Removing Collected Water There are three ways to remove collected water: 1. Emptying the bucket 1. Lift the unit off the bucket and place it on a level surface. • When the bucket reaches the set Fill Level, the unit’s display will show P2 regardless of power status.
- Page 13 • When removing the drain hose, some water may remain in the hose or the drain outlet. Be sure this water will not spill by drying the wet area before moving the unit. NOTICE When using the continuous draining feature, ensure the unit is placed above the sink or drain being used.
- Page 14 • Make sure the hose is secure so there are no leaks. • Direct the hose toward the drain, making sure that there are no kinks that will stop the water flowing. • Place the end of the hose into the drain. •...
-
Page 15: Care And Cleaning
CARE AND CLEANING Turn the dehumidifier off and disconnect the plug from the power source before cleaning. 1. Clean the Grill and Case • Use water and a mild detergent. Do not use bleach or abrasives. • Do not splash water directly onto the unit. Doing so may cause an electrical shock, cause the insulation to deteriorate, or cause the unit to rust. -
Page 16: Nesting And Storing Instructions
NESTING AND STORING INSTRUCTIONS Step 1: Power off and unplug the unit. Then lift the dehumidifier off the bucket. Step 2: Empty all water from bucket. WARNING Make sure the bucket is empty before nesting the dehumidifier to avoid risk of electrical shock. Fig. -
Page 17: Troubleshooting Tips
TROUBLESHOOTING TIPS Before calling for service, review this list. It may save you time and money. This list includes common occurrences that are not the result of defective workmanship or materials in this appliance. Problem Solution Make sure the dehumidifiers plug is connected firmly into the wall outlet. -
Page 18: App Instructions
OS may or may not be supported until a new version is released. Your specific mobile phone or problems in your network may prevent the system from working and Midea will not be responsible for any problems that could be caused by incompatibility or network issues. - Page 19 Apple QR code Scan to download app. • You can also go to Google Play or App Store and search for Midea Air. NOTICE All the images in this manual are for reference only, your product and app may look slightly different.
- Page 20 CREATE YOUR ACCOUNT • Make sure your smartphone is connected to your wireless router and your wireless router has a working 2.4GHz internet connection. • It is recommended to activate your account immediately to be able to recover your password by email. 1.
- Page 21 ADDITIONAL APP AND SMART HOME FUNCTIONS For additional instructions regarding the features of the app and Smart Home skill capabilities, scan the QR code below. Page 21 ...
- Page 23 Voltaje Nominal: 115V Frecuencia: 60Hz Avisos de advertencia: Antes de usar este producto, lea atentamente este manual y consérvelo para futuras referencias. MAD20S1QWT El diseño y las especificaciones están sujetos a cambios sin previo MAD35S1QWT aviso para la mejora del producto. MAD50S1QWT...
- Page 24 Manual del Usuário Precauciones de Seguridad ..............25 Especificaciones y Características del Aparato ....... 28 Instrucciones de Configuración ............29 Instrucciones de Instalación ..............30 Instrucciones de Operación ..............31 Cuidado y Limpieza ................37 Instrucciones de Alineación y Almacenamiento ......
-
Page 25: Precauciones De Seguridad
PRECAUCIONES DE SEGURIDAD Para prevenir daños al usuario o a otras personas y a la propiedad, las instrucciones que se muestran aquí deben ser seguidas. El uso incorrecto debido a ignorar las instrucciones podría causar perjuicios o lesiones. El nivel de riesgo está clasificado por las siguientes indicaciones. - Page 26 ADVERTENCIA • Evite el peligro de incendio o la descarga eléctrica. No utilice un cable de extensión ni un enchufe adaptador. No extraiga ninguna clavija del cable de alimentación. • Enchúfalo en el enchufe de alimentación eléctrica correctamente. De lo contrario, puede causar una descarga eléctrica o un incendio debido a la excesiva generación de calor.
- Page 27 PRECAUCIÓN • No sitúe el aparato en lugares donde el agua pueda salpicarle. El agua puede entrar en el aparato y degradar el aislamiento que podría conducir a una descarga eléctrica. • Coloque el aparato en una zona nivelada y resistente del suelo. Si el aparato se cae, puede hacer que el agua se derrame y dañe sus pertenencias, o provocar una descarga eléctrica o un incendio.
-
Page 28: Especificaciones Y Características Del Aparato
ESPECIFICACIONES Y CARACTERÍSTICAS DEL APARATO Descripción del Producto Frontal Trasera Panel Frontal Entrada Canal de almacenamiento de Aire del cable de alimentación Salida de Manguera Asa del de Bomba Depósito (algunos modelos) Agujeros Ventana de Nivel Salida de de Alivio de Água del Manguera Depósito... -
Page 29: Instrucciones De Configuración
INSTRUCCIONES DE CONFIGURACIÓN Paso 1: Separe el deshumidificador y el depósito de la posición de envío/almacenamiento alineado. Retire todos los materiales de embalaje de la unidad. Fig. 3a Posición de envío/ almacenamiento alineado Fig. 3b Paso 2: Gire el deshumidificador 90° y alinee las flechas en las dos etiquetas (una en el depósito y otra en el deshumidificador) y coloque con cuidado el deshumidificador sobre el depósito. -
Page 30: Instrucciones De Instalación
INSTRUCCIONES DE INSTALACIÓN Colocación del Aparato El deshumidificador debe colocarse en el área donde más se desee deshumidificar. Las habitaciones adyacentes en las que también se desea la deshumidificación deben permitir un flujo de aire adecuado dentro y fuera del espacio que contiene el deshumidificador. •... -
Page 31: Instrucciones De Operación
INSTRUCCIONES DE OPERACIÓN Mandos de Control Botón del Nivel Indicador de Botón del Power de Llenado Indicador de la Conexión (conexión) e Indicadores la Bomba de Red Botón del Ventilador Botón del Timer Indicador Display LEDs e Indicadores e Indicador Sin Depósito (restablecer filtro) Botones... - Page 32 2. Asegúrese de que el deshumidificador esté en una superficie plana y nivelada (sin residuos). Nivel de Modelos Modelos Llenado MAD20S1QWT MAD35S1QWT 3. Asegúrese de que la manguera para MAD50S1QWT el modo sin depósito esté inclinada MAD50PS1QWT hacia el drenaje (ver fig. 6) y no...
- Page 33 Reinicio automático Botón del Timer : Pulse este botón para activar la función del Si el aparato se detiene inesperadamente debido a un corte de energía, se temporizador. El LED del Timer se iluminará para indicar que se está configurando el modo, reiniciará...
- Page 34 Eliminar el Agua Acumulada Hay tres maneras de eliminar el agua acumulada: 1. Vaciar el depósito 1. Levante el aparato del depósito y colóquela en una superfi cie • Cuando el depósito alcanza el Nivel de Llenado nivelada. establecido, la pantalla del aparato mostrará P2 independientemente del estado de energía.
- Page 35 • Al retirar la manguera de drenaje, puede quedar algo de agua en la manguera o en la salida de drenaje. Asegúrese de que esta agua no se derrame secando el área húmeda antes de mover el aparato. AVISO Cuando utilice la función de drenaje continuo, asegúrese de que el aparato esté...
- Page 36 • Asegúrese de que la manguera esté segura para que no haya fugas. • Dirija la manguera hacia el drenaje, asegurándose de que no haya torceduras que detengan el flujo de agua. • Coloque el extremo de la manguera en el drenaje. •...
-
Page 37: Cuidado Y Limpieza
MANTENIMIENTO Y LIMPIEZA Apague el deshumidificador y desconecte el enchufe de la pared antes de limpiar. 1. Limpiar la Rejilla y la Carcasa • Use agua y un detergente suave. No use lejía ni abrasivos. • No salpique agua directamente sobre el aparato. -
Page 38: Instrucciones De Alineación Y Almacenamiento
INSTRUCCIONES DE ALINEACIÓN Y ALMACENAMIENTO Paso 1: Apague y desenchufe el aparato. Luego levante el deshumidificador del depósito. Paso 2: Vacíe toda el agua del depósito. ADVERTENCIA Asegúrese de que el depósito esté vacío antes de colocar el deshumidificador para evitar el riesgo de descarga eléctrica. Fig. -
Page 39: Solución De Problemas
SOLUCIONES DE PROBLEMAS Antes de llamar al servicio técnico, revise esta lista. Puede ahorrarle una gran cantidad de tiempo y dinero. Esta lista incluye ocurrencias comunes que no son consecuencia de un trabajo o materiales defectuosos en el equipo. Problema Solución Asegúrese de que el enchufe del deshumidificador esté... -
Page 40: Instrucciones Del App
Su teléfono móvil específico o problemas en su red pueden impedir que el sistema funcione y Midea no será responsable de ningún problema que pueda ser causado por incompatibilidad o problemas de red. - Page 41 Código QR de Android Código QR de Apple Escanear para descargar la aplicación. • También puede ir a Google Play o App Store y buscar Midea Air. AVISO Todas las imágenes de este manual son solo para referencia, su producto y aplicación pueden tener un aspecto ligeramente diferente.
- Page 42 CREA TU CUENTA • Asegúrese de que su Smartphone esté conectado a su router inalámbrico y que su router inalámbrico tenga una conexión a Internet de 2,4 GHz. • Se recomienda activar su cuenta inmediatamente para poder recuperar su contraseña por correo electrónico..
- Page 43 FUNCIONES ADICIONALES DE LA APLICACIÓN Y SMART HOME Para obtener instrucciones adicionales sobre las características de la aplicación y las capacidades del sistema Smart Home, escanee el código QR a continuación. Page 43 ...
Need help?
Do you have a question about the MAD20S1QWT and is the answer not in the manual?
Questions and answers
What is the lowest temperature in the basement to have this woirk effectively
The lowest temperature for the Midea MAD20S1QWT to work effectively is 5°C (41°F).
This answer is automatically generated