Sony DVP-S530D Operating Instructions Manual
Dvd players & recorders: cd/dvd player
Hide thumbs
Also See for DVP-S530D:
- Service manual (116 pages) ,
- Training manual (92 pages) ,
- Operating instructions manual (67 pages)

Related Manuals for Sony DVP-S530D


Summary of Contents for Sony DVP-S530D
- Page 1 CD/DVD Player Operating Instructions Manual de instrucciones DVP-S530D 1999 by Sony Corporation 3-865-642-31(1)
- Page 2 If the AC plug of your unit does not fit into the wall outlet, attach the supplied AC plug adaptor. Welcome! Thank you for purchasing the Sony CD/ DVD Player. Before operating the unit, please read this manual thoroughly and retain it for future reference.
-
Page 3: Table Of Contents
ABLE OF CONTENTS About This Manual 4 This Player Can Play the Following Discs 4 Precautions 6 Notes on Discs 6 Getting Started 7 Unpacking 7 TV Hookups 8 Receiver (Amplifier) Hookups 10 5.1 Channel Surround Hookups 12 Selecting the Language for On-Screen Display 14 Playing Discs 15 Playing Discs Playing at Various Speeds/Frame by Frame... -
Page 4: About This Manual
Indicates the functions for Audio CDs. Audio CDs Audio 8 cm 12 cm 8 cm (CD single) 20 min. 74 min. 20 min. “DVD VIDEO” logo is a trademark. Region code MODEL NO. DVP–8306 CD/DVD PLAYER AC 110V 60Hz SONY CORPORATION MADE IN JAPAN 3-444-464-01... - Page 5 Terms for discs • Title The longest sections of a picture or a music piece on a DVD; a movie, etc., for a picture piece on a video software; or an album, etc., for a music piece on an audio software. Each title is assigned a title number enabling you to locate the title you want.
-
Page 6: Precautions
If you have any questions or problems concerning your player, please consult your nearest Sony dealer. IMPORTANT NOTICE Caution: The enclosed DVD player is capable of holding a still video image or On screen display image on your television screen indefinitely. -
Page 7: Getting Started
Procedimientos iniciales En esta sección se describe cómo conectar el reproductor de CD/DVD a un TV (con tomas de entrada de audio/video) y/o a un receptor de AV (amplificador). No es posible conectar este reproductor a un TV que no disponga de conector de entrada de video. -
Page 8: Tv Hookups
Conexiones del TV Esta conexión sirve para escuchar el sonido a través de los altavoces del TV (2 canales, izquierdo y derecho). Consulte las instrucciones suministradas con el componente que desee conectar. Reproductor de CD/DVD S VIDEO LINE OUT COMPONENT VIDEO OUT R–AUDIO 1–L VIDEO 1 DIGITAL OUT... - Page 9 Si conecta el reproductor a un monitor o proyector que dispone de conectores de entrada de video de componente compatibles con las señales de salida de los conectores COMPONENT VIDEO OUT (Y, P /B-Y, P /R-Y) del reproductor Conecte el componente a través de los conectores COMPONENT VIDEO OUT mediante tres cables de conexión de video (no suministrados) del mismo tipo.
-
Page 10: Conexión Del Receptor (Amplificador)
Conexión del receptor (amplificador) Esta conexión sirve para escuchar el sonido a través de altavoces conectados a un receptor (como un amplificador estéreo integrado, un receptor con decodificador Dolby Pro Logic incorporado, etc.). Consulte las instrucciones suministradas con el componente que desee conectar. Podrá... -
Page 11: Ajustes Necesarios Previos Al Empleo Del Reproductor
Si cuenta con un componente digital, por ejemplo un receptor (amplificador) con conector digital, DAT o MD Conecte el componente a través del conector DIGITAL OUT OPTICAL o COAXIAL utilizando un cable de conexión digital óptico o coaxial (no suministrado). Al reproducir un disco DVD, asigne el valor “SI”... -
Page 12: Colocación De Los Altavoces
Puede disfrutar del sistema VES (Virtual Enhanced Surround) utilizando el método DCS (Digital Cinema Sound) desarrollado por Sony. El sistema VES crea el sonido envolvente utilizando solamente los altavoces frontales. Para obtener más información sobre el modo VES, consulte la página 32. - Page 13 Reproductor de CD/DVD S VIDEO COMPONENT VIDEO OUT LINE OUT R–AUDIO 1–L VIDEO 1 DIGITAL OUT OPTICAL COAXIAL PCM/DTS/ R–AUDIO 2–L VIDEO 2 DOLBY DIGITAL (AC-3) Receptor de AV DIGITAL TV/LD VIDEO 2 (amplificador) TV/LD IN AC-3 RF con entradas de DVD IN S-VIDEO S-VIDEO...
-
Page 14: Selección Del Idioma De Las Indicaciones En Pantalla
Selección del idioma de las indicaciones en pantalla Es posible seleccionar el idioma de la pantalla de ajustes, la pantalla del menú de control o los mensajes mostrados en pantalla. El ajuste de fábrica es “ESPAÑOL”. SET UP ENTER ?/>/.// Presione SET UP y seleccione “AJUSTE DE IDIOMA”... -
Page 15: Playing Discs
Playing Discs This chapter describes how to play a DVD/CD/VIDEO CD. Playing Discs Depending on the DVD or VIDEO CD, some operations may be different or restricted. Refer to the instructions supplied with your disc. 1/u (POWER) § · Connect headphones. Adjust the headphone volume. - Page 16 Playing Discs You can turn on the player using the remote Press 1/u (POWER) when the indicator above the 1/u (POWER) button on the front panel is lit in red. Notes • If you leave the player or the remote in pause or stop mode for 15 minutes, the screen saver image appears automatically.
-
Page 17: Playing At Various Speeds/Frame By Frame
Playing at Various Speeds/Frame by Frame Using the click shuttle and the JOG button/indicator on the player, you can play back a DVD/CD/VIDEO CD at various speeds or frame by frame. Each time you press JOG, it changes between shuttle mode and jog mode. To change the playback speed (Shuttle mode) Turn the click shuttle. -
Page 18: Resuming Playback From The Point Where You Stopped The Disc (Resume Play)
Playing at Various Speeds/Frame by Frame To play the disc frame by frame changing the playback speed (Jog mode) Press JOG. JOG lights up during jog mode. When you press JOG, the player pauses. Turn the click shuttle. Depending on the turning speed, the playback goes to frame-by-frame in the direction that the click shuttle is turned. -
Page 19: Using The Menu For Each Dvd
Notes • Resume Play may not be available depending on the DVD. • Resume Play is not available in Shuffle or Program Play mode. • Depending on where you stopped the disc, the player may resume playback from a different point. •... -
Page 20: Playing Video Cds With Pbc Functions (Pbc Playback)
Using the Menu for Each DVD Using the DVD menu Some DVDs allow you to select the disc contents using the menu. When you play these DVDs, you can select the language for the subtitles, the language for the sound, etc., using the DVD menu. -
Page 21: Using The Front Panel Display
Going back to the menu screen Press ˆRETURN, =, or +. When playing VIDEO CDs with PBC functions PBC playback starts automatically. To cancel PBC playback of a VIDEO CD with PBC functions and play the disc in Continuous Play mode There are two ways. -
Page 22: When Playing Back A Cd/Video Cd
Using the Front Panel Display Playing time and number of the current chapter Digital DISC TITLE CHAPTER 1 2 3 4 5 6 7 8 9 10 11 12 13 14 15 MPEG DTS NTSC TRACK INDEX VIDEO CD ANGLE HOUR REPEAT 1 PGM A–B... -
Page 23: Using Various Functions With The Control Menu
Using Various Functions with the Control Menu This chapter describes how to play discs in various modes and how to use the convenient features of the on- screen menu (Control Menu). Using the Control Menu Display Z Using the Control Menu display, you can select the start point, play in a order you like, change the angles, set for Digital Cinema Sound, etc. -
Page 24: Control Menu Display
Using the Control Menu Display Select the item you want using >/., then press / or ENTER. 1 2 ( 2 7 ) 1 8 ( 3 4 ) C 0 1 : 3 2 : 5 5 1 : SPANISH Items To select, press , then... -
Page 25: Control Menu Item List
Control Menu Item List (DVD only) (page 26) TITLE (DVD only) (page 26) CHAPTER (VIDEO CD/CD only) (page 26) TRACK (VIDEO CD/CD only) (page 26) INDEX (VIDEO CD during PBC playback only) SCENE (page 26) You can search by selecting the title/chapter/track/index. (page 27, 28) TIME/TEXT You can check the playing time and remaining time of the... -
Page 26: Searching For The Title/Chapter/Track/Index/Scene
Searching for the Title/Chapter/Track/Index/Scene You can search by selecting the title/chapter/track/ index/scene. Select “TITLE,” “ CHAPTER,” “ TRACK”, “INDEX” or “SCENE” after pressing DISPLAY. When you play back a DVD, “TITLE” and “CHAPTER” are displayed. When you play back a VIDEO CD/CD, “TRACK” and “INDEX”... -
Page 27: Checking The Playing Time And Remaining Time
Checking the Playing Time and Remaining Time You can check the playing time and remaining time of the current title/chapter/track and the total remaining time of the disc. Select “TIME/TEXT” after pressing DISPLAY. You can also check the DVD TEXT and CD TEXT. See page 28. -
Page 28: Checking The Information Of The Disc
Selecting a Start Point Using the Time Code Input the time code using the number buttons, then press ENTER. The player starts searching. To cancel the number, press CLEAR before pressing ENTER. To cancel inputting Press ˆRETURN. You can display “TIME/TEXT” display using the remote Press TIME/TEXT on the remote. -
Page 29: Changing The Sounds
Changing the Sounds Z With DVDs recorded with multilingual sounds, you can select the language you want while playing the DVD. With multiplex CDs or VIDEO CDs, you can select the sound from the right or left channel and listen to the sound of the selected channel through both the right and left speakers. -
Page 30: Displaying The Subtitles
Changing the Sounds The display examples are as follows: •PCM (stereo) C 0 1 : 3 2 : 5 5 1: SPANISH PROGRAM FORMAT PCM 48kHz 24bits To select, press , then ENTER •Dolby Surround 1: SPANISH PROGRAM FORMAT DOLBY DIGITAL 2/0 DOLBY SURROUND To select, press , then... -
Page 31: Changing The Angles
Changing the Angles Z With DVDs on which various angles (multi-angles) for a scene are recorded, you can change the angles. For example, while playing a scene of a train in motion, you can display the view from either the front of the train, the left window of the train or from the right window without having the train’s movement interrupted. -
Page 32: Setting For Digital Cinema Sound
Setting for Digital Cinema Sound Z Select the mode to enjoy multi channel surround sound such as Dolby Digital. Even if you connect only front speakers, Virtual Enhanced Surround lets you enjoy 3D sound by using 3D sound imaging to create virtual rear speakers from the sound of the front speakers (L, R) without using actual rear speakers. - Page 33 Notes • Each item of “VES” is effective on only discs on which a multi- channel soundtrack is recorded. Some discs do not have rear sound. In this case, you cannot get the 3D surround effect. • When you select an item, the sound cuts off for a moment. •...
-
Page 34: Creating Your Own Program (Program Play)
Creating Your Own Program (Program Play) You can play the contents of the disc in the order you want by arranging the order of the titles, chapters or tracks on the disc and create your own program. One program can be restored in the player and contain up to 99 titles, chapters and tracks. - Page 35 pWhen playing a VIDEO CD or CD Select the track you want to program. Total time of the programmed tracks 0:15:30 PROGRAM ALL CLEAR – – 1. TRACK 0 2 2. TRACK 3. TRACK – – 4. TRACK – – 5.
-
Page 36: Playing In Random Order (Shuffle Play)
Playing in Random Order (Shuffle Play) You can have the player “shuffle” titles or tracks and play them in a random order. The playing order may differ from the previous “shuffling.” Select “SHUFFLE” after pressing DISPLAY. When you do not select “OFF,” the indicator of the “SHUFFLE” lights in green. -
Page 37: Playing Repeatedly (Repeat Play)
Playing Repeatedly (Repeat Play) You can play all the titles/tracks on a disc or a single title/ chapter/track. In Shuffle or Program Play mode, the player repeats the titles or tracks in the shuffled or programmed order. You cannot do Repeat Play during PBC playback of VIDEO CDs (page 20). - Page 38 Repeating a Specific Portion (A˜B Repeat) Setting a portion for A˜B repeat Select “SET/” in “A-B REPEAT.” The A˜B REPEAT setting display appears. 1 2 ( 2 7 ) PLAY 1 8 ( 3 4 ) C 0 1 : 3 2 : 5 5 To select, press , then ENTER...
-
Page 39: Checking The Play Information
Checking the Play Information Z You can check the play information on the bit rate, bit rate history or the portion where the disc is played (layer). While playing a disc, the approximate bit rate of the playback picture is always displayed by Mbps (Mega bit per second) and the audio by kbps (Kilo bit per second). - Page 40 Checking the Play Information LAYER Indicates where the disc is played. When the DVD has dual-layer, the player indicates which layer is being read. For details on layer, see page 60 (DVD).
-
Page 41: Settings And Adjustments
Settings and Adjustments This chapter describes how to set and how to adjust using the on-screen SET UP menu. Most settings and adjustments are required to be set when you first use the player. This chapter also describes how to set the remote for controlling the TV or the AV receiver (amplifier). - Page 42 Using the Setup Display Select the main item you want using >/., and then press ENTER. The selected main item is highlighted. LANGUAGE SETUP OSD: DVD MENU: AUDIO: SUBTITLE: AUDIO FOLLOW Main item To set, press , then ENTER To quit, press SETUP SCREEN SETUP TV TYPE:...
-
Page 43: Setup Display Item List
Setup Display Item List Default settings are underlined. LANGUAGE SETUP (page 44) SPANISH PORTUGUESE ENGLISH FRENCH DVD MENU SPANISH PORTUGUESE ENGLISH FRENCH GERMAN ITALIAN DUTCH CHINESE JAPANESE DANISH SWEDISH FINNISH NORWEGIAN RUSSIAN OTHERS / AUDIO ORIGINAL (same as DVD MENU) AUDIO FOLLOW SUBTITLE (same as DVD MENU) -
Page 44: Setting The Language For Display And Sound (Language Setup)
Setting the Language for Display and Sound (LANGUAGE SETUP) Z Select “LANGUAGE SETUP” after pressing SET UP. “LANGUAGE SETUP” allows you to set various languages for on-screen display or sound. Default settings are underlined. Note When you select a language that is not recorded on the DVD, one of the recorded languages is automatically selected except for the “OSD.”... -
Page 45: Settings For Display (Screen Setup)
Settings for Display (SCREEN SETUP) Z Select “SCREEN SETUP” after pressing SET UP. “SCREEN SETUP” allows you to set the display according to the playback conditions. Default settings are underlined. SCREEN SETUP TV TYPE: SCREEN SAVER: BACKGROUND: JACKET PICTURE To set, press , then ENTER To quit, press... -
Page 46: Custom Settings (Custom Setup)
Custom Settings (CUSTOM SETUP) Z Select “CUSTOM SETUP” after pressing SET UP. “CUSTOM SETUP” allows you to set the playback conditions. Default settings are underlined. CUSTOM SETUP AUTO PLAY: DIMMER: PAUSE MODE: PARENTAL CONTROL To set, press , then ENTER To quit, press SETUP pAUTO PLAY... - Page 47 pWhen you have already entered a password The display for confirming the password appears. Skip Step 2. CUSTOM SETUP PARENTAL CONTROL Enter password, then press ENTER To return, press RETURN To cancel, press SETUP Enter a password in 4 digits using the number buttons, then press ENTER.
- Page 48 Custom Settings (CUSTOM SETUP) To return to the normal screen Press SET UP. To turn off the Parental Control function and play the DVD after entering your password Set “LEVEL” to “OFF” in Step 7, then press ·. To change the password 1 After Step 3, select “CHANGE PASSWORD”...
-
Page 49: Settings For Sound (Audio Setup)
Settings for Sound (AUDIO SETUP) Select “AUDIO SETUP” after pressing SET UP. “AUDIO SETUP” allows you to set the sound according to the playback conditions. Default settings are underlined. AUDIO SETUP AUDIO ATT: AUDIO DRC: TRACK SELECTION: DOWNMIX: DOLBY SURROUND DIGITAL OUT: DOLBY DIGITAL: DTS:... - Page 50 Settings for Sound (AUDIO SETUP) Setting for the Signal to the Digital Output When you select “ON,” set “DOLBY DIGITAL” and “DTS.” Switches the methods of outputting audio signals when you connect a digital component such as a receiver (amplifier) having a digital connector, an audio component having a built-in DTS decoder, a DAT or MD via the DIGITAL OUT OPTICAL or COAXIAL connector using an optical or coaxial digital connecting cord.
-
Page 51: Speaker Set Up
Notes on playing the DTS sound tracks on a DVD • No sounds will come out from the LINE OUT (AUDIO 1, 2) and PHONES connectors. • If the player is connected to an audio component lacking a built-in DTS decoder, do not set “DTS” in “DIGITAL OUT” to “ON”... - Page 52 Speaker Set Up Notes • When you select an item, the sound cuts off for a moment. • The cut off frequency for the subwoofer is fixed at 100 Hz. • Set the subwoofer’s cut off frequency as high as possible. •...
-
Page 53: Controlling The Tv Or The Av Receiver (Amplifier) With The Supplied Remote
Default setting is to control Sony TVs with the g mark. When you connect the player to a Sony AV receiver (amplifier), you can also set the input of the receiver (amplifier) to this player with the supplied remote . - Page 54 DVD•RECEIVER. Hold down 1/u (POWER), and enter your AV receiver’s manufacturer’s code (see the table below) using the number buttons. Then release 1/u (POWER). Manufacturer Code number Sony 91(default), 88, Denon 84, 85, 86 Kenwood 92, 93 Onkyo 81, 82, 83...
-
Page 55: Additional Information
If you experience any of the following difficulties while using the player, use this troubleshooting guide to help you remedy the problem. Should any problem persist, consult your nearest Sony dealer. Power The power is not turned on. / If the indicator above the 1/u (POWER) button is not lit, check that the AC power cord is connected securely. -
Page 56: Operation
Troubleshooting Sound There is no sound. / Check that the player is connected securely. / The audio connecting cord is damaged. Replace it with a new one. / Make sure you connect the player to the audio input connectors on the receiver (amplifier) (page 10). - Page 57 / In the set up display, “DIMMER” in “CUSTOM SETUP” is set to “OFF.” Set “DIMMER” to “BRIGHT” or “DARK” (page 46). The disc tray does not open and “LOCKED” is displayed on the front panel display. / Contact your Sony dealer or local authorized Sony service facility.
-
Page 58: Self-Diagnosis Function
•The disc is not inserted correctly. /Open the disc tray and insert the disc correctly. •To prevent the player from malfunctioning, the self-diagnosis function has worked. /When you contact your Sony dealer or local authorized Sony service facility, give the 5-character service number. (example: E:61:10) -
Page 59: Specifications
Specifications CD/DVD player Laser Semiconductor laser Signal format system NTSC Audio characteristics Frequency response DVD (PCM 96 kHz): 2 Hz to 44 kHz (±1 dB)* DVD (PCM 48 kHz): 2 Hz to 22 kHz (±0.5 CD: 2 Hz to 20 kHz (±0.5 dB) Signal-to-noise ratio More than 115 dB (LINE OUT (AUDIO 1, 2) connectors only) -
Page 60: Glossary
Digital Cinema Sound (DCS) (page 32) The general name of technology that Sony developed to enjoy the surround sound in a home. To enjoy the surround sound of a movie theater in the comfort of your own home, it simulates the sound not in a concert hall as usual but in a movie editing studio. - Page 61 Track (page 5) Sections of a picture or a music piece on a CD or VIDEO CD. Each track is assigned a track number enabling you to locate the track you want. VIDEO CD (page 4) A compact disc that contains moving pictures. The picture data uses the MPEG 1 format, one of the worldwide standards of digital compression technology.
-
Page 62: Language Code List
Language Code List For details, see page 30, 44. Code Language Code Language 1027 Afar 1186 Scots Gaelic 1194 Galician 1028 Abkhazian 1032 Afrikaans 1196 Guarani 1203 Gujarati 1039 Amharic 1209 Hausa 1044 Arabic 1045 Assamese 1217 Hindi 1051 Aymara 1226 Croatian 1229... -
Page 63: Index To Parts And Controls
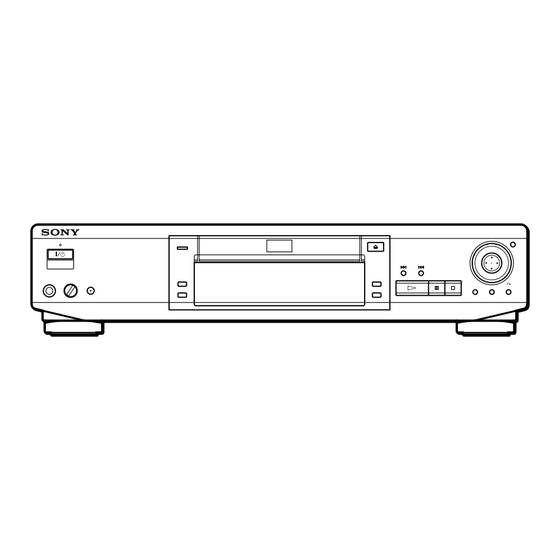
Index to Parts and Controls Refer to the pages indicated in parentheses for details. Front Panel !™ !£ 1 g (remote sensor) (7) Accepts the remote control signals. 2 1/u (POWER) button and indicator (15) Turns on and off the power of the player. 3 VES button/indicator (33) Selects the item of “VES.”... -
Page 64: Rear Panel
Index to Parts and Controls Rear Panel LINE OUT S VIDEO COMPONENT VIDEO OUT R–AUDIO 1–L VIDEO 1 DIGITAL OUT OPTICAL COAXIAL PCM/DTS/ R–AUDIO 2–L VIDEO 2 DOLBY DIGITAL (AC-3) 1 DIGITAL OUT (OPTICAL) connector (11) Connects to an audio component using the optical digital connecting cord. - Page 65 Remote !º !¡ !™ !£ !¢ !∞ !§ 1 TV/DVD•RECEIVER switch (53) Selects to control the player, the TV or the receiver (amplifier) with the remote. 2 6OPEN/CLOSE button (15) Opens or closes the disc tray. 3 Number buttons Select the items or settings. 4 CLEAR button (35, 36, 37) Press to return to the Continuous play, etc.
-
Page 66: Index
Index Numerics 4:3 LETTER BOX 45 4:3 PAN SCAN 45 4:3 WIDE MODE 45 5.1 Channel Surround 12, 32 16:9 45 A–B REPEAT 37 A˜B Repeat 37 Angle 31 ANGLE 31 AUDIO 29, 44 AUDIO ATT 49 AUDIO DRC 49 AUDIO SETUP 49 AUTO PLAY 46 BACKGROUND 45... - Page 68 Si el enchufe de CA de la unidad no encaja en la toma mural, fíjele el adaptador de enchufe de CA suministrado. ¡Bienvenido! Gracias por adquirir el reproductor de CD/DVD de Sony. Antes de utilizar la unidad, lea este manual atentamente y consérvelo para realizar consultas en el futuro.
- Page 69 Í NDICE Acerca de este manual 4 Este reproductor puede reproducir los siguientes discos 4 Precauciones 6 Notas sobre los discos 6 Procedimientos iniciales 7 Desembalaje 7 Conexiones del TV 8 Conexión del receptor (amplificador) 10 Conexiones para el sonido envolvente de 5,1 canales 12 Selección del idioma de las indicaciones en pantalla 14...
-
Page 70: Acerca De Este Manual
Audio 12 cm 8 cm 8 cm (CD single) 74 min. 20 min. 20 min. El logotipo “DVD VIDEO” es una marca comercial. Código de MODEL NO. DVP–8306 región CD/DVD PLAYER AC 110V 60Hz SONY CORPORATION MADE IN JAPAN 3-444-464-01... -
Page 71: Estructura De Los Discos
Estructura de los discos • Título Sección de mayor extensión de imagen o sonido de un disco DVD. Por ejemplo, una película en el caso de software de video y un álbum musical en el caso de software de audio. A cada título se le asigna un número para facilitar su localización. -
Page 72: Notas Sobre Los Discos
Si desea r ealizar alguna consulta o solucionar algún problema r efer entes al r epr oductor , póngase en contacto con el pr oveedor Sony más próximo. rama líquido AVISO IMPORTANTE Precaución: El r epr oductor de DVD es capaz de mantener imágenes fijas de video o la imagen de la... - Page 73 Procedimientos iniciales En esta sección se describe cómo conectar el reproductor de CD/DVD a un TV (con tomas de entrada de audio/video) y/o a un receptor de AV (amplificador). No es posible conectar este reproductor a un TV que no disponga de conector de entrada de video.
-
Page 74: Cables Necesarios
Conexiones del TV Esta conexión sirve para escuchar el sonido a través de los altavoces del TV (2 canales, izquierdo y derecho). Consulte las instrucciones suministradas con el componente que desee conectar. Reproductor de CD/DVD S VIDEO LINE OUT COMPONENT VIDEO OUT R–AUDIO 1–L VIDEO 1 DIGITAL OUT... - Page 75 Si conecta el reproductor a un monitor o proyector que dispone de conectores de entrada de video de componente compatibles con las señales de salida de los conectores COMPONENT VIDEO OUT (Y, P /B-Y, P /R-Y) del reproductor Conecte el componente a través de los conectores COMPONENT VIDEO OUT mediante tres cables de conexión de video (no suministrados) del mismo tipo.
- Page 76 Conexión del receptor (amplificador) Esta conexión sirve para escuchar el sonido a través de altavoces conectados a un receptor (como un amplificador estéreo integrado, un receptor con decodificador Dolby Pro Logic incorporado, etc.). Consulte las instrucciones suministradas con el componente que desee conectar. Podrá...
- Page 77 Si cuenta con un componente digital, por ejemplo un receptor (amplificador) con conector digital, DAT o MD Conecte el componente a través del conector DIGITAL OUT OPTICAL o COAXIAL utilizando un cable de conexión digital óptico o coaxial (no suministrado). Al reproducir un disco DVD, asigne el valor “SI”...
- Page 78 Puede disfrutar del sistema VES (Virtual Enhanced Surround) utilizando el método DCS (Digital Cinema Sound) desarrollado por Sony. El sistema VES crea el sonido envolvente utilizando solamente los altavoces frontales. Para obtener más información sobre el modo VES, consulte la página 32.
- Page 79 Reproductor de CD/DVD S VIDEO COMPONENT VIDEO OUT LINE OUT R–AUDIO 1–L VIDEO 1 DIGITAL OUT OPTICAL COAXIAL PCM/DTS/ R–AUDIO 2–L VIDEO 2 DOLBY DIGITAL (AC-3) Receptor de AV DIGITAL TV/LD VIDEO 2 (amplificador) TV/LD IN AC-3 RF con entradas de DVD IN S-VIDEO S-VIDEO...
- Page 80 Selección del idioma de las indicaciones en pantalla Es posible seleccionar el idioma de la pantalla de ajustes, la pantalla del menú de control o los mensajes mostrados en pantalla. El ajuste de fábrica es “ESPAÑOL”. SET UP ENTER ?/>/.// Presione SET UP y seleccione “AJUSTE DE IDIOMA”...
-
Page 81: Reproducción De Discos
Reproducción de discos En este capítulo se describe cómo reproducir un disco DVD/CD/ VIDEO CD. Reproducción de discos Determinadas operaciones de algunos tipos de discos DVD o VIDEO CD pueden ser distintas o estar limitadas. Consulte las instrucciones suministradas con el disco. - Page 82 Reproducción de discos Es posible encender el reproductor con el control remoto Presione 1/u (POWER) cuando el indicador situado encima del botón 1/u (POWER) esté iluminado en color rojo. Notas • Si deja el reproductor o el control remoto en el modo de pausa o de parada durante 15 minutos, aparece automáticamente la imagen de protección de pantalla.
- Page 83 Reproducción a distintas velocidades/fotograma por fotograma Con el conmutador lanzadera y el botón/indicador JOG del reproductor, es posible reproducir un DVD/CD/ VIDEO CD a distintas velocidades o fotograma por fotograma. Cada vez que presione JOG, cambiará entre el modo de lanzadera y el de avance. Para cambiar la velocidad de reproducción (modo de lanzadera) Gire el conmutador lanzadera.
-
Page 84: Donde Detuvo El Disco (Reanudación De)
Reproducción a distintas velocidades/ fotograma por fotograma Para reproducir el disco fotograma por fotograma cambiando la velocidad de reproducción (modo de avance) Presione JOG. JOG se ilumina durante el modo de avance. Al presionar JOG, el reproductor realiza una pausa. Gire el conmutador lanzadera. -
Page 85: Uso Del Menú Para Cada Disco Dvd
Notas • En algunos discos DVD, es posible que la reanudación de reproducción no esté disponible. • La reanudación de reproducción no está disponible en los modos de reproducción aleatoria y de programa. • Según el punto donde haya detenido el disco, es posible que el reproductor reanude la reproducción desde un punto distinto. - Page 86 Uso del menú para cada disco DVD Uso del menú DVD Ciertos discos DVD permiten seleccionar el contenido del disco mediante el menú. Al reproducir dichos discos, puede seleccionar el idioma de los subtítulos, el del sonido, etc., mediante el menú DVD. Presione DVD MENU.
-
Page 87: Uso Del Visor Del Panel Frontal
Para volver a la pantalla de menús Presione ˆRETURN, =, o +. Al reproducir discos VIDEO CD con funciones PBC La reproducción PBC se inicia de forma automática. Para cancelar la reproducción PBC de un disco VIDEO CD con funciones PBC y reproducir el disco en el modo de reproducción continua Existen dos maneras. - Page 88 Uso del visor del panel frontal Tiempo de reproducción y número del capítulo actual Digital DISC TITLE CHAPTER 1 2 3 4 5 6 7 8 9 10 11 12 13 14 15 MPEG DTS NTSC TRACK INDEX VIDEO CD ANGLE HOUR REPEAT 1...
- Page 89 Uso de distintas funciones con el menú de control En este capítulo se describe cómo reproducir discos en diferentes modos y cómo utilizar las cómodas funciones del menú en pantalla (menú de control). Uso de la pantalla del menú de control Z Con la pantalla del menú...
-
Page 90: Uso De La Pantalla Del Menú De Control
Uso de la pantalla del menú de control Seleccione el elemento que desee mediante >/. y, a continuación, presione / o ENTER. 1 2 ( 2 7 ) 1 8 ( 3 4 ) C 0 1 : 3 2 : 5 5 1: ESPAÑOL Elementos Seleccionar:... -
Page 91: Lista De Elementos Del Menú De Control
Lista de elementos del menú de control (sólo discos DVD) (página 26) TITLE (sólo discos DVD) (página 26) CHAPTER (sólo VIDEO CD/CD) (página 26) TRACK (sólo VIDEO CD/CD) (página 26) INDEX (sólo VIDEO CD durante la reproducción SCENE PBC) (página 26) Podrá... - Page 92 Búsqueda del título/capítulo/pista/índice/escena Es posible realizar búsquedas seleccionando el título/ capítulo/pista/índice/escena. Seleccione “TITLE”, “CHAPTER”, “TRACK”, “INDEX” o “SCENE” después de presionar DISPLAY. Al reproducir un disco DVD, aparecen “TITLE” y “CHAPTER”. Al reproducir un disco VIDEO CD/CD, aparecen “TRACK” e “INDEX”. Al reproducir un disco VIDEO CD con funciones PBC, aparece “SCENE”.
- Page 93 Comprobación del tiempo de reproducción y tiempo restante Z Es posible comprobar el tiempo de reproducción y tiempo restante del título/capítulo/pista y el tiempo total restante en el disco. Seleccione “TIME/TEXT” después de presionar DISPLAY. También es posible comprobar la información DVD TEXT y CD TEXT.
-
Page 94: Comprobación De La Información Sobre El Disco
Selección de un punto inicial mediante el código de tiempo Introduzca el código de tiempo mediante los botones numéricos y presione ENTER. El reproductor inicia la búsqueda. Para cancelar el número, presione CLEAR antes de presionar ENTER. Para cancelar la entrada Presione ˆRETURN. - Page 95 Cambio del sonido Z En los discos DVD grabados con sonido multilingüe, puede seleccionar el idioma que desee mientras reproduce el disco. Con los CD o VIDEO CD de tipo multiplex, es posible seleccionar el sonido del canal derecho o izquierdo y escuchar el sonido del canal seleccionado a través de los altavoces derechos e izquierdos.
-
Page 96: Cambio Del Sonido
Cambio del sonido A continuación se ofrecen ejemplos de visualización: •PCM (estéreo) 1: ESPAÑOL PROGRAM FORMAT PCM 48kHz 24bits Seleccionar: ENTER •Dolby Surround 1: ESPAÑOL PROGRAM FORMAT DOLBY DIGITAL 2/0 DOLBY SURROUND Seleccionar: ENTER •Dolby Digital de 5,1 canales 1: ESPAÑOL PROGRAM FORMAT DOLBY DIGITAL 3/2.1 Seleccionar:... - Page 97 Cambio de los ángulos Z Con los discos DVD que tienen múltiples ángulos grabados para una escena, es posible cambiar los ángulos. Por ejemplo, durante la reproducción de una escena de un tren en movimiento, es posible mostrar la vista desde la cabeza del tren, la ventana izquierda o la ventana derecha sin interrumpir su movimiento.
- Page 98 Ajuste para Digital Cinema Sound Z Seleccione el modo para disfrutar de sonido envolvente multicanal, como Dolby Digital. Incluso si sólo conecta altavoces frontales, Virtual Enhanced Surround le permite disfrutar de un sonido 3D mediante imágenes acústicas 3D para crear altavoces posteriores virtuales a partir del sonido de los altavoces frontales (L, R) sin emplear altavoces posteriores reales.
- Page 99 Notas • Los elementos de “VES” sólo tienen efecto en los discos que tienen grabada una pista de sonido multicanal. Algunos discos no cuentan con sonido posterior. En este caso, no es posible obtener el efecto de sonido envolvente 3D. •...
-
Page 100: Creación De Un Programa Propio (Reproducción De)
Creación de un programa propio (reproducción de programa) Z Es posible reproducir el contenido del disco en el orden que desee, cambiando el orden de los títulos, capítulos o pistas del disco para crear un programa propio. Un programa puede restaurarse en el reproductor y puede contener hasta 99 títulos, capítulos y pistas. - Page 101 pAl reproducir un VIDEO CD o CD Seleccione la pista que desee programar. Tiempo total de las pistas programadas PROGRAMA 0:15:30 BORRAR TODO – – 1. PISTA 0 2 2. PISTA 3. PISTA – – 4. PISTA – – 5. PISTA – – 6.
-
Page 102: Reproducción En Orden Aleatorio (Reproducción Aleatoria)
Reproducción en orden aleatorio (reproducción aleatoria) Es posible hacer que el reproductor establezca el orden de los títulos o pistas y los reproduzca en orden aleatorio. El orden de reproducción puede variar con respecto a la vez anterior. Seleccione “SHUFFLE” después de presionar DISPLAY. Si no selecciona “OFF”, el indicador de “SHUFFLE”... -
Page 103: Reproducción Repetida
Reproducción repetida Es posible reproducir de forma repetida todos los títulos/ pistas de un disco o un solo título/capítulo/pista. En el modo de reproducción aleatoria o de programa, el reproductor repite los títulos o pistas en el orden programado o en un orden aleatorio. No es posible realizar la reproducción repetida durante la reproducción PBC de discos VIDEO CD (página 20). - Page 104 Repetición de una parte específica (Repetición A˜B) Especificación de una parte del disco para la repetición A˜B Seleccione “AJUSTAR/” dentro de “A-B REPEAT”. Aparece la indicación del ajuste A˜B REPETICION. 1 2 ( 2 7 ) PLAY 1 8 ( 3 4 ) C 0 1 : 3 2 : 5 5 AJUSTAR AJUSTAR...
- Page 105 Comprobación de la información de reproducción Z Es posible consultar los datos de velocidad de bits, historial de velocidad de bits o la parte donde se reproduce el disco (capa). Al reproducir un disco, la velocidad de bits aproximada de la imagen reproducida siempre se muestra en Mbps (megabits por segundo) y el audio en kbps (kilobits por segundo).
-
Page 106: Comprobación De La Información De Reproducción
Comprobación de la información de reproducción LAYER (capa) Indica dónde se reproduce el disco. Si el DVD tiene dos capas, el reproductor indica cuál se está leyendo. Para obtener más información sobre las capas, consulte la página 60 (DVD). -
Page 107: Uso De La Pantalla De Ajustes
Ajustes En este capítulo se describe cómo realizar ajustes mediante la pantalla de ajustes. La mayoría de los ajustes deben realizarse al utilizar el reproductor por primera vez. En este capítulo también se describe cómo ajustar el control remoto para controlar el TV o receptor de AV (amplificador). - Page 108 Uso de la pantalla de ajustes Seleccione el elemento principal que desee mediante >/. y, a continuación, presione ENTER. El elemento principal seleccionado aparece resaltado. AJUSTE DE IDIOMA MENU PANTALLA: MENU DVD: AUDIO: SUBTITULO: Elemento principal Para ajustar, oprima .Para salir, oprima ENTER SETUP AJUSTE PANTALLA...
-
Page 109: Lista De Elementos De La Pantalla De Ajustes
Lista de elementos de la pantalla de ajustes Los ajustes de fábrica aparecen subrayados. AJUSTE DE IDIOMA (página 44) MENU PANTALLA ESPAÑOL PORTUGUES INGLES FRANCES MENU DVD ESPAÑOL PORTUGUES INGLES FRANCES ALEMAN ITALIANO HOLANDES CHINO JAPONES DINAMARQUÉS SUECO FINES NORUEGO RUSO OTROS / AUDIO... -
Page 110: Ajuste Del Idioma De Las Indicaciones Y El Sonido
Ajuste del idioma de las indicaciones y el sonido (AJUSTE DE IDIOMA) Z Seleccione “AJUSTE DE IDIOMA” después de presionar SET UP. “AJUSTE DE IDIOMA” permite establecer varios idiomas para las indicaciones en pantalla o el sonido. Los ajustes de fábrica aparecen subrayados. Nota Si selecciona un idioma que no está... - Page 111 Ajustes de las indicaciones (AJUSTE PANTALLA) Seleccione “AJUSTE PANTALLA” después de presionar SET UP. “AJUSTE PANTALLA” permite ajustar la pantalla según las condiciones de reproducción. Los ajustes de fábrica aparecen subrayados. AJUSTE PANTALLA TIPO TV: 4:3 LETTER BOX PROTECTOR PANTALLA: FONDO: Para ajustar, oprima .Para salir, oprima...
- Page 112 Ajustes personalizados (AJUSTE PERSONALIZADO) Seleccione “AJUSTE PERSONALIZADO” después de presionar SET UP. “AJUSTE PERSONALIZADO” permite definir las condiciones de reproducción. Los ajustes de fábrica aparecen subrayados. AJUSTE PERSONALIZADO REPRODUCCION AUTO: ATENUADOR: MODO PAUSA: CONTROL DE BLOQUEO Para ajustar, oprima .Para salir, oprima ENTER SETUP pREPRODUCCION AUTO...
- Page 113 Si ya ha introducido una contraseña Aparece la indicación para confirmar la contraseña. Omita el paso 2. AJUSTE PERSONALIZADO CONTROL DE BLOQUEO Ingrese contraseña y oprima ENTER Para volver, oprima RETURN Para cancelar, oprima SETUP Introduzca una contraseña de 4 dígitos mediante los botones numéricos y presione ENTER.
- Page 114 Ajustes personalizados (AJUSTE PERSONALIZADO) Para desactivar la función de control de limitación y reproducir el disco DVD tras introducir la contraseña Ajuste “NIVEL” en “NO” en el paso 7 y presione ·. Para cambiar la contraseña 1 Después del paso 3, seleccione “CAMBIAR CONTRASEÑA”...
-
Page 115: Ajustes Del Sonido (Ajuste Audio)
Ajustes del sonido (AJUSTE AUDIO) Seleccione “AJUSTE AUDIO” después de presionar SET “AJUSTE AUDIO” permite ajustar el sonido de acuerdo con las condiciones de reproducción. Los ajustes de fábrica aparecen subrayados. AJUSTE AUDIO ATENUACION DE AUDIO: AUDIO DRC: SELECCION PISTA MEZCLA: DOLBY SURROUND SALIDA DIGITAL:... - Page 116 Ajustes del sonido (AJUSTE AUDIO) Notas • Si reproduce las pistas de sonido con una frecuencia de muestreo de 96 kHz, las señales de salida de DIGITAL OUT (OPTICAL, COAXIAL) se convierten a 48 kHz (frecuencia de muestreo). La frecuencia de muestreo sólo permanece en 96 kHz cuando las señales se envían a través de los conectores LINE OUT (AUDIO 1, 2).
-
Page 117: Ajuste De Los Altavoces
Notas sobre la reproducción de pistas de sonido DTS de un CD • No reproduzca pistas de sonido DTS sin conectar antes el reproductor a un componente de audio con un decodificador DTS incorporado. El reproductor enviará la señal DTS a través de los conectores DIGITAL OUT OPTICAL y COAXIAL incluso si “DTS”... - Page 118 Ajuste de los altavoces Notas • Al seleccionar un elemento, el sonido se interrumpe de forma momentánea. • La frecuencia de corte del altavoz potenciador de graves está fijado en 100 Hz. • Ajuste la frecuencia de corte más alta posible para el altavoz potenciador de graves.
- Page 119 • Si introduce un número de código nuevo, se borrará el número introducido anteriormente. • Al sustituir las pilas del control remoto, el número de código se vuelve a poner automáticamente en 01 (Sony). Vuelva a ajustar el código apropiado. Fabricante Sony (ajuste de fábrica)
- Page 120 AV (consulte la siguiente tabla) con los botones numéricos. A continuación, suelte 1/u (POWER). Fabricante Número de código 91(ajuste de fábrica), 88, 89 Sony 84, 85, 86 Denon 92, 93 Kenwood 81, 82, 83...
-
Page 121: Información Adicional
Si le surge alguno de los siguientes problemas mientras emplea el reproductor, utilice esta guía de solución de problemas para resolverlo. Si no se soluciona, póngase en contacto con el proveedor Sony más próximo. Alimentación La alimentación no se activa. - Page 122 Solución de problemas Sonido Ausencia de sonido. / Compruebe que el reproductor está firmemente conectado. / El cable de conexión de audio está dañado. Sustitúyalo por uno nuevo. / Compruebe que conecta el reproductor a los conectores de entrada de audio del receptor (amplificador) (página 10).
- Page 123 Ajuste “ATENUADOR” en “BRILLO” u “OSCURO” (página 46). La bandeja de discos no se abre y aparece “LOCKED” en el visor del panel frontal. / Póngase en contacto con su proveedor Sony o con un centro de servicio técnico Sony autorizado.
-
Page 124: Función De Autodiagnóstico
•Para evitar fallos de funcionamiento del reproductor, se ha activado la función de autodiagnóstico. /Cuando se ponga en contacto con su proveedor Sony o con el centro de servicio técnico local autorizado Sony, comuníquele el número de servicio de 5 caracteres (por... -
Page 125: Especificaciones
Especificaciones Reproductor de CD/DVD Láser Láser semiconductor Sistema de formato de señal NTSC Características de audio Respuesta de frecuencia DVD (PCM 96 kHz): 2 Hz a 44 kHz (±1 dB)* DVD (PCM 48 kHz): 2 Hz a 22 kHz (±0,5 CD: 2 Hz a 20 kHz (±0,5 dB) Relación señal-ruido Superior a 115 dB (sólo conectores LINE... - Page 126 Digital Cinema Sound (DCS) (página 32) El nombre general de una tecnología desarrollada por Sony para poder disfrutar del sonido envolvente en el hogar. Para que pueda gozar del sonido envolvente de una sala de cine en la comodidad de su propio hogar, DCS simula el sonido de un estudio cinematográfico en lugar...
- Page 127 Función multilingüe (páginas 14, 30, 44) Ciertos discos DVD disponen de varios idiomas para el sonido o los subtítulos de una imagen. Pista (página 5) Secciones de una imagen o pieza musical en un CD o disco VIDEO CD. A cada pista se le asigna un número para facilitar su localización.
-
Page 128: Lista De Códigos De Idiomas
Lista de códigos de idiomas Para más información, consulte las páginas 30, 44. Código Idioma Código Idioma 1027 Afar 1186 Scots Gaelic 1194 Galician 1028 Abkhazian 1032 Afrikaans 1196 Guarani 1203 Gujarati 1039 Amharic 1209 Hausa 1044 Arabic 1045 Assamese 1217 Hindi 1051... -
Page 129: Ndice De Componentes Y Controles
Índice de componentes y controles Para obtener más información, consulte las páginas que se indican entre paréntesis. Panel frontal !™ !£ 1 g (sensor remoto) (7) Acepta las señales de control remoto. 2 Botón e indicador 1/u (POWER) (15) Enciende y apaga el reproductor. 3 Botón/indicador VES (33) Selecciona el elemento de “VES”. -
Page 130: Panel Posterior
Índice de componentes y controles Panel posterior LINE OUT S VIDEO COMPONENT VIDEO OUT R–AUDIO 1–L VIDEO 1 DIGITAL OUT OPTICAL COAXIAL PCM/DTS/ R–AUDIO 2–L VIDEO 2 DOLBY DIGITAL (AC-3) 1 Conector DIGITAL OUT (OPTICAL) (11) Se conecta a un equipo de audio mediante el cable de conexión digital óptico. - Page 131 Control remoto !º !¡ !™ !£ !¢ !∞ !§ 1 Conmutador TV/DVD•RECEIVER (53) Permite seleccionar si desea controlar el reproductor, el TV o el receptor (amplificador) con el control remoto. 2 Botón 6OPEN/CLOSE (15) Abre o cierra la bandeja de discos. 3 Botones numéricos Seleccionan los elementos o ajustes.
-
Page 132: Ndice Alfabético
Discos que pueden utilizarse 4 DISTANCIA 52 Dolby Digital 12, 29 DTS 50 DVD 15 DVD MENU 20, 44 Escena 5 Sony Corporation Printed in Japan F, G, H FONDO 45 Funciones PBC 20 I, J, K Indicación en pantalla Pantalla de ajustes 41 Pantalla del menú...
Need help?
Do you have a question about the DVP-S530D and is the answer not in the manual?
Questions and answers