Bresser NightExplorer 80/400 Instruction Manual
Hide thumbs
Also See for NightExplorer 80/400:
- Operating instructions manual (36 pages) ,
- Instruction manual (28 pages)
Table of Contents
Advertisement
Quick Links
Advertisement
Table of Contents

Subscribe to Our Youtube Channel
Related Manuals for Bresser NightExplorer 80/400


Summary of Contents for Bresser NightExplorer 80/400
- Page 1 Telescope · NightExplorer 80/400 Instruction manual...
- Page 2 Entonces visite nuestra página web utilizando el siguiente enlace (código QR) para ver las versiones disponibles. Desidera ricevere informazioni esaustive su questo prodotto in una lingua specifica? Venga a visitare il nostro sito Web al seguente link (codice QR Code) per conoscere le versioni disponibili. www.bresser.de/download/9621800 GARANTIE · WARRANTY · GARANTÍA · GARANZIA www.bresser.de/warranty_terms...
-
Page 3: Table Of Contents
Contents 1 Imprint ................................ 4 2 Validity note .............................. 4 3 About this Instruction Manual........................ 4 4 Intended Use .............................. 4 5 General safety instructions ........................... 5 6 Parts overview & scope of delivery ...................... 6 7 Site location .............................. 7 8 Setting up the tripod ............................ 7 9 Moving the tripod head .......................... 7 10 Mounting the OTA on the tripod ........................ 8 11 Installing accessories ............................ 8... -
Page 4: Imprint
Errors and technical changes excepted. © 2021 Bresser GmbH All rights reserved. The reproduction of this documentation - even in extracts - in any form (e.g. photocopy, print, etc.) as well as the use and distribution by means of electronic systems (e.g. -
Page 5: General Safety Instructions
5 General safety instructions DANGER Risk of blindness! Never look directly at, or near the sun with this device. There is a RISK OF BLINDNESS! DANGER Danger of suffocation! Improper use of this product may result in suffocation, especially for children. It is therefore imperative that you observe the following safety information. -
Page 6: Parts Overview & Scope Of Delivery
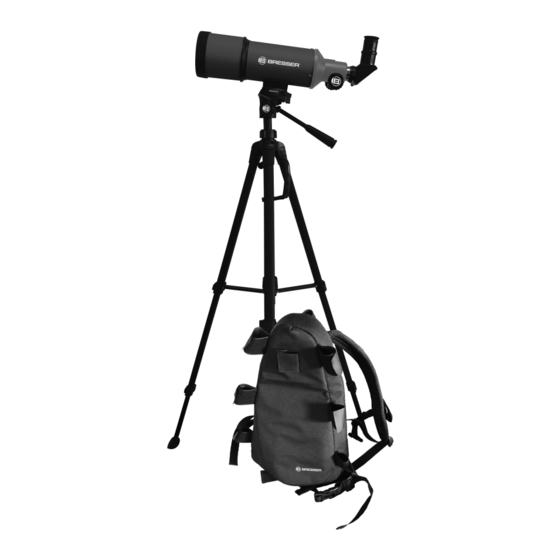
6 Parts overview & scope of delivery SR-4mm H-12.5mm H-20mm PUSH Illustration 1: All parts of the telescope 1 Dew protection cap 2 Objective lens (Inside) 3 Optical Tubes 4 Eyepiece holder 5 Fixing screw (Eyepiece connection) 6 Dust cap (Eyepiece connection) 7 Eyepieces 8 Fixation screw (Diagonal mirror) 9 Diagonal mirror... -
Page 7: Site Location
29 Tripod leg lower part 30 Lower locking clip 31 Tripod leg center section 32 Upper locking clip 33 Tripod cross 34 Tripod leg upper part 35 Mounting base 36 Dust cap (lens) 37 Mounting ring 38 Fixing screw (mounting ring) 39 Bracket 40 Guide rail 41 Fixing screw (bracket) -
Page 8: Mounting The Ota On The Tripod
6. Tilt the tilt plate to the right and tighten the fixing screw by hand to set the tilt plate in current posi- tion. 10 Mounting the OTA on the tripod NOTICE Save the OTA when installing it. Save the OTA always with one hand when installing it! It can cause serious damage if the device is falling down. -
Page 9: Using Eyepieces
12 Using eyepieces The magnification depends on the focal length of the telescope and the eyepiece. By changing the eyepieces, the magnification can be varied. Formula for calculating the magnification: Focal length telescope : Focal length eyepiece = Magnification Example calculation: 400 mm : 20 mm = 20x Three eyepieces are included with this telescope. -
Page 10: Before Starting An Observation
5. If necessary, correct the position of the smartphone* until the desired image section is displayed. To do this, loosen the fixing screw (S6) on the underside of the holder and move the smartphone up or down on the rail in the holder. 6. -
Page 11: Disposal
20 Warranty The regular warranty period is 5 years and starts on the day of purchase. For full warranty terms and services, please visit www.bresser.de/warranty_terms. 11 / 16... - Page 15 (de preferencia por Telephone*: +44 1342 837 098 e-mail). BRESSER UK Ltd e-mail: servicio.iberia@bresser-iberia.es Customer Support Teléfono*: +34 91 67972 69 Suite 3G, Eden House BRESSER Iberia SLU...
- Page 16 Bresser GmbH Bresser UK Ltd. Gutenbergstraße 2 Suite 3G, Eden House 46414 Rhede · Germany Enterprise Way, Edenbridge, Kent TN8 6Hf, Great Britain www.bresser.de @BresserEurope �� ...
Need help?
Do you have a question about the NightExplorer 80/400 and is the answer not in the manual?
Questions and answers