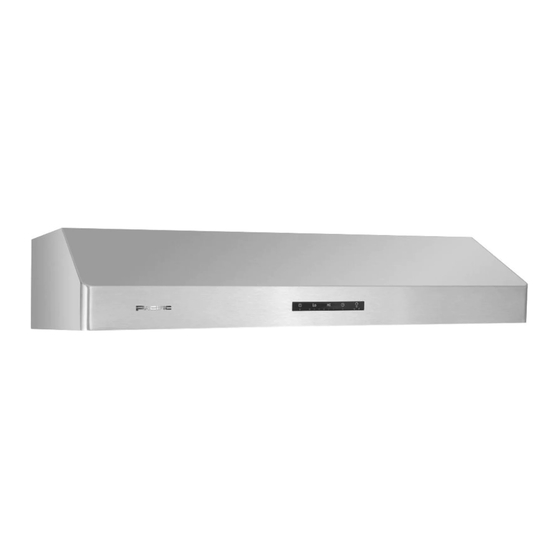
Summary of Contents for Pacific PR-6830AS
- Page 1 PR-6830AS / PR-6836AS Model number Serial Number Read all instructions before operating the range hood. XP022577(1)
- Page 3 IMPORTANT SAFETY NOTICE READ AND SAVE THESE INSTRUCTIONS WARNING TO REDUCE THE RISK OF FIRE OR ELECTRIC SHOCK, DO NOT USE THIS FAN WITH ANY SOLID-STATE CONTROL DEVICE. WARNING TO REDUCE THE RISK OF FIRE, ELECTRIC SHOCK, OR INJURY TO PERSONS, OBSERVE THE FOLLOWING: a) Use this unit only in the manner intended by the manufacturer, if you have questions, contact the manufacturer.
- Page 4 IMPORTANT SAFETY NOTICE a) Installation work and electrical wiring must be done by qualified person(s) in accordance with all applicable codes and standards. Including fire-rated construction. b) Sufficient air is needed for power combustion and exhausting of gases through the flue (chimney) of fuel burning equipment to prevent back-drafting.
-
Page 5: Table Of Contents
Table of Content I. Product Functions/Performance Specification Chart ..1 II. Parts Supplied ..............2 III. Installation Guidelines ............3 IV. Installation Procedures ............4 V. Operating Instructions ............5 VI. Surface Maintenance ............6 VII. Remarks ................7 VIII. Troubleshooting ..............8... -
Page 6: Product Functions/Performance Specification Chart
1. Delay off Button. 2. One touch On/Off Button. 3. Micro-Computer Programmed functions. 4. Push Button: Power, Low Fan Speed, High Fan Speed, Delay-off, Light. B. Specification Chart Models PR-6830AS PR-6836AS Net Weight(lbs) Measurement(inches) (W)29-3/4 x(D)6-1/2 x(H)20-1/2 (W)35-11/16 x(D)6-1/2 x(H)20-1/2 Maximum Voltage 120 V –... -
Page 7: Parts Supplied
II. Parts Supplied (1) Collar (1) Hood body (1) Switch assembly (1) Housing (1) Oil Cup (1) Bottom panel (1) Bottom Filters (1) LED light (1) Hardware Packet HARDWARE PACKAGE CONTENTS (For Canada) TYPE TYPE DESCRIPTION Q’ty DESCRIPTION Q’ty P3 Wire nuts 3/16 x 1/4"... -
Page 8: Installation Guidelines
III. Installation Guidelines 1. Surrounding Environment (Fig.1) Check the surrounding of range hood. If there are too many windows or doors nearby, it is advisable to close the windows and doors before turning on the range hood to prevent the external convection and affecting the ventilation. -
Page 9: Installation Procedures
IV. Installation Procedures 1. Prepare duct location on hood (vertical). 2. Measure and cut out duct and electrical openings in cabinet or wall to match up with the hood. Ducting and electrical Duct cover dimensions can be found on Page 1. mounting bracket Note: Makesure duct opening is large... -
Page 10: Operating Instructions
V. Operating Instructions 1. “ Power ” Button (1) Turn On or Turn Off the hood. (2) First time turn on the hood, hood will at low fan speed and light off. (3) Hood will remember the last speed and light level it was turned off at. (4) With the fans on press Power button to turn off the entire hood (fan and light). -
Page 11: Surface Maintenance
VI. Surface Maintenance A. Surface Maintenance 1. Please clean the range hood surface regularly with warm soapy water and wipe with a cotton cloth to prevent grease from accumulating. 2. Please do not use harsh cleansers or coarse material to clean the surface because that will damage the surface. -
Page 12: Remarks
VII. Remarks A. Precautions: 1. When filling the range hood with the cleaner mixture, use only the special jar provided with the range hood and take precautions not to overfill the cleaner storage unit. 2. Check the oil retainer during the cleaning process to prevent oil spillage. Do not allow dirty oil to exceed the marked level. -
Page 13: Troubleshooting
VIII. Troubleshooting Problem Possible Cause Solution 1. No power (burnedwire or fuse) 1. Replace the PC board 2. Motor temperature regulator is off and can’t 2. Replace motor be recovered Motor stops 3. Motor copper wire is burned 3. Replace motor running 4. - Page 14 八.排除故障 異常狀況 原 因 處理方式 1.無電源輸入(電源線燒毀)或保險絲燒毀 1.更換PC板 2.馬達溫控跳脫無法回復 2.更換馬達 馬達不轉 3.馬達銅線燒毀 3.更換馬達 4.電容器燒毀 4.更換電容器 5.無電源輸入(電源線燒毀)或保險絲燒毀 5.三用電表測(更換電源線) 1.電容器變形或電量不足 1.更換電容器 馬達轉速變慢 2.馬達燒毀 2.更換馬達 1.馬達銅線短路 1.更換馬達 風葉有反轉現象 2.出風口逆風現象(倒灌風) 2.出風口或排風管阻塞清理 1.電容器燒毀 1.更換電容器 馬達無分段速度 2.線路脫落 2.重整電線 1.建議煮食方法稍改: 1.溫控在感應到異常高溫時,馬達會停止轉動 若煮食時長時間用大火,建議改用 ,當溫度降到一般煮食時,會恢復正常運作 中小火或暫停煮食 馬達時轉時不轉 2.更換馬達 1.主控PC板失效 1.更換主控PC板 Delay off 延遲失效...
- Page 15 七.注意事項及警告標示 一.注意事項及警告標示: 1.每次煮食前先開啟抽油煙機,在開始煮食,可防止高溫損壞排油煙機。 2.假若電源線損壞時,必須經由製造廠商或服務站或是類似專業的人員更換, 避免造成危險。...
- Page 16 六.機身表面保養和清潔 一.機身表面保養 1.請定期以熱肥皂水和棉布擦拭機身以防油垢堆積。 2.請勿使用腐蝕性洗碗精和材質過粗的布料擦拭,以免傷害到機身表面。 3.擦拭完成後建議使用無刺激性的不鏽鋼拋光劑來進行第二次擦拭。 4.請使用軟布輕擦,您的油煙機表面將會更加光亮。 5.請勿使用含有漂白成分的清潔液。 二.保養和清潔 1.清潔前,務必要切斷電源。 2.定期清潔抽油煙機的內外側,可以保持抽油煙機壽命, 切勿使用研磨性清潔劑。 3.請將不鏽鋼濾網從煙罩取下,濾網可過濾煮食中的油 脂及殘留物。儘管濾網不需要更換,但建議根據煮食 習慣至少每30天清潔一次。 請將濾網置於洗碗機中低溫清洗或浸泡於熱肥皂水中 清洗,待濾網乾燥後重新安裝於煙罩上。 4.將油杯由油槽下方取下並做清潔。 5.在開啟煮食爐前,請先開啟抽油煙機以免廚房溫度太高。...
- Page 17 五.按鍵說明 1.“ 電源 ”鍵 (1) 輕按按鍵開啟或關閉排油煙機 。 (2) 初次啟動時 風速預設為低速 照明關閉 , , 。 (3) 再次啟動時 會自動記憶前次使用之風速及照明段數 , 。 (4) 排油煙機開啟時 輕按此鍵關閉油煙機所有動作 , 。 (5) 延遲關機啟動狀態下 輕按此鍵關閉油煙機和延遲關機功能 , 。 2.“ 風扇低速”鍵 (1) 輕按此鍵可啟動低速風速 。 (2) 風扇低速運轉時 輕按此鍵無作用維持低速運轉 不影響照明 , , 。...
- Page 18 四.安裝步驟 1.請準備安裝位置及空間(上出風) 。 2.測量出風口及電源線孔的大小 , 然後 再鑽孔 。 備註:出風口尺寸應要足以安裝鋁 風管 。 3.櫥櫃需加強本機固定的地方 , 建議使 用木條強化在櫥櫃內底部 。 4.請用十字螺絲起子移除油機煙罩上5 支螺絲(如圖1)並取下油機煙罩 。 5.在抽油煙機頂部兩端黏貼抬腳(如圖2) 6.依安裝位置設置4支木螺釘 。 7.安裝時用木螺釘扣上之後 , 將油機與 櫥櫃用螺絲鎖緊 , 確保油機穩固的安 裝在櫥櫃上不會掉落 。 8.裝設電源 。 9.安裝風管並用風管膠帶密封 。 10.檢查風管處是否緊密及其他功能是否 正常 。 11.將油機煙罩重新鎖上螺絲安裝於油機 圖 1 下方...
- Page 19 三.安裝原則 1. 周圍環境(圖一): 抽油煙機安裝位置,如在窗上或附近有太多門 窗,請在開動抽油煙機前,先關閉門窗,以免 空氣對流大而影響吸力,因當油煙上昇未至10 英吋之有效吸力範圍 ,則無法充分發揮抽油煙 最佳效果 。 2. 安裝高度(圖二): 安裝高度自本機底板至煮食爐面之距離以24~ 30英吋為最理想 。 3. 機體應保持水平(圖三): 機體應保持前、後、左、右水平,以免氣流箱, 導油盆積油而溢出。 左、右水平可由掛碼調整,前、後水平則由鋼 釘螺絲鎖緊牆壁,以固定標準。 4. 排風管: 為增加吸力效能,請配合使用本機出風管接頭 之直徑6英吋排風管 , 排風管長度應以適合長 度 最佳,不宜過長。 5. 插座安排: 請勿與烤箱或冰箱等耗電量較高之電器產品共 用一個插座。 安裝前先以矽利康注入風管圈後將風管崁入,再用封膠封住風管圈。...
- Page 20 二.配件說明 (1) 風管圈 (1) 機箱 (1) 觸控開關組 (1) 風胃 (2) 油杯 (1) 煙罩 (2) 不鏽鋼濾網 (1) LED燈 (1) 螺絲包 螺絲包配件(加拿大地區): 序號 圖示 種 類 數量 序號 圖示 種 類 數量 3/16 x 1/4吋平頭斜邊 P3螺母 螺絲 5 x 12 x 1T 華司 抬腳...
- Page 21 一.功能簡介/性能規格表 A. 產品功能 1.具有延遲關機功能。 2.具有一按開關功能。 3.微電腦程式操控。 4.按鍵功能:電源、風扇低速、風扇高速、延遲關機、照明。 B. 規格表 型 號 PR-6830AS PR-6836AS 磅 淨 重 尺 寸 (英吋) (寬)29-3/4 x(深)6-1/2 x(高)20-1/2 (寬)35-11/16 x(深)6-1/2 x(高)20-1/2 最 大 伏 特 數 120 V – 60 Hz 風 管 直 徑 6 英吋...
- Page 22 目錄 一.功能簡介/性能規格表 ........ 1 二.配件說明 ..........2 三.安裝原則 ..........3 四.安裝步驟 ..........4 五.按鍵說明 ..........5 六.機身表面保養和清潔 ........6 七.注意事項 ..........7 八.排除故障 ..........8...
- Page 24 抽 油 煙 機 抽 油 煙 機 使 用 說 明 書 使 用 說 明 書 抽油機型號: PR-6830AS / PR-6836AS 序 號: (使用 前 , 請先 詳 細閱 讀此 說 明書 ) XP022577(1)


Need help?
Do you have a question about the PR-6830AS and is the answer not in the manual?
Questions and answers