
Related Manuals for Pacific PQ6830AB


Summary of Contents for Pacific PQ6830AB
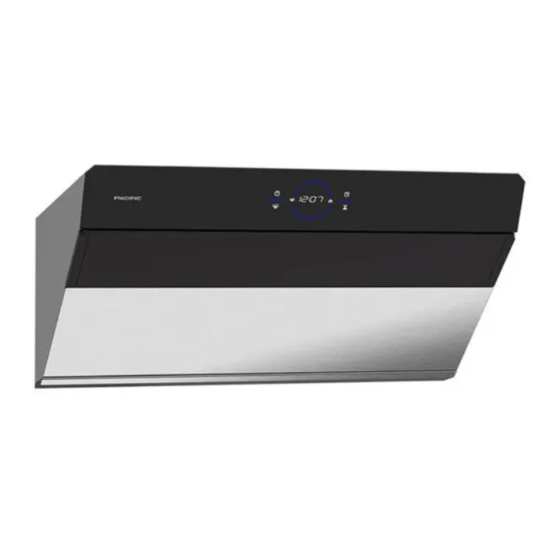
- Page 1 PACIFIC RANGE HOOD OPERATING INSTRUCTION Model Number: PQ6830AB, PQ6830AW PQ6836AB, PQ6836AW Read all instructions before operating the range hood. Airflow Control Technology www.2pacific.com XP022665 ( 2 )
-
Page 2: Table Of Contents
Table of Content Safety Information P1-P3 Product Functions / Performance Specification Chart Part Supplied Circuit Diagram Product Dimension List of Materials Installation Guidelines P10-P11 Installation Procedures – Under Cabinet Installation Procedures – Wall Mount P12-P13 Installation Instructions – Optional Duct Cover P13-P15 Operating Instructions P16-P18... - Page 3 Safety Information READ AND SAVE THESE INSTRUCTIONS Your safety and the safety of others are very important. WARNING We have provided many important safety messages in this manual for your appliance. Always read and obey all safety messages. WARNING - TO REDUCE THE RISK OF FIRE, ELECTRIC SHOCK, OR INJURY TO PERSONS, OBSERVE THE FOLLOWING: a) Use this unit only in the manner intended by the manufacturer.
- Page 4 Safety Information READ AND SAVE THESE INSTRUCTIONS WARNING WARNING WARNING - TO REDUCE THE RISK OF FIRE, ELECTRIC SHOCK, WARNING - TO REDUCE THE RISK OF INJURY TO PERSONS OR INJURY TO PERSONS, OBSERVE THE FOLLOWING: IN THE EVENT OF A RANGE TOP GREASE FIRE, OBSERVE THE FOLLOWING a) Installation work and electrical wiring must be done by qualified person(s) in accordance with all applicable codes and...
-
Page 5: Safety Information
Safety Information READ AND SAVE THESE INSTRUCTIONS Operation Always leave saf ety grilles and fil ters in place. Without these components, operating blowers could catch onto hair, fingers and loose clothing. The manufacturer declines all responsibility in the event of failure to observe the instructions given here for installation, maintenance and suitable use of the product. -
Page 6: Product Functions / Performance Specification Chart P4
1. Memory function to remember the last used fan and light settings 2. 3-min and 5-min automatic delay o 3. Built-in timer 4. Built-in clock 5. Air ow Control Technology (ACT™) Performance Specification Chart PQ6830AB/AW PQ6836AB/AW Model Weights(Kg/Ibs) 24.9/54.78 27.2/59.84 Size 36”... -
Page 7: Part Supplied P5
Parts Supplied (1) Mounting Bracket (1) 7” Collar (1) Hood Body (1) Blower Housing (1) Bottom Panel (1) Glass Touch Control (2) Ba e Filter (1) Oil Tray (1) LEDStrip www.2pacific.com... -
Page 8: Circuit Diagram
Circuit Diagram Yellow Yellow Yellow Yellow MOTOR MOTOR Blue Blue Brown Brown Black Black White White LOGO LED www.2pacific.com... - Page 9 Installation Specifications Dimensional Drawing Side 30”29-3/4'' 36”35-7/16'' Front Back Mounting Template 3-1/8'' 8-11/16'' 11'' 10-1/4'' 29-3/4'' / 35-7/16'' 29-3/4'' / 35-7/16'' Cabinet Wall www.2pacific.com...
-
Page 10: List Of Materials
List of Materials Part Supplied STANDARD CONFGURATION HARDWARE PACKET CONTENT 5x24x1T Washer Hood 3/16x2” Flat Head Screw 7 inch Collar 1-1/2 Wood Screw M4x8 Round Head Screw Foam Strip Oil Tray Duct Cover; Upper User Manual Duct Cover; Lower Cabinet Mounting Template Bracket Mounting Bracket, Wall... -
Page 11: Installation Guidelines
Installation Guidelines 1.Location • Suggest to close windowdoor before using hood .(FIG. 1) 2.Mounting Height and Position (FIG.1) • • Avoid left-right or front-dropped inclination.(FIG. 2) • The minimum mount height is 15 inches from the bottom of the range hood to the surface of the stove top, and the maximum is 20-1/2 inches.(FIG. -
Page 12: Installation Procedures - Under Cabinet
Installation Procedures Under Cabinet – 4. Measure the Installation Bracket Location. 1. Take out the appliance from the box and check the Take out the Installation Bracket and the Installation List of Material . Bracket Mounting template from the accessory pack, stick the template on the wall, and then drill the holes as indicated on the template. - Page 13 Installation Procedures Under Cabinet – 6. Place the cabinet installation template facing 11. Install duct work and seal with aluminum down and stick the template on the bottom of duct tape. the upper cabinet, then open and drill holes according to the template, after done those holes, tear o the template from the cabinet.
-
Page 14: Installation Procedures - Wall Mount
Installation Procedures Wall Mount – 1. Take out the appliance from the box and check the 4. Measure the Installation Bracket Location. Take out the Installation Bracket and the Installation List of Material . Bracket Mounting template from the accessory pack, stick the template on the wall, and then drill the holes as indicated on the template. - Page 15 Installation Procedures Wall Mount – 7. Use the two holes under backside to hang 11. Install duct work and seal with aluminum the appliance on the installation template . duct tape. 8. Fix the support brackets with (2) M4x8 round head screws above the appliance .
-
Page 16: Installation Instructions - Optional Duct Cover
Installation Instructions – Optional Duct Cover P1C-0068 Duct cover Optional Duct Cover 30"-36" Model #: P1C-0068 Note: P1C-0068 is not supplied in the package, To order it, please visit us online at www.2paci c.com www.pacifichoods.com or call 888-833-8833. 718-633-3688 1. Center and attach duct cover bracket to wall below ceiling or so t using (2) 1-1/2” wood screws. www.2pacific.com... - Page 17 Installation Instructions – Optional Duct Cover 2. Attach the bottom bracket to the top of hood by securing the (6) M4x8 black screws for each side. 3. Remove the protective lm from the duct cover surface. 4. Then extend inner (top) duct cover upwards and secure to duct cover bracket using (2) M4x8 round head screws.
-
Page 18: Operating Instructions
Operating Instructions Show the Speeds & Timer Hour Minute PROXIMITY SENSOR When approaching the hood while it is powered off, the clock will illuminate. If neither the fan nor lights are turned on within 60 seconds, the clock will turn off. The icons will not disappear until the fan and lights are turned off. - Page 19 Operating Instructions Show the Speeds & Timer Hour Minute Timer Alarm Press one time to enable alarm function. Press to increase minutes and to decrease minutes. After completed the setting of minutes, press second time to set the “hours”. And press again to start the alarm function.
- Page 20 Operating Instructions Show the Speeds & Timer Hour Minute Air ow Control Technology (ACT™) Some local codes limit the maximum amount of CFM a range hood can move. ACT™ allows you to control the maximum blower CFM of select Paci c range hoods without the need for expensive make up air kits. ACT™...
-
Page 21: Surface Maintenance
Surface Maintenance Surface Maintenance 1. Please clean the range hood surface regularly with warm soapy water and wipe with a cotton cloth to prevent grease from accumulating. 2. Please do not use harsh cleansers or coarse material to clean the surface because that will damage the surface. -
Page 22: Troubleshooting
Troubleshooting After installation, the The power source is not turned ON. Make sure the circuit breaker and the unit’s unit doesn’t work. power is ON. The power line and the cable Check the power connection with the unit is locking connector is not connecting connected properly. - Page 23 Product Registration Congratulations on your PACIFIC range hood purchase! Please take a moment to register your new range hood at https://www.2paci c.com/en-us/ productregistration IT’S IMPORTANT Prompt registration helps in more ways than one. Ensures warranty coverage should you need service.
- Page 24 太 平 洋 油 煙 機 排油煙機使用說明書 型號: PQ6830AB, PQ6830AW PQ6836AB, PQ6836AW (使用前,請先詳細閱讀此說明書) Airflow Control Technology www.2pacific.com XP022665 ( 2 )
- Page 25 目 錄 功能簡介 / 性能規格表 爆炸圖 規格線路圖 安裝尺寸 配件說明 安裝原則 安裝步驟 - 櫥櫃式 P7-P8 P9-P10 安裝步驟 - 壁掛式 安裝步驟- 選配風管飾板 P11-P12 P13-P14 功能操作 P12-P14 產品保養與清潔 故障排除 www.2pacific.com...
- Page 26 功能簡介 1. 自動記憶前次使用風速及燈段。 2. 可選擇3分鐘或5分鐘倒數計時關機。 3. 內建倒計時功能,擔任貼心的烹飪小助手。 4. 內建時鐘功能。 5. ACT™ 專利風量控制技術,可依照地區法規調整風速設定。 性能規格表 PQ6830AB/AW PQ6836AB/AW 機 型 24.9/54.78 27.2/59.84 重量(Kg/Ibs) 黑色玻璃+不鏽鋼 顏色材質 白色玻璃+不鏽鋼 29-3/4” x 18-7/8" x 12-1/8" 35-7/16” x 18-7/8" x 12-1/8" 機箱尺寸(英吋) 9W LED 燈條x1 LED 照明 風管口徑 7吋上出風 櫥櫃式/壁掛式...
- Page 27 爆炸圖 (1) 吊掛片 (1) 出風口 (1) 機箱 (1) 風胃 (1) 煙罩 (1) 觸控開關組 (2) 不鏽鋼濾網 (1) 油杯 (1) LED 燈 www.2pacific.com...
- Page 28 規格線路圖 Yellow Yellow Yellow Yellow MOTOR MOTOR Blue Blue Brown Brown Black Black White White LOGO LED www.2pacific.com...
- Page 29 安裝尺寸 產品尺寸圖 上視圖 側視圖 30”29-3/4'' 36”35-7/16'' 正視圖 後視圖 安裝尺寸圖 3-1/8'' 8-11/16'' 11'' 10-1/4'' 29-3/4'' / 35-7/16'' 29-3/4'' / 35-7/16'' 壁式 櫥櫃 www.2pacific.com...
- Page 30 配件說明 螺絲包內容 標準配置 5x24x1T 墊片 整機 扁平頭螺絲 3/16*2” (7") 出風口 1-1/2 吋木螺釘 M4 x 8 圓頭螺絲 泡棉條 配件(選配) 油杯 P1C-0068 風管飾板 風管飾板 (上) 說明書 風管飾板 (下) 櫥櫃開孔 尺寸圖 吊掛片 風管吊掛片 安裝尺寸圖 固定片 主機吊掛片 1-1/2 木螺釘 輔助吊掛片 M4x8 圓頭螺絲 螺絲包 M4x8 黑色螺絲 www.2pacific.com...
- Page 31 安裝原則 1.周圍環境 抽油煙機安裝位置如在窗上或附近有太多門窗,開動抽油煙機前先關閉門窗。(圖1) ( 圖1) 2.安裝高度和機體位置 抽油煙機安裝高度: 抽油煙機機體應保持左、右水平避免油杯積油溢出。(圖2) 量度安裝高度應從機器最低點垂直量度至爐頭正上方, 最低15吋最高20-1/2吋。(圖3) 傾 斜 ( 圖2) 3.風喉 風喉必須配合本機出風管接頭之直徑(7吋)及避免太多彎位,以免影響抽風效果。 可以安裝6吋風管接頭,但會影響抽風量。 將排風管安裝至風管圈並使用金屬膠帶固定。 m i n a x . 1 5 “ " m 1 / 2 2 0 - (圖3) www.2pacific.com...
-
Page 32: 安裝步驟 - 櫥櫃式
安裝步驟 - 櫥櫃式 1. 拆箱取出機器,並依照配件說明清點 4. 測量吊掛片位置 附件包內容物 從附件包內拿出吊掛片安裝尺寸圖,將尺寸 圖貼到牆面上並依照圖面指示鑽孔 5. 撕下尺寸圖,將吊掛片放置在牆面上,調整水 2. 安裝高度,從爐頭到機器最低點高度介於 平後並使用(6)1-1/2''木螺釘將固定片鎖在牆壁 15''-20-1/2''(381mm到520mm)之間 上 30''機器 安裝寬度最小29-15/16'' (760mm) 36''機器 安裝寬度最小35-5/8'' (905mm) 29-15/16'' 35-5/8'' Min (760mm) / (905mm) 3. 尋找壁面的支撐點並標註 www.2pacific.com... - Page 33 安裝步驟 - 櫥櫃式 11. 接上鋁管,使用膠帶密封周圍 6. 把櫥櫃開孔尺寸圖貼附在櫥櫃下方,並依照 尺寸圖要求開孔和鑽洞,完成後撕下尺寸圖 12. 將油杯上的膜撕除後,裝上機器底部 7. 將機器的保護膜全撕除 8. 將機器掛上主機吊掛片 9. 用單手撐住機器,再由上方使用(3)3/16x2” 扁平頭螺絲鎖及5x24x1T墊圈,固定於櫥櫃 (右邊2個、左邊1個) 13. 插上電源後測試所有功能是否正常運作 14. 測試完成後開啟照明,喚醒導流板,當導流板 開啟後,請拿下濾網並撕除保護膜後裝回 10. 使用(4)M4x8圓頭螺絲,鎖上排風管 www.2pacific.com...
-
Page 34: 安裝步驟 - 壁掛式
安裝步驟 - 壁掛式 1. 拆箱取出機器,並依照配件說明清點 4. 測量吊掛片位置 附件包內容物 取出附件包內的主機吊掛片,依安裝高度在牆 面上作記號 2. 安裝高度,從爐頭到機器最低點高度介於 5. 撕下尺寸圖,將吊掛片放置在牆面上,調整水 15''-20-1/2''(381mm到520mm)之間 平後並使用(6)1-1/2''木螺釘將固定片鎖在牆壁 30''機器 安裝寬度最小29-15/16'' (760mm) 上 36''機器 安裝寬度最小35-5/8'' (905mm) 29-15/16'' 35-5/8'' Min (760mm) / (905mm) 6. 將附件包內泡棉條拿出,貼在機器後方(如圖) 3. 尋找壁面的支撐點並標註 泡棉條 www.2pacific.com... - Page 35 安裝步驟 - 壁掛式 11. 接上鋁管,使用膠帶密封周圍 7.將機器吊掛上去 8.使用(2)M4x8圓頭螺絲將輔助吊掛片鎖固於機器 上 方 12. 將油杯上的膜撕除後,裝上機器底部 9.再用(2)1-1/2"木螺釘將機器鎖固於牆面 13. 插上電源後測試所有功能是否正常運作 14. 測試完成後開啟照明,喚醒導流板,當導流板 10.使用(4)M4x8圓頭螺絲安裝7吋出風口 開啟後,請拿下濾網並撕除保護膜後裝回 www.2pacific.com...
-
Page 36: 安裝步驟- 選配風管飾板
安裝步驟- 選配風管飾板 P1C-0068 風管飾板組 選配飾風管飾版組:22-1/16"-43-3/4" 型號 #: P1C-0068 注意: P1C-0068不包含在機器裡面, 請上我們網站www.2pacific.com www.pacifichoods.com 或撥打 888-833-8833 訂購此產品。 718-633-3688 1. 將風管吊掛片與機器中心對齊,並使用(2)1-1/2"木螺釘將吊掛片鎖於牆面。 www.2pacific.com... - Page 37 安裝步驟- 選配式風管飾版 2. 將附件包內兩支固定片各使用(6)M4x8黑色螺絲鎖固於機器頂部。 3. 移除風管飾板表面保護膜。 4. 使用(2)M4x8圓頭螺絲將內風管飾板鎖固於吊掛片上,並用(2)M4x8圓頭螺絲 將外風管飾版固定在底部固定片上。 www.2pacific.com...
-
Page 38: 功能操作
功能操作 顯示速別 延遲關閉倒數 小時 分鐘 接近感應功能 關機狀態下,接近設備時顯示所有圖示,按下任意鍵後圖示會全部亮起。 在未使用任何功能60秒後螢幕會全暗,進入 休眠模式。 電源鍵: 可啟動/關閉風扇、照明及玻璃導流板。本排油煙機自動記憶使用者前次使用風速和照明。 例:關閉時,本機風扇速度為4速和照明為全亮,再次開啟開關時,風扇速度即為4速和照明為全亮, 且玻璃導流板會開啟。 開關鎖定鍵 : 關機狀態下,按住 3秒以上即鎖定開關按鍵,指示燈全暗掉,且觸控無反應,以利清潔玻璃觸控面板。 若欲解除再按住 3秒以上,指示燈全亮時,即可操作。 照明鍵: LED照明有二段亮度可供調整;每按一下 為全亮→微亮→關閉循環操作,推桿到定位後才會開啟照明。 風速調整鍵: 按下 鍵可降低風扇轉速 4、3、2、1、關閉。顯示框會顯示當時的速別。 按下 鍵可提高風扇轉速,開啟 1、2、3 、4, 顯示框會顯示當時的速別。 延遲關機鍵: 有兩種時段可以選擇5分鐘或3分鐘 開機狀態下,按1下 ,啟動5分鐘延時關閉計時器,再按第2下則為3分鐘,且風速降至1速中間螢幕會 顯示剩餘時間,此功能開啟時可以依需求調整風速,時間到後會自動關閉風扇和照明。 若想中途停止,可以按下 關閉電源即可停止倒計時。 計時鍵: 在未使用延遲關機功能或設定時鐘的狀態下,按1下 進入設定,設定中連續6秒未操作機器則不會儲存... - Page 39 功能操作 顯示速別 延遲關閉倒數 小時 分鐘 時鐘: 螢幕顯示時間為12小時制,送電後機器會自動顯示12:00,若要調整,關機的狀態下長按5秒 後,進入 現在時間設定,設定過程中若連續6秒以上未動作,將不會儲存當前設定並自動離開設定介面,設定時鐘時, 機器會強制取消計時器動作。 分鐘 小時 按壓 或 設定,分鐘數字從0到59循環, 按壓 或 設定,分鐘數字從1到12循環, 長按 或 時,中間的數字會快速跳動, 長按 或 時,中間的數字會快速跳動, 若確定後按1下 即可設定小時。 若確定後按1下 即可設定小時。 ACT功能 關機狀態下,同時按住 和 3秒,會顯示原廠設定為6,按一下 進入設定,每按1下 介面數字會顯示6->4->3->6循環,超過6秒沒有動作,機器會不儲存並自動離開設定介面。 當螢幕顯示為 6,則目前風速為原廠設定 當螢幕顯示為 4,則目前設定最大為400CFM 當螢幕顯示為 3,則目前設定最大為300CFM www.2pacific.com...
-
Page 40: 產品保養與清潔
產品保養與清潔 一.機身表面保養 1.請勿使用腐蝕性/漂白成份的清潔液和過粗材質布料擦拭,避免傷害到機身表面。 2.請定期以熱肥皂水和棉布擦拭機身以防油垢堆積。擦拭完成後建議使用無刺激性的 不鏽鋼拋光劑來進行第二次擦拭保養。 3.使用軟布輕擦,您的排油煙機表面將會更加光亮。 二.過濾網保養 1.在沒有安裝過濾網的情況下,請勿使用排油煙機,以免油污附著到馬達和排油煙機內部 2.每隔一個月或30小時的使用後,應將過濾網拆下清洗。 3.過濾網可用溫水清洗或請使用非腐蝕性洗碗精浸泡後清洗。風乾後請安裝回機身。 4.若過濾網有所損壞,請洽經銷商購買更換。 5.移除過濾網方法如右圖示: (1)握住濾網把手將濾網向下壓 (2)將濾網前端向外取出 (3)將濾網從機器上取下 三.排油煙機清潔方法 1.清潔排油煙機時,請先拔掉電源插頭以免發生危險。 2.請勿用水沖洗馬達以免馬達燒毀。 3.煮食時,勿噴清潔劑清洗排油煙機,以免清潔劑掉落菜餚。 4.清潔時,藉由工具拆卸零件,使用者不得徒手拆卸,以免發生危險。 5.建議市售之廚房專用除油清潔劑。依據市售之廚房專用除油清潔劑,使用方法清潔 排油煙機煙罩外殼表面。 6.清潔油杯 : 將油杯往自身方向拆下,在油杯中倒入除油清潔劑,靜置30分鐘再清洗。 請勿直接噴灑清潔劑至開關表面。 使用者依煮食習慣一周清潔一次,當油杯油污七分滿時,請清潔油杯。 www.2pacific.com... - Page 41 排除故障 異常狀況 原 因 處理方式 電源未打開 確認斷路器及機器電源開啟 安裝後機器 沒有運作 電源線未正確連接 檢查與機器的電源連接是否正確連接 開關組或主控PC板電線未正確連接 檢查開關組或主控PC板的電線是否正確連接 開關組或主控PC板損壞 更換開關組或主控PC板 主控PC板連接線脫落 檢查連接到主控PC板的所有連接線是否都正確連接 馬達連接線未正確連接 檢查連接到馬達的所有連接線是否都正確連接 燈正常運作 但馬達不轉 馬達熱保護裝置偵測過熱跳脫停止運作 馬達熱保護裝置溫度下降後機器將恢復正常運作 開關組或主控PC板損壞 更換開關組或主控PC板 馬達損壞 更換馬達 馬達未正確安裝 將馬達鎖緊 機器振動 風葉損壞 更換風葉 機器未正確安裝 檢查機器是否正確安裝 濾網或導流板未正確安裝 調整濾網或導流板直到口哨聲消失 機器有口哨聲 風管未密封或正確安裝 檢查風管是否正確密封 LED燈連接線脫落 檢查LED燈連接線是否正確連接...
- Page 42 www.2pacific.com...
- Page 43 www.2pacific.com...
- Page 44 產品註冊 在開始使用前,需要您花一點時間 在以下網址註冊您的油煙機。 https://www.2pacific.com/en-us/ productregistration 註冊很重要 即時註冊的幫助不止一種。 當您需要服務時,確保產品保固範圍。 保障產品所有權驗證。 產品變更或召回通知。 PACIFIC KITCHEN LIFE | 390 Kansas St. | San Francisco, CA 94103 | 888-833-8833 如需要訂購零件,請上 www.2pacific.com 跟我們聯繫或者以電話 www.pacifichoods.com 888-833-8833聯絡我們。 718-633-3688 www.2pacific.com...
Need help?
Do you have a question about the PQ6830AB and is the answer not in the manual?
Questions and answers