
Related Manuals for Pacific PR6108-U70


Summary of Contents for Pacific PR6108-U70
-
Page 1: Table Of Contents
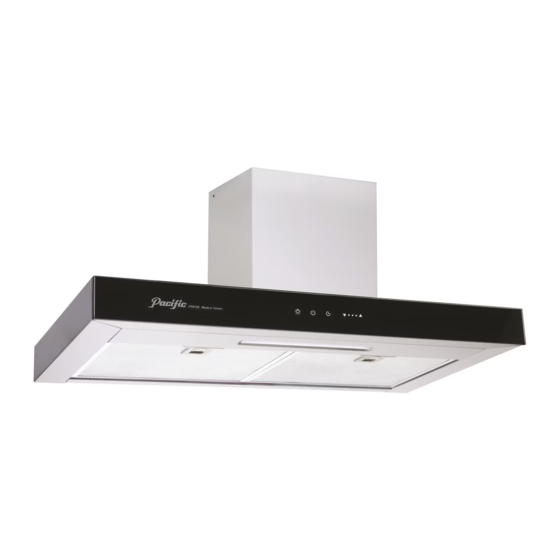
使 用 說 明 書 MODEL NO: PR6108-U70 / U90 Warning Installation Mounting method Operating instructions Surface Maintenance Service parts identification 型各 名 Specifications 性 規格 Wiring diagram 路圖 注 事項 則 功 操作 明 清洗 明 XP022492(1) -
Page 2: Warning P1
Warning Important For safety purpose, you should read the instructions carefully before using the appliance for the first time.Save the instruction for future reference. The appliance is designed for domestic use and may only be installed and operated in accordance with these instructions for use. ** Remove the protection film outside the hood before installation. -
Page 3: Installation P2
Installation • Packing materials (plastic bags, polystyrene, etc.) must be kept out of children’ reach, as they are potentially dangerous. • Installation must be carried out by a qualified technician. • Check the voltage on the rating plate which should corresponds to the voltage in your home. -
Page 4: Mounting Method P3
Mounting method 1. Measure from range top to hood bottom and mark line A.(650-750 mm minimum from range top) . 2. Plum and mark center line. 3. Mark hood height line B. (362 mm from line A) 4. Mark mounting spread from C/L. (264 mm on line B) 5. -
Page 5: Operating Instructions P4
Operating instructions 1. Light Button • When lights are off and " Light " button is pressed, light will turn on to the lowest intensity. • When lights are on, and " Light " button is pressed, the light intensity will index to its next highest level. -
Page 6: Surface Maintenance P5
Surface Maintenance A. Surface Maintenance 1. Please clean the range hood surface regularly with warm soapy water and wipe with a cotton cloth to prevent grease from accumulating. 2. Please do not use harsh cleansers or coarse material to clean the surface because that will damage the surface. -
Page 7: Service Parts Identification 型各 名 P6
Service parts identification 型各 名 固 片 Bracket 板(上) Duct cover, Upper 板(下) Duct cover, Bottom Cover, Junction Box 電 Capacitor Collar Pc板 Main PCB 盒 Housing, Motor Holder, Junction Box 電源 Power Cord 油杯 Residue Cup 吊掛片 Ring Bracket 觸... -
Page 8: Specifications 性 規格 P7
Specifications 性 規格 Model PR6108-U70 PR6108-U90 型 Net Weights 17 Kg 18.2 Kg 重 Gross Weights 22 Kg 23.8 Kg 毛 重 Hood Size 700 x 350 x 526 mm 893 x 350 x 526 mm 種 尺 寸 Packing Size... - Page 9 注 事項 重要說明 為安全起見,初次使用產品前請先細閱本說明書,並保存本說明書,以便作參考之用。 本產品只供家居使用,請必須依照本說明書內的指示安裝及操作。 * * *安裝前請先撕除抽油煙機機箱外的保護膠膜。 1. 請依照本說明書內的指示安裝及操作。 2. 維修抽油煙機前,請務必切斷電源。 3. 維修抽油煙機時,請戴上橡膠手套。 4. 請勿直接噴水在抽油煙機上。 5. 當與易燃氣體一起使用時,廚房請保持良好的通風,以避免危險。 6. 不可在抽油煙機下方直接燃燒。 7. 請勿與其他易燃氣體共用排氣通道。 8. 孩童不可玩耍此抽油煙機。且不可在無人監督下操作此抽油煙機。 9. 若未依此說明書執行清潔可能產生危險或引起火災。 10. 不可在抽油煙機下方點燃酒精等易燃物品。 11. 警告:在煮食過程中,部份零配件有可能會變燙。 12. 排出的油煙不得藉由瓦斯或其他燃料之排氣通道釋出。 13. 排出的油煙程序需符合相關的排放空氣法規。 14. 若電源線損毀,請勿操作抽油煙機。必須由製造廠或總代理維修部派遣師傅或有類 似資歷的認可技術人員更換以避免危險。 15. 不可使用此抽油煙機的人:生理、感官或心智能力不足(包括兒童),或缺乏相關 經驗和知識。除非他們是在被監督或有其他具相關訓練的人員指導下方可使用。 16.
- Page 10 則 • 包裝材料(如:塑膠袋、發泡膠等)有潛在性的危險請勿讓孩童接觸。 • 請由受過專業訓練的技術人員進行安裝。 • 安裝前請確認規格線路標籤上所列示的電壓符合您家的電壓。 • 安裝前燈膽後接上電源,檢查照明、摩打及開關是否正常。 • 安裝前檢查下列附件: a. 油杯1個 b. 風管飾板組1組 c. 說明書1本 d. 螺絲包1組 (M6 x 1"木螺釘4支、華司4片、3/16" x 3/8" 平頭十字螺絲2支、M4 x 8鐵板牙螺絲 2個) 1. 周圍環境 • 抽油煙機安裝位置如在窗上或附近有太多門窗,請在開動 抽油煙機前先關閉門窗。 • 建議油煙上升至25厘米以上,抽油煙機始能充份發揮抽油 煙效果。 FIG.1 2. 安裝高度和機體位置 • 抽油煙機安裝高度,自本機底板至瓦斯爐面之距離以70± 5厘米為最理想。...
- Page 11 1. 完成油煙機安裝前檢查後,測量爐檯面至油煙機底部的高度650~750mm,如圖中的 A線,後標記在牆上。(最少650mm) 2. 測量中間線,標記於牆上。 3. 測量A線至B線上的螺絲點,標記在牆上。(約362mm) 4. 測量B線上的兩個螺絲點,標記於牆上,(約264mm) 5. 將(2) M6 x 1" 的木螺絲固定於B線上的螺絲標記點,但先不鎖到底。(安裝吊掛用) 6. 將油煙機上濾網拆下。 7. 將油煙機掛上至先前鎖上牆的兩個螺絲上。確認油煙機已水平安裝後,將螺絲鎖緊。 8. 利用(2) M6 x 1" 木螺絲於排油煙機正上方固定風管飾板固定片。 9. 安裝電源線和風管圈。 10. 開啟電源測試,並檢查風管連接處是否有排風外洩。 11. 使用(2) 3/16 x 3/8" 螺絲,將下半部風管飾板安裝至油煙機兩側。 12. 裝上風管飾板組,使用(2) M4 x 8 螺絲,將上半部風管飾板安裝至風管飾板固定片。 13.
- Page 12 功 操作 明 1. 電燈鍵 .燈關時,按壓電燈鍵,會開至最低亮度。 .燈開時,按壓電燈鍵,會開至次段較強亮度。 .電燈鍵可以獨立操作。 2. 電源鍵 .按壓此鍵會啟動風扇至第二速或關閉風扇。 3. 延遲功能鍵 .當風扇開啟時,按下延遲功能鍵會降至最低風速,可變換風速,對應的LED指示燈會閃爍。 .延遲功能啟動計時五分鐘倒數。 .延遲功能使用五分鐘後,風扇及所有LED指示燈皆會關閉,但照明燈不受影響。 4. 風速鍵 .當風扇開啟時,按壓 鍵,會升至次段較強風速,對應的LED指示燈會亮起。 .當風扇開啟時,按壓 鍵,會減至次段較弱風速,對應的LED指示燈會亮起。 .當風扇關閉時,按壓 或 鍵,會啟動風扇至第二速。...
- Page 13 清 保 警告 : 電力接線方面必須由專人處理,排油煙機必須接上接地線。 接線前請務必確保電源開關已關閉。 1. 機身表面保養 請定期以熱肥皂水和棉布擦拭機身以防油垢堆積。 • 請勿使用腐蝕性清潔液和材質過粗的布料擦拭,以免傷害到機身表面。 • 擦拭完成後建議使用無刺激性的不鏽鋼拋光劑來進行第二次擦拭。 • 請使用軟布輕擦,您的油煙機表面將會更加光亮。 • 請勿使用含有漂白成分的清潔液。 • 2. 保養和清潔 清潔前,務必要切斷電源。 • 定期清潔抽油煙機的內外側,有助延長抽油煙機的使用年期,切勿使用研磨性清潔液。 • 濾網需定期拆卸清洗,或是放置洗碗機以最低循環及低溫清洗。(建議一個月清洗一次 • ,依煮食習慣調整清洗頻率。) 洗碗機中的清潔劑可能會導致濾網變色,但不影響濾網的過濾效果。 清潔後將濾網放置至乾燥,並重新安裝回機器即可。 抽油煙機中央的油杯可拆卸作定期清潔。 • 在開啟煮食爐前,請先開啟抽油煙機,以免廚房溫度太高。 •...
- Page 14 抽油煙 費保用 款 , ,本 1. 本產品只供 居使用。如產品 使用 居 括 業,工業,或其他用 司 不 提供 費保用。 。 2. 在 居 正常使用下,自購買日 保用三(3)年。 費保用只在 特別行政 範 內有 , 3. 不 是否在 費保用期 島 用戶 需 繳付 修人員 費用, 用上門 修服務 。 地...
Need help?
Do you have a question about the PR6108-U70 and is the answer not in the manual?
Questions and answers