Yamaha YDP-131 Service Manual
Hide thumbs
Also See for YDP-131:
- Owner's manual (48 pages) ,
- Quick operation manual (2 pages) ,
- Owner's manual (48 pages)
Advertisement
SERVICE MANUAL
YDP-131
YDP-131C
CONTENTS (目次)
SPECIFICATIONS (総合仕様) ................................................ 3/4
PANEL LAYOUT (パネルレイアウト)...................................... 5
DISASSEMBLY PROCEDURE (分解手順)............................... 6
LSI PIN DESCRIPTION (LSI端子機能表)............................... 21
IC BLOCK DIAGRAM (ICブロック図) .................................... 23
CIRCUIT BOARDS (シート基板図)........................................ 24
TEST PROGRAM (テストプログラム) .............................. 32/37
(バックアップデータと初期化) ..................................... 42/43
AND YDP-131/YDP-131C
(YDP-131/YDP-131Cとコンピューター間でのデータの送受信)......... 44/45
MIDI IMPLEMENTATION CHART .......................................... 46
MIDI DATA FORMAT ............................................................. 47
PARTS LIST
BLOCK DIAGRAM (ブロックダイアグラム)
CIRCUIT BOARD LAYOUT & WIRING
(ユニットレイアウト&結線図)
OVERALL CIRCUIT DIAGRAM (総回路図)
PK
000398
20060801-オープンプライス
Copyright (c) Yamaha Corporation. All rights reserved. PDF
'06.08
Advertisement
Chapters

Related Manuals for Yamaha YDP-131


Summary of Contents for Yamaha YDP-131
-
Page 1: Table Of Contents
AND YDP-131/YDP-131C (YDP-131/YDP-131Cとコンピューター間でのデータの送受信)..44/45 MIDI IMPLEMENTATION CHART .......... 46 MIDI DATA FORMAT ............. 47 PARTS LIST BLOCK DIAGRAM (ブロックダイアグラム) CIRCUIT BOARD LAYOUT & WIRING (ユニットレイアウト&結線図) OVERALL CIRCUIT DIAGRAM (総回路図) 000398 20060801-オープンプライス Copyright (c) Yamaha Corporation. All rights reserved. PDF ’06.08... - Page 2 YDP-131/YDP-131C IMPORTANT NOTICE This manual has been provided for the use of authorized Yamaha Retailers and their service personnel. It has been assumed that basic service procedures inherent to the industry, and more specifically Yamaha Products, are already known and understood by the users, and have therefore not been restated.
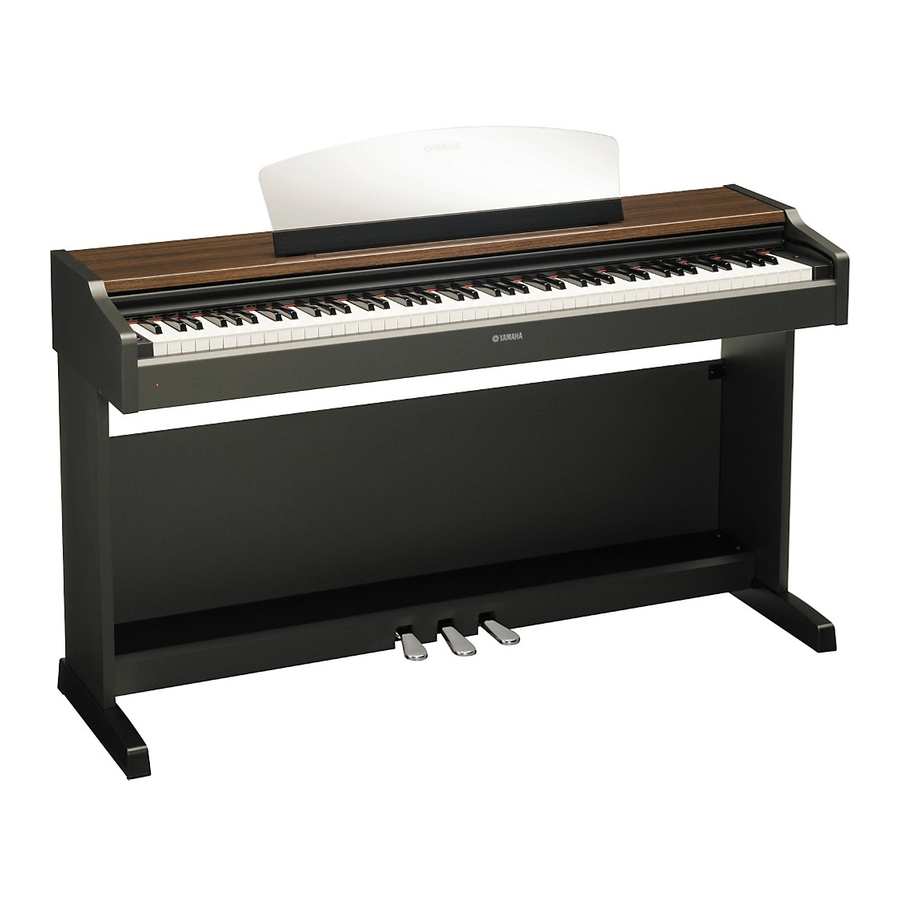
- Page 3 YDP-131/YDP-131C SPECIFICATIONS Item YDP-131/YDP-131C Keyboard 88 keys (A-1 - C7) Sound Source AWM Stereo Sampling Polyphony 64 Notes Max. Voice Selection Effect Reverb Volume Master Volume Controls Dual, Metoronome, Transpose Pedal Damper, Sostenuto, Soft Demo Songs 6 Demo Songs, 50 Piano Preset Songs Recording Function One song 65 KB (approx.
- Page 4 YDP-131/YDP-131C ■ 総合仕様 鍵盤 88 鍵 (A-1 〜 C7) 音源 AWM ステレオサンプリング 最大同時発音数 音色数 効果 リバーブ ボリューム マスターボリューム コントロール デュアル、 メトロノーム、 トランスポーズ ペダル ダンパー、 ソステヌート、 ソフト デモ 各音色デモ曲、 ピアノ曲50曲 録音機能 1曲録音可能 65KB (約11,000 音符) コンピューターからのソング 最大10ソング データ読み込み 最大容量合計で325KB 付属端子 MIDI端子 (IN/OUT)、 PHONES (ヘッドフォン) 端子 x 2 メインアンプ 6W×2 スピーカー 楕円 (12cm×6cm) x 2 定格電源...
- Page 5 YDP-131/YDP-131C PANEL LAYOUT(パネルレイアウト) MIDI PEDAL 1 [STANDBY/ON] switch [STANDBY/ON] スイッチ 2 [DEMO/SONG] button [DEMO/SONG] ボタン 3 [PIANO/VOICE] button [PIANO/VOICE] ボタン 4 [SELECT] button [SELECT] ボタン YDP-131 5 [REC] button [REC] ボタン 6 [PLAY] button [PLAY] ボタン 7 [METRONOME] button [METRONOME] ボタン 8 [MASTER VOLUME] dial [MASTER VOLUME] ダイアル 9 [PHONES] jacks [PHONES] 端子...
-
Page 6: Disassembly Procedure(分解手順
YDP-131/YDP-131C DISASSEMBLY PROCEDURE(分解手順) Caution: 注意事項 Be sure to attach the removed filament tape just as it was 分解のために剥がしたフィラメントテープは、 必ず元どおりに貼ってく before removal. ださい。 Music Rest Assembly 譜面板Ass y (所要時間 : 約1分) (Time required: About 1 minute) [S12]のネジ4本を外し、 譜面板Ass yを外します。 Remove the four (4) screws marked [S12]. The music (図1)... - Page 7 YDP-131/YDP-131C Circuit Boards & Assemblies (Main Unit) 基板とアッセンブリ (メインユニット部) (Time required: About 3 minutes each) (所要時間 : 各約3分) Remove the top board assembly. (See procedure 2) 屋根Ass yを外します。 ( 2項参照) Each circuit board and assembly can be removed by 次のネジを外すことにより、 基板 ・ アッセンブリを外...
- Page 8 YDP-131/YDP-131C Key Cover Assembly スライド蓋Ass y (所要時間 : 約2分) (Time required: About 2 minutes) スライド蓋を閉じます。 Close the key cover. 屋根Ass yを外します。 ( 2項参照) Remove the top board assembly. (See procedure 2) スライド蓋後部を上に持ち上げます。 ( 図5) Lift the rear key cover assembly. (Fig. 5) スライド蓋Ass yを少し斜めにして、...
- Page 9 YDP-131/YDP-131C End Block Assembly (L, R) 拍子木Ass y ( L ・ R) (所要時間 : 約5分) (Time required: About 5 minutes) 屋根Ass yを外します。 ( 2項参照) Remove the top board assembly. (See procedure 2) スライド蓋Ass yを外します。 ( 6項参照) Remove the key cover assembly. (See procedure 6) 鍵盤押えAss yを外します。...
- Page 10 YDP-131/YDP-131C 13-4 Remove the rack R. (See procedure 8) 13-4 ラック (R) を外します。 ( 8項参照) 13-5 Remove the end block assembly R. (See procedure 9) 13-5 拍子木 (R) Ass yを外します。 ( 9項参照) 13-6 Remove the two (2) screws marked [30]. The SW 13-6 [30]のネジ2本を外し、...
- Page 11 YDP-131/YDP-131C PL Circuit Board PLシート (所要時間 : 約10分) (Time required: About 10 minutes) 14-1 屋根Ass yを外します。 ( 2項参照) 14-1 Remove the top board assembly. (See procedure 2) 14-2 スライド蓋Ass yを外します。 ( 6項参照) 14-2 Remove the key cover assembly. (See procedure 6) 14-3 鍵盤押えAss yを外します。...
- Page 12 YDP-131/YDP-131C Front rail Assembly 口棒Ass y (所要時間 : 約12分) (Time required: About 12 minutes) 16-1 屋根Ass yを外します。 ( 2項参照) 16-1 Remove the top board assembly. (See procedure 2) 16-2 スライド蓋Ass yを外します。 ( 6項参照) 16-2 Remove the key cover assembly. (See procedure 6) 16-3 鍵盤押えAss yを外します。...
- Page 13 YDP-131/YDP-131C Key cover (キーカバー) Top portion (屋根板) Z CAUTION Do not hold the key cover or top portion. (キーカバーや屋根板を持たないで く ださい。 ) For safety, this work should be done by two persons. (安全のために、 かな らず二人で作業して く ださい。 ) Do not hold here.
- Page 14 YDP-131/YDP-131C Pedal Box Assembly, Pedal Assembly ペダルBox Ass y、 ペダルAss y (所要時間 : 約5分) (Time required: About 5 minutes) 21-1 Disconnect the PK-LF cable. (Fig. 13) 21-1 PK-LFケーブルを外します。 ( 図13) 21-2 Remove the four (4) screws marked [5d]. (Fig. 2) 21-2 [5d]のネジ4本を外します。...
- Page 15 YDP-131/YDP-131C Disassembling the Keyboard Assembly GHL (GHS) 鍵盤Ass yの分解 White key assembly and black key assembly 白鍵Ass y、 黒鍵Ass y 23-1 23-1 各オクターブ (C〜B) の白鍵Ass yと黒鍵Ass yを止 Remove the four (4) screws marked [270A] fixing the black and white key assembly for one octave (C–B).
- Page 16 YDP-131/YDP-131C Rubber Contact 接点ゴム 23-5 23-5 Remove the black and white key assembly for two 該当する接点ゴムの2オクターブ分の白鍵Ass y/黒 octaves related to the subject rubber contact. The rubber 鍵Ass yを外して、 接点ゴムを外します。 contact can then be removed. (Fig. 23, Fig. 23-1) (図23、 図23-1)...
- Page 17 YDP-131/YDP-131C GHL88L Circuit Board GHL88Lシート 23-6 23-6 Remove the black and white key assembly (A1–B2). A-1〜B2までの白鍵Ass y/黒鍵Ass yを外します。 (See procedure 23-1) (23-1項参照) Remove the six (6) screws marked [260A]. The [260A]のネジ6本を外して、 GHL88Lシートを外しま GHL88L circuit board can then be removed. (Fig. 23) す。...
- Page 18 YDP-131/YDP-131C Hammer (White Key), (Black Key) 23-9 23-9 ハンマー (白鍵) 、 ( 黒鍵) Remove the black and white key assembly for the 該当する白鍵Ass y/黒鍵Ass yを外します。 related keys. 鍵盤フレームを裏側にして、 後方からハンマーを前 With the key frame placed upside down, push the に押すと、 「 カチッ」 と音がして鍵盤フレームのハン...
- Page 19 YDP-131/YDP-131C Assembling the Keyboard Assembly GHL (GHS) 鍵盤Ass yの組立 24-1 Hammer (White Key), (Black Key) 24-1 ハンマー (白鍵) 、 ( 黒鍵) After applying grease to the bearing section of the ハンマー軸部にグリス塗布後、 後方からハンマー (白 hammer, bring the hammer (white key) (black key) 鍵) 、 ( 黒鍵) を横にして入れて、 ハンマーの軸受け部...
- Page 20 YDP-131/YDP-131C GHL88H Circuit Board GHL88Hシート 24-4 24-4 Tighten the five (5) screws marked [260C] to fix the GHL88Hシートを取り付け、 [260C]のネジ5本で固定 GHL88H circuit board. (Fig. 23) します。 (図23) Rubber Contact 接点ゴム 24-5 24-5 Note that the rubber contact has s specific installation 接点ゴムには、...
-
Page 21: Lsi Pin Description (Lsi端子機能表
YDP-131/YDP-131C 白鍵Ass y、 黒鍵Ass y White key assembly and black key assembly 24-7 24-7 キーガイドにグリス塗布後、 白鍵Ass y/黒鍵Ass y After applying grease to the key guide, install the white を取り付けます。 key assembly/black key assembly. At this time, check このとき、 鍵盤フレームのキーガイドと白鍵前部の to make sure that the key guide of the key frame and 内側スリット、... - Page 22 YDP-131/YDP-131C YMW767-VTZ (X6055A00) CPU (SWL01B) DM: IC101, IC201 NAME FUNCTION NAME FUNCTION Ground Ground Input for TEST Power supply +3.3 V TESTN PLLBPN PLL bypass select External memory lower-byte enable / Port F LBN/LWRN/PF6 PLLV PLL Power supply +2.5 V...
-
Page 23: Ic Block Diagram (Icブロック図
YDP-131/YDP-131C µPD789022GB-A15-8E (XZ560100) CPU KBS DM: IC301 NAME FUNCTION NAME FUNCTION P32/INTP2/CPT2 Port 3/External interrupt input/Capture edge input Port 1 P31/INTP1 Port 3/External interrupt input P30/INTP0 P47/KR7 P22/RXD/SI0 Port 2/Asynchronous serial interface serial data input/Serial interface serial data input P46/KR6... - Page 24 YDP-131/YDP-131C (シート基板図) CIRCUIT BOARDS AM (X6634D0) ......26/27 HP (X6672C0) ......28 DJ (X6672C0) .
- Page 25 YDP-131/YDP-131C DM Circuit Board to PN-CN401 Component side to GHL88M-CN2 (部品側) Pattern side (パターン側) 2NA-WF20750...
- Page 26 YDP-131/YDP-131C AM Circuit Board to MV-CN201 to HP-CN301 not installed to SPEAKERS DC IN 12V Component side (部品側) 2NA-WF20640 3...
- Page 27 YDP-131/YDP-131C AM Circuit Board Pattern side (パターン側) 2NA-WF20640 3...
- Page 28 YDP-131/YDP-131C PEDAL Circuit Board Soft Pedal Sostenuto Pedal Damper Pedal to DJ-JK103 Component side (部品側) HP Circuit Board SW Circuit Board PHONES STANDBY PL Circuit Board POWER indicator to AM-CN106 Component side Component side (部品側) (部品側) Component side (部品側) HP, PL, SW: 2NA-WF20810...
- Page 29 YDP-131/YDP-131C GHL88L Circuit Board 2NAK8-WF46230...
- Page 30 YDP-131/YDP-131C GHL88M Circuit Board 2NAK8-WF46240 2...
- Page 31 YDP-131/YDP-131C GHL88H Circuit Board 2NAK8-WF46250...
- Page 32 YDP-131/YDP-131C TEST PROGRAM Preparation • Use an AC adaptor PA-5D. • Following items are required for testing. (Input impedance of measuring instrument is more than 1MΩ) - Level meter (with JIS-C Filter) - Frequency counter: Below decimal point 3 or more figures measurement is possible.
- Page 33 YDP-131/YDP-131C Table 1 Test items Test item Test function and judgment criteria ROM version check To check the Master ROM version using C0–A2 keys. To check the Slave ROM version using C3–A5 keys. Press keys in the specified range and find the key where the sine wave sounds. Check the version by the scale of that key.
- Page 34 YDP-131/YDP-131C Test item Test function and judgment criteria TG1 check The sine wave sounds from the low range in the key range (A0–E3) capable of sounding (Auto Scaling) while the sound production channel of the sound source is changed one after another.
- Page 35 YDP-131/YDP-131C Test item Test function and judgment criteria Pedal 2 check The sine wave of C3 sounds when the test is started and the sine wave of C4 sounds when (Sostenuto pedal) the pedal is depressed. When the pedal is released, the sounding of the C4 sine wave stops and the test result is For the NG test result, the sine wave sounds continuously (until any key is pressed).
- Page 36 YDP-131/YDP-131C Test item Test function and judgment criteria Test Mode Exit To end the test program and reset to the normal mode (for restarting). Table 2 Switch test order Order Switch name LED to light up Note No. DEMO/SONG PIANO/VOICE...
- Page 37 YDP-131/YDP-131C ■ テストプログラム 準備 AC アダプターは、PA-5D を使用します。 テストを行うためには、 以下の測定器、 治具が必要です。 (測定器の入力インピーダンスは、 1MΩ以上あること。 ) ・レベルメーター(JIS‐C フィルター使用) ・周波数カウンター:小数点以下 3 桁以上測定可能であること。 ・MIDI ケーブル [ MASTER VOLUME ]を最大にして、ペダルは OFF にしておきます。 [ PHONES ]端子に、測定プラグ(ステレオプラグ)を挿入します。 ( 33 Ω負荷) テストプログラムの起動 [ C#2 ]と[ F2 ]と[ G#2 ]の鍵盤を同時に押さえながら、パワースイッチを ON にします。 (図 1) テストプログラムが正しく起動されると、 A3のサイン波が発音されます。 [ DEMO/SONG ]ボタンを押すと、 音が止まります。 (図1) テストの進め方 テスト項目の一覧は、表 1 のとおりです。 各テストに対応する鍵盤を押すと、テストが実行されます。 (図 2 参照)...
- Page 38 YDP-131/YDP-131C 表1 テスト項目 鍵盤 テスト項目 テスト内容及び判定条件など ROM バージョン確認 C0〜A2の鍵盤でMaster ROMのバージョンを確認します。 C3〜A5の鍵盤でSlave ROMのバージョンを確認します。 指定された範囲の鍵盤を押した時、正弦波が発音される鍵盤の音階でバー ジョンを確認します。 (図3参照) 鍵盤C0〜A0を押してMaster ROMのバージョンの整数部を確認します。 鍵盤C1〜A1を押してMaster ROMのバージョンの小数部第1位を確認します。 鍵盤C2〜A2を押してMaster ROMのバージョンの小数部第2位を確認します。 鍵盤C3〜A3を押してSlave ROMのバージョンの整数部を確認します。 鍵盤C4〜A4を押してSlave ROMのバージョンの小数部第1位を確認します。 鍵盤C5〜A5を押してSlave ROMのバージョンの小数部第2位を確認します。 押された鍵盤に対応する数字が現在のバージョンと一致する場合はOK音 (C4 正弦波) が、一致しない場合はNG音 (C2正弦波) が発音されます。 鍵盤と数字の対応は図3を参照してください。 例) Ver. 1. 01の場合 C#0鍵を押した時にC4の正弦波が発音され、 C1鍵を押した時にC4の正弦波が発音され、 C#2鍵を押した時にC4の正弦波が発音されます。 3つのC4正弦波の発音で1. 01が確認できます。 (C#0, C1, C#2以外の鍵盤を押すとC2の正弦波が発音されます) C0 D0 E0 F0 G0 A0 B0 C1 D1...
- Page 39 YDP-131/YDP-131C 鍵盤 テスト項目 テスト内容及び判定条件など 音源 1 チェック 音源の発音チャンネルを順番に切り替えながら、発音可能な鍵域 (A0〜E3) で低 (Auto Scaling) 域から正弦波が発音されます。 (32 ch分の発音が終了すると発音が止まります) 異音、ノイズが無いことを確認します。 Auto Scaling終了後に鍵盤を押すと、正弦波が発音されます。 (単音、先着優先) [ DEMO/SONG ]ボタンを押して終了します。 音源 2 チェック 音源の発音チャンネルを順番に切り替えながら、発音可能な鍵域 (F3〜C6) で低 (Auto Scaling) 域から正弦波が発音されます。 (32 ch分の発音が終了すると発音が止まります) 異音、ノイズが無いことを確認します。 Auto Scaling終了後に鍵盤を押すと、正弦波が発音されます。 (単音、先着優先) [ DEMO/SONG ]ボタンを押して終了します。 Pitch チェック 439.92 Hz ±0.22 Hzの正弦波が特定のレベル (DAC入力フルビット-12dB) で発 音されることを確認します。 ( PAN =センター) [ PHONES ] 端子に周波数カウンターを接続して測定します。 [ DEMO/SONG ]ボタンでテスト項目を終了する際、発音が止まります。 Output Level R チェック...
- Page 40 YDP-131/YDP-131C 鍵盤 テスト項目 テスト内容及び判定条件など ペダル 2 チェック テストに入るとC3の正弦波が発音され、ペダルを踏むとC4の正弦波が発音さ (ソステヌートペダル) れます。 ペダルを離すとC4の正弦波の発音が止まり、テストOKとなります。 NGの場合は、正弦波が発音され続けます。 (NGの場合は何らかの鍵盤を押す まで発音は止まりません) ペダル 3 チェック テストに入るとC3の正弦波が発音され、ペダルを踏むとC4の正弦波が発音さ (ダンパーペダル) れます。 ペダルを離すとC4の正弦波の発音が止まり、テストOKとなります。 NGの場合は、正弦波が発音され続けます。 (NGの場合は何らかの鍵盤を押す まで発音は止まりません) MIDI チェック [ MIDI IN ]端子と[ MIDI OUT ]端子をMIDIケーブルで接続後、テストを実行し ます。 OKの場合は、C4の正弦波が発音されます。 (1秒間、発音します) NGの場合は、C2の正弦波が発音されます。 (NGの場合は何らかの鍵盤を押す まで発音は止まりません) 鍵盤種別チェック 工場検査用のテストです。 Master ROM チェック 2 CPU のバスに接続されているROMのチェックサム検査です。 (フルアドレス) OKの場合は、C4の正弦波が発音されます。 (1秒間、発音します)...
- Page 41 YDP-131/YDP-131C 鍵盤 テスト項目 テスト内容及び判定条件など Factory Set 全てのバックアップ領域を初期化して、工場出荷状態にします。 (RAMおよび Flash) ※全データが消去されるので、注意してください。 OKの場合は、C4の正弦波が発音されます。 (1秒間、発音します) NGの場合は、C2の正弦波が発音されます。 (NGの場合は何らかの鍵盤を押す まで発音は止まりません) ※ ここでは初期化用のフラグを立てるだけで、実行は次回電源起動時に行われ ます。 このFactory Setを実行した後、必ずテストNo.48の Test Exit を実施してくだ さい。 再起動 (RE BOOT) した時に実際のメモリーの初期化が行われます。再起動後 は、LEDの点滅が終わるまで電源を切らないでください。 完了まで5秒かかります。 Test Mode Exit テストプログラムを終了し、通常モードに戻ります。 (再起動します) 表2 スイッチテスト順 順番 スイッチ名 点灯させる LED ノート番号 DEMO/SONG PIANO/VOICE SELECT PLAY...
-
Page 42: Backing Up Data And Initializing The Settings
YDP-131/YDP-131C BACKING UP DATA AND INITIALIZING THE SETTINGS Backing up data to flash memory The following items will be stored in flash memory on this instrument. This data will be kept after you turn off the power to the instrument. -
Page 43: バックアップデータと初期化
YDP-131/YDP-131C ■ バックアップデータと初期化 フラッシュメモリーへのデータバックアップ 下記の項目は楽器のフラッシュメモリーに保存されます。 これらは電源を切っても記憶されています。 バックアップデータ メトロノームの音量 メトロノームの拍子 タッチ感度 チューニング 自分で録音したソング(ユーザーソング)データ コンピューターから読み込んだソングデータ 初期化 ( イニシャライズ ) の方法 この 操作 をする と、ユーザ ーソ ングと コンピ ュー ターか ら読み 込ん だソン グ以 外の データが初期化(工場出荷時の状態になります)されます。 右端の鍵盤(C7)を押しながら電源を入れます。 自分で 録音 したソ ング、コン ピュー ター から読 み込ん だソン グ以 外の... -
Page 44: Transmitting Song Data Between The Computer
Yamaha website. To be able to use this function, you must first download Musicsoft Downloader from Yamaha website at the following URL, and install it on your computer. -
Page 45: ■ Ydp-131/Ydp-131C とコンピューター間でのデータの送受信
YDP-131/YDP-131C ■ YDP-131/YDP-131C とコンピューター間でのデータの送受信 ミ ュ ー ジ ッ ク ソ フ ト ダ ウ ン この楽器にはデモソングやピアノ50 曲を内蔵していますが、 そのほかにコンピューターか ローダーのソフトウェアは、 無 らソングデータを読み込んで演奏することもできます。 料でダウンロードできます。 この操作をするためには、 下記URL からミュージックソフトダウンローダーをダウンロー ドし、 ご使用のコンピューターにインストールする必要があります。 http://www.yamaha.co.jp/download/msd/ ● ミュージックソフトダウンローダーを使用するために必要なコンピューターシステム ・OS : Windows 98SE/Me/2000/XP Home Edition/XP Professional ® ・CPU : 233MHz 以上(500MHz 以上推奨)のIntel Pentium および Celeron ® ファミリー ・メモリー : 64MB 以上(256MB 以上推奨) ・ハードディスク... -
Page 46: Midi Implementation Chart
YDP-131/YDP-131C MIDI IMPLEMENTATION CHART MIDI Implementation Chart YAMAHA [ Digital Piano ] Date :08-APR-2005 Version : 1.0 Model YDP-131 MIDI Implementation Chart Function... Transmitted Recognized Remarks Basic Default 1-16 Channel Changed 1-16 1-16 Mode Default Messages Altered ************** 0-127 0-127... -
Page 47: Midi Data Format
YDP-131/YDP-131C MIDI DATA FORMAT If you’re already very familiar with MIDI, or are using a computer to control your music hardware with computer-generated MIDI messages, the data provided in this section can help you to control this instrument. 1. NOTE ON/OFF 3. - Page 48 YDP-131/YDP-131C 4. PROGRAM CHANGE 7. SYSTEM EXCLUSIVE MESSAGES (Universal System Exclusive) Data format: [CnH] -> [ppH] CnH = Program event (n = channel number) (1) Universal Realtime Message ppH = Program change number Data format: [F0H] -> [7FH] -> [XnH] -> [04H] -> [01H] ->...
- Page 49 Data format: [F0H] -> [43H] -> [1nH] -> [4CH] -> [hhH] -> F0H = Exclusive status [mmH] -> [llH] -> [ddH] -> [F7H] 43H = Yamaha ID F0H = Exclusive status 73H = Digital Piano ID 43H = YAMAHA ID 7FH = Extended Product ID 1nH = When received, n=0~F.
- Page 50 YDP-131/YDP-131C <Table 1> MIDI Parameter Change table (SYSTEM) Address (H) Size (H) Data (H) Parameter Description Default value (H) 00 00 00 020C - 05F4(*1) MASTER TUNE -50 - +50[cent] 00 04 00 00 1st bit 3 - 0 bit 15 - 12...
- Page 51 PARTS LIST CONTENTS(目次) KEY COVER ASSEMBLY(スライド蓋 Ass y) ..16 OVERALL ASSEMBLY(総組立) ......2 D-JACK ASSEMBLY(D ジャック Ass y) ..... 17 MAIN UNIT(メインユニット) ........ 4 SIDE BOARD ASSEMBLY(側板 Ass y) ....18 KEYBED ASSEMBLY(棚板集成)......7 PEDAL BOX ASSEMBLY(ぺダル Box Ass y)..20 FRONT RAIL ASSEMBLY(口棒 Ass y)...
-
Page 52: Overall Assembly(総組立
YDP-131/YDP-131C OVERALL ASSEMBLY (総組立) Main Unit: See page 4. (メ イ ンユニッ ト) Side Board Assembly L: Side Board Assembly R: See page 18. See page 18. (側板Ass'y ( L) ) (側板Ass'y ( R) ) Pedal Box Assembly: See page 20. - Page 53 WF324900 AC Adaptor PA-5D CHN 同 梱 品 セ ッ ト 椅 子 WH499000 Bench BC-104DR YDP-131 J,N,O 同 梱 品 セ ッ ト 椅 子 WH499200 Bench BC-104CH YDP-131C J,N,O 同 梱 品 セ ッ ト 椅 子 WH499300...
-
Page 54: Main Unit(メインユニット
YDP-131/YDP-131C MAIN UNIT (メインユニット) Rear view Top Board Assembly: Music Rest Assembly: Top view 1 See page 14. See page 15. (屋根Ass'y) (譜面板Ass'y) D-JACK Assembly: Top view 2 See page 17. (Dジ ャ ッ クAss'y) Key Cover Assembly: See page 16. - Page 55 YDP-131/YDP-131C Bottom view Keyboard Assembly: See page 22. Top view 3 (GHL鍵盤束線付B) 12 S04 End Block Assembly L: End Block Assembly R: See page 12. See page 13. (拍子木 (L) Ass'y) (拍子木 (R) Ass'y) Keybed Assembly: See page 7. Top view 4 (棚板集成)...
- Page 56 YDP-131/YDP-131C PART NO. DESCRIPTION 部 品 名 REMARKS REF NO. QTY RANK MAIN UNIT メ イ ン ユ ニ ッ ト YDP-131/YDP-131C Main Unit メ イ ン ユ ニ ッ ト YDP-131 (WF08010) Main Unit メ イ ン ユ ニ ッ ト...
-
Page 57: Keybed Assembly(棚板集成
YDP-131/YDP-131C KEYBED ASSEMBLY (棚板集成) Top view PART NO. DESCRIPTION 部 品 名 REMARKS REF NO. QTY RANK KEYBED ASSEMBLY 棚 板 集 成 YDP-131/YDP-131C WF055200 Keybed Assembly 棚 板 集 成 Keybed Assembly 棚 板 木 部 集 成 (WF05530) 鬼... -
Page 58: Front Rail Assembly(口棒 Ass Y
YDP-131/YDP-131C FRONT RAIL ASSEMBLY (口棒 Ass y) Side view Rear view Top view PART NO. DESCRIPTION 部 品 名 REMARKS REF NO. QTY RANK FRONT RAIL ASSEMBLY 口 棒 A s s y YDP-131/YDP-131C Front Rail Assembly 口 棒 A s s... -
Page 59: Back Top Board Assembly(背面框 Ass Y
YDP-131/YDP-131C BACK TOP BOARD ASSEMBLY (背面框 Ass y) Rear view Top view Front view PART NO. DESCRIPTION 部 品 名 REMARKS REF NO. QTY RANK BACK TOP BOARD ASSEMBLY 背 面 框 A s s y YDP-131/YDP-131C Back Top Board Assembly 背... -
Page 60: Arm Assembly(腕木 Ass Y
YDP-131/YDP-131C ARM ASSEMBLY (腕木 Ass y) Top view Arm Assembly L only. (腕木Ass'y ( L) のみ) Front view Side view Rear view NOTE: This figure shows the left arm assembly. 注 : このイラストは腕木 Ass y ( L) を表わしています。... - Page 61 YDP-131/YDP-131C Arm Assembly L (腕木 Ass y (L) ) PART NO. DESCRIPTION 部 品 名 REMARKS REF NO. QTY RANK ARM ASSEMBLY L LEFT 腕 木 A s s y ( L ) YDP-131/YDP-131C Arm Assembly L LEFT 腕 木 A s s...
-
Page 62: End Block Assembly L(拍子木 (L)Ass Y
YDP-131/YDP-131C END BLOCK ASSEMBLY L (拍子木 (L) Ass y) Top view Bottom view YDP-131 PART NO. DESCRIPTION 部 品 名 REMARKS REF NO. QTY RANK END BLOCK ASSEMBLY L LEFT 拍 子 木 ( L ) A s s y... -
Page 63: End Block Assembly R(拍子木 (R)Ass Y
YDP-131/YDP-131C END BLOCK ASSEMBLY R (拍子木 (R) Ass y) Top view Side view Bottom view PART NO. DESCRIPTION 部 品 名 REMARKS REF NO. QTY RANK END BLOCK ASSEMBLY R RIGHT 拍 子 木 ( R ) A s s... -
Page 64: Top Board Assembly(屋根 Ass Y
YDP-131/YDP-131C TOP BOARD ASSEMBLY (屋根 Ass y) Top view Front view Bottom view PART NO. DESCRIPTION 部 品 名 REMARKS REF NO. QTY RANK TOP BOARD ASSEMBLY 屋 根 A s s y YDP-131/YDP-131C WF058600 Top Board Assembly 屋 根 A s s... -
Page 65: Music Rest Assembly(譜面板 Ass Y
YDP-131/YDP-131C MUSIC REST ASSEMBLY (譜面板 Ass y) Rear view PART NO. DESCRIPTION 部 品 名 REMARKS REF NO. QTY RANK MUSIC REST ASSEMBLY 譜 面 板 A s s y YDP-131/YDP-131C WF069600 Music Rest Assembly 譜 面 板 A s s... -
Page 66: Key Cover Assembly(スライド蓋 Ass Y
YDP-131/YDP-131C KEY COVER ASSEMBLY (スライド蓋 Ass y) Bottom view PART NO. DESCRIPTION 部 品 名 REMARKS REF NO. QTY RANK KEY COVER ASSEMBLY ス ラ イ ド 蓋 A s s y YDP-131/YDP-131C WF071800 Key Cover Assembly ス ラ イ ド 蓋 A s s... -
Page 67: D-Jack Assembly(D ジャック Ass Y
YDP-131/YDP-131C D-JACK ASSEMBLY (Dジャック Ass y) PART NO. DESCRIPTION 部 品 名 REMARKS REF NO. QTY RANK D-JACK ASSEMBLY D ジ ャ ッ ク A s s y YDP-131/YDP-131C D-JACK Assembly D ジ ャ ッ ク A s s y (WF22300) Angle, D-JACK D... -
Page 68: Side Board Assembly(側板 Ass Y
YDP-131/YDP-131C SIDE BOARD ASSEMBLY (側板 Ass y) Top view Front view Side view Bottom view NOTE: This figure shows the left side board assembly. 注 : このイラストは側板 Ass y ( L) を表わしています。... - Page 69 YDP-131/YDP-131C Side Board Assembly L (側板 Ass y (L) ) PART NO. DESCRIPTION 部 品 名 REMARKS REF NO. QTY RANK SIDE BOARD ASSEMLBY L LEFT 側 板 A s s y ( L ) YDP-131/YDP-131C Side Board Assembly L LEFT 側...
-
Page 70: Pedal Box Assembly(ぺダル Box Ass Y
YDP-131/YDP-131C PEDAL BOX ASSEMBLY (ペダルBox Ass y) Front view Bottom view Pedal Assembly: See page 21. (ペダルAss'y ( T) ) PART NO. DESCRIPTION 部 品 名 REMARKS REF NO. QTY RANK PEDAL BOX ASSEMBLY ペ ダ ル B o x A s s... -
Page 71: Pedal Assembly(ぺダル Ass Y(T
YDP-131/YDP-131C PEDAL ASSEMBLY (ペダル Ass y (T) ) • Top view • Side view PART NO. DESCRIPTION 部 品 名 REMARKS REF NO. QTY RANK PEDAL ASSEMBLY ペ ダ ル A s s y ( T ) YDP-131/YDP-131C WF224300 Pedal Assembly ペ... -
Page 72: Keyboard Assembly(Ghl 鍵盤束線付 B
YDP-131/YDP-131C KEYBOARD ASSEMBLY (GHL 鍵盤束線付B) Keyboard Assembly (GHL鍵盤Ass'y) GHL88 Circuit 230a Board Assembly (GHL88シー ト) 230d 230b 230d 230c... - Page 73 YDP-131/YDP-131C PART NO. DESCRIPTION 部 品 名 REMARKS REF NO. QTY RANK KEYBOARD ASSEMBLY G H L 鍵 盤 束 線 付 B YDP-131/YDP-131C WF575700 Keyboard Assembly GHL-B A88 K6 G H L 鍵 盤 束 線 付 B Keyboard Assembly GHL A88 K6 G...
-
Page 74: Headphones Jack Assembly (Hp ジャック Ass Y
YDP-131/YDP-131C HEADPHONES JACK ASSEMBLY (HPジャック Ass y) Top view Side view Bottom view PART NO. DESCRIPTION 部 品 名 REMARKS REF NO. QTY RANK HEADPHONES JACK ASSEMBLY H P ジ ャ ッ ク A s s y YDP-131/YDP-131C Headphones Jack Assembly H... -
Page 75: Bench (Bc-104Dr/Ch)(椅子
同 梱 品 セ ッ ト 椅 子 YDP-131/YDP-131C WH499000 Bench BC-104DR 同 梱 品 セ ッ ト 椅 子 YDP-131 J,N,O Bench BC-104CH 同 梱 品 セ ッ ト 椅 子 YDP-131C J,N,O WH499200 同 梱 品 セ ッ ト 椅 子... -
Page 76: Electrical Parts(電気部品
YDP-131/YDP-131C ELECTRICAL PARTS (電気部品) PART NO. DESCRIPTION 部 品 名 REMARKS REF NO. QTY RANK ELECTRICAL PARTS 電 気 部 品 YDP-131/YDP-131C Circuit Board A M シ ー ト (WF20640)(X6634D0) WF206500 Circuit Board D J シ ー ト (WF20810)(X6672C0) WF208200 H... - Page 77 YDP-131/YDP-131C PART NO. DESCRIPTION 部 品 名 REMARKS REF NO. QTY RANK C306 VM902400 Semiconductive Cera. Cap. 0.1000 25V Z FORM. 半 導 体 セ ラ コ ン 天 津 C307 Mylar Capacitor 0.1000 50V J RX TP マ...
- Page 78 YDP-131/YDP-131C PART NO. DESCRIPTION 部 品 名 REMARKS REF NO. QTY RANK R115 RD355100 Carbon Resistor (chip) 100.0 63M J RECT. チ ッ プ 抵 抗 R117 Carbon Resistor (chip) 10.0K 63M J RECT. チ ッ プ 抵 抗 RD357100...
- Page 79 YDP-131/YDP-131C PART NO. DESCRIPTION 部 品 名 REMARKS REF NO. QTY RANK CN302 V I 8 7 8 0 0 0 Cable Holder 51048 2P TE ケ ー ブ ル ホ ル ダ ー CN302 VY668300 Cable Holder 51048 2P TE ケ...
- Page 80 YDP-131/YDP-131C PART NO. DESCRIPTION 部 品 名 REMARKS REF NO. QTY RANK WH101 Connector Assembly DJ 10P-360 D J 線 材 (WF21550) WH102 Connector Assembly PL 2P-150 P L 線 材 (WF21610) WH103 Connector Assembly SW 4P-550 S W 線...
- Page 81 YDP-131/YDP-131C PART NO. DESCRIPTION 部 品 名 REMARKS REF NO. QTY RANK C417 UF037100 Electrolytic Cap. (chip) 10 16V チ ッ プ ケ ミ コ ン C418 Electrolytic Cap. (chip) 10 16V チ ッ プ ケ ミ コ ン UF037100...
- Page 82 YDP-131/YDP-131C PART NO. DESCRIPTION 部 品 名 REMARKS REF NO. QTY RANK R327 RD357220 Carbon Resistor (chip) 22.0K 63M J RECT. チ ッ プ 抵 抗 -332 RD357220 Carbon Resistor (chip) 22.0K 63M J RECT. チ ッ プ 抵 抗...
- Page 83 HP.........3 PEDAL UNIT DJ........2 MV.........3 DM........2 PEDAL.........2 GHL88H......3 PL........3 SOFT DAMPER GHL88L......3 PN........2 SOSTENUTO GHL88M......3 SW........3 YDP-131/YDP-131C CIRCUIT BOARD LAYOUT & WIRING M104 WH101 P102 P101 M103 M104 WH103 NOTE3: Portion of B.(B部) CN104 White CN102 Black CN101 CN105 CN401...
- Page 84 <Page. 2> YDP-131/YDP-131C YDP-131/YDP-131C OVERALL CIRCUIT DIAGRAM 1/2 (DJ, DM, PEDAL, PN) DRAM 4M FLASH ROM 64M FLASH ROM 4M PROG./WAVE not installed 28CC1-2000006135 KEY MATRIX not installed SW [0] SW [1] SW [2] SW [3] SW [4] SW [5]...
- Page 85 <Page. 3> YDP-131/YDP-131C YDP-131/YDP-131C OVERALL CIRCUIT DIAGRAM 2/2 (AM, GHL88H, GHL88L, GHL88M, HP, MV, PL, SW) BA50BC0T (X5887A00) REGULATOR +5V AM: IC401, 402 POWER AMP 6W + 6W 1. INPUT MASTER 2. OUTPUT OP AMP VOLUME 3. GND OP AMP...