Table of Contents

Related Manuals for Yamaha ARIUS YDP-165


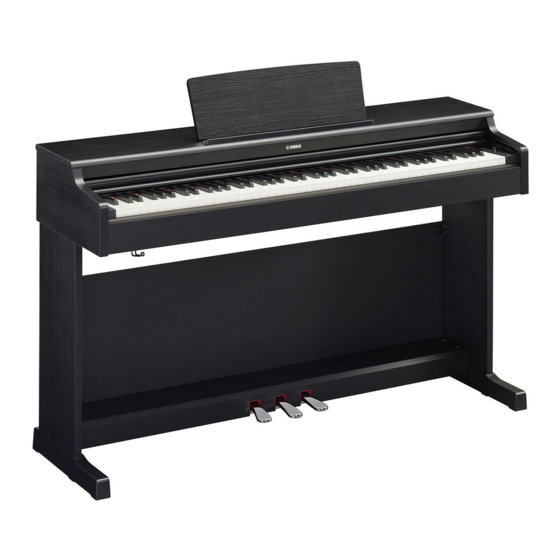
Summary of Contents for Yamaha ARIUS YDP-165
- Page 1 DIGITAL PIANO YDP - 165 YDP - 145 YDP - S55 YDP - S35 Owner’s Manual Before using the instrument, be sure to read “PRECAUTIONS” on pages 4-5. For information on assembling the instrument, refer to the instructions at the end of this manual.
- Page 2 This equipment generates/uses radio frequen- The above statements apply ONLY to those products dis- cies and, if not installed and used according to the instruc- tributed by Yamaha Corporation of America or its subsid- tions found in the users manual, may cause interference iaries.
- Page 3 For AC adaptor Explanation of Graphical Symbols The lightning flash with arrowhead symbol CAUT ION within an equilateral triangle is intended to alert the user to the presence of uninsulated RISK OF ELECTRIC SHOCK “dangerous voltage” within the product’s DO NOT OPEN enclosure that may be of sufficient magnitude to constitute a risk of electric shock to persons.
-
Page 4: Precautions
PRECAUTIONS PLEASE READ CAREFULLY BEFORE PROCEEDING Especially in the case of children, a guardian should provide guidance on how to properly use and handle the product before actual use. Please keep this manual in a safe and handy place for future reference. WARNING Always follow the basic precautions listed below to avoid the possibility of serious injury or even death from electrical shock, short-circuiting, damages, fire or other hazards. - Page 5 Connections • Before connecting the product to other electronic Yamaha cannot be held responsible for damage components, turn off the power for all components. caused by improper use or modifications to the Before turning the power on or off for all components, product, or data that is lost or destroyed.
- Page 6 Yamaha Corporation is not required regardless of whether the distribution method is paid or free • Do not expose the instrument to excessive dust or of charge.
-
Page 7: Table Of Contents
Table of Contents PRECAUTIONS ........4 Recording Your Performance ..... 28 Recording Your Performance ........ 28 About the Manuals ........ 8 Changing the Initial Settings of the Recorded Song ..................29 Included Accessories ......8 Deleting Recorded Data .......... 29 Panel Controls and Terminals ..... -
Page 8: About The Manuals
Thank you for choosing this Yamaha digital piano. This instrument provides exceptionally high-quality sound and expressive control for your playing enjoyment. In order to make the most of the performance potential and features of the instrument, please read the manuals thoroughly, and keep them in a handy place for later reference. -
Page 9: Panel Controls And Terminals
Panel Controls and Terminals YDP-165, YDP-145 Music braces (YDP-165) The illustrations are taken from the YDP-145. Music rest Bottom YDP-145 Bottom Bottom YDP-165 (Keyboard side) (Keyboard side) (Keyboard side) YDP-S55, YDP-S35 The illustrations are taken from the YDP-S55. Rear YDP-S35 Bottom Bottom YDP-S55... - Page 10 [P] (Standby/On) switch......page 13 [PHONES] jacks........page 15 For turning the power on or setting to standby. For connecting a set of standard stereo headphones. Headphone hanger (YDP-165 only) [MASTER VOLUME] knob ..... page 14 You can hang the headphones on this instrument For adjusting the volume of the entire sound.
-
Page 11: Basic Operations
Basic Operations Setting Up Key Cover (YDP-165, YDP-145) Music Rest (YDP-165, YDP-145) To open the key cover: To raise the music rest: Lift the cover slightly, then push and slide it to the end. To close the key cover: Slide the cover toward you and gently lower the cover over the keys. -
Page 12: Key Cover And Music Rest (Ydp-S55, Ydp-S35)12
Setting Up Closing the key cover Key Cover and Music Rest (YDP-S55, YDP-S35) Fold the music rest. Unfold the front part of the key cover. CAUTION Hold the key cover with both hands when opening or closing Hold the key cover with both hands and it. -
Page 13: Turning The Power On
Setting Up Turning the Power On Turn down the [MASTER VOLUME] knob to “MIN.” Connect the plugs of the AC adaptor in the order shown in the illustration. Press the [P] (Standby/On) switch to YDP-165, YDP-S55 turn the power on. The lamps on the buttons to the left of the keyboard light up, and when they go out, the instrument starts DC IN jack (page 10) -
Page 14: Auto Power Off Function
Setting Up Turning the Operation Confirmation Auto Power Off Function Sounds On/Off While holding down [DEMO/SONG] and To prevent unnecessary power consumption, this [PIANO/VOICE] simultaneously, press the A#-1 function automatically turns the power off if the key to turn the sounds on or the A-1 key to turn the instrument is not operated for 30 minutes. -
Page 15: Using Headphones
Setting Up Reproducing a natural sense of distance Using Headphones (Stereophonic Optimizer) The Stereophonic Optimizer gives you the feeling Since this instrument is of playing an actual acoustic piano — even though equipped with two you’re listening through headphones. Normally, the [PHONES] jacks, you sound comes out from headphones sounds very can connect two sets of... -
Page 16: Playing The Piano
Playing the Piano Intelligent Acoustic Control (IAC) IAC is a function which automatically adjusts and controls the sound quality according to the overall volume of the instrument. IAC Control is effective only on the sound output of the instrument speakers or headphones. Even when the Default setting: volume is low, this lets you hear both low sounds and high sounds clearly. -
Page 17: Using The Pedals
Playing the Piano Using the Pedals Damper Pedal (Right) NOTE When you press the damper pedal, the notes you If the pedals do not work, the pedal cord plug may be not play have a longer sustain. When you select a connected. -
Page 18: Using The Vrm Lite Function
Playing the Piano Using the VRM Lite Function The VRM (Virtual Resonance Modeling) Lite technology featured in this instrument reproduces sophisticated string resonance faithfully using a virtual musical instrument (physical modeling), and makes the sound more like that of a real acoustic piano. Since instantaneous resonance is made at the moment according to the state of the keyboard or pedal, you can vary the sound expressively by changing the timing of your pressing the keys, and the timing and depth of your pressing the pedal. -
Page 19: Using The Metronome
Playing the Piano Using the Metronome The metronome feature is convenient for practicing with an accurate tempo. Press [METRONOME] to start the Metronome. Press [METRONOME] to stop the Metronome. Metronome setting While holding down the [METRONOME], press one of the highlighted keys (shown below) or [+R]/[−L] to set the Metronome parameter. -
Page 20: Advanced Operations
C1 D1 E1 F1 G1 A1 Voice List Voice Name Voice description Yamaha’s CFX flagship concert grand piano sound with a wide CFX Grand* dynamic range for maximum expressive control. Suitable for playing in any music genre and style. Grand piano sound with a soft and warm tone. Good for playing Mellow Grand* ballads. -
Page 21: Listening To The Demo Songs
Original — Strings Original — The length and actual content of the Demo Songs (excluding the original Songs) may differ from the original compositions. The original Demo Songs are Yamaha originals (© Yamaha Corporation). YDP-165, YDP-145, YDP-S55, YDP-S35 Owner’s Manual... -
Page 22: Adding Variations To The Sound (Reverb)
Playing Various Musical Instrument Sounds (Voices) Adding Variations to the Sound (Reverb) This instrument features several Reverb Types that add extra depth and expression to the sound to create a realistic acoustic ambience. The appropriate Reverb Type and Depth are called up automatically when you select each of the Voices and Songs. -
Page 23: Transposing The Pitch In Semitones
Playing Various Musical Instrument Sounds (Voices) Transposing the Pitch in Semitones You can shift the pitch of the entire keyboard up or down in semitones in order to facilitate playing in difficult key signatures, or to easily match the pitch of the keyboard to the range of a singer or other instruments. -
Page 24: Layering Two Voices (Dual Mode)
Playing Various Musical Instrument Sounds (Voices) Layering Two Voices (Dual mode) You can layer two Voices and play them simultaneously to create a more richly textured sound. Engage the Dual mode. While holding down [PIANO/VOICE], simultaneously hold down two keys between C1 and A1 to select the two desired Voices. -
Page 25: Playing Duo
Playing Various Musical Instrument Sounds (Voices) Playing Duo This function allows two different players to play the instrument, one on the left and the other on the right, over the same octave range. While holding down [PIANO/VOICE], press [+R] and [−L] NOTE simultaneously to engage Duo. -
Page 26: Song Playback And Practice
Song Playback and Practice Listening to Preset Songs In addition to the Demo Songs, Preset Songs (50 Classical Music Masterpieces and Lesson Songs) are provided for your listening pleasure. Find the Song number and Music book that you want to Default Setting (Music book): play back. -
Page 27: Practicing A One-Hand Part
Song Playback and Practice To play back from the beginning of the Song During playback, press [+R] and [−L] simultaneously to jump to the playback position at the beginning of the Song then continue playback at the last specified tempo. Press [DEMO/SONG] or [PLAY] to stop playback. -
Page 28: Recording Your Performance
Recording Your Performance This instrument lets you record your keyboard performance as the User Song. Up to two Parts (left-hand and right-hand) can be recorded separately. Recording Your Performance Select the desired Voice and other parameters, such as beat NOTICE Only one Song (2 tracks) can (time signature), for recording. -
Page 29: Changing The Initial Settings Of The Recorded Song
Recording Your Performance Changing the Initial Settings of the Recorded Song The settings of the following parameters can be changed after the Record operation is completed. • For individual Parts: Voice, Volume balance (Dual/Duo), Reverb Depth • For the entire Song: Tempo, Reverb Type Make settings for the above parameters as desired. -
Page 30: Using With A Computer Or A Smart Device
When using this function on a computer running Windows, you will need to install the Yamaha Steinberg USB Driver to your computer. For details, refer to the “Computer-related Operations” on the website (page 8). Audio Loop Back On/Off... -
Page 31: Backing Up Data And Initializing The Settings
Lowest key About the latest Firmware Version Yamaha may from time to time update firmware of the product without notice for improvement. Make sure to check our website for information of the latest release and upgrade the firmware for your instrument. -
Page 32: Appendix
(pages 36, 39). This is no problem. Yamaha develops the Piano Voices so that the original piano sound is The pitch and sound quality of the Piano Voice reproduced as faithfully as possible. This is why you may hear overtones is wrong in a specific key range. -
Page 33: Keyboard Stand Assembly
Keyboard Stand Assembly Moving/Installing YDP-165, YDP-145 page 34 YDP-S55, YDP-S35 page 37 When moving the instrument, be sure to keep the Before assembling the instrument, be sure to read the instrument horizontal and hold with two or more people. precautions below. Do not subject the instrument to excessive vibration or shock. -
Page 34: Ydp-165, Ydp-145 Assembly
Keyboard Stand Assembly Align the side boards with each end YDP-165, YDP-145 Assembly of pedal box, and lightly tighten with flat head screws (6 × 20 mm) You can watch a video of the assembly. for temporary fastening Scan the QR code at left or access the These screws will be tightened securely later in website below. - Page 35 Keyboard Stand Assembly Securely tighten the screws on the top of the Set the main unit in place. back board that were attached in step 2-2. Be sure to hold the bottom surface at least 2 - 2, 2 - 4 10 cm inside from the edge of the main unit Side board (R) ×...
- Page 36 Keyboard Stand Assembly (YDP-165 only) Connect the power cord to Connect the pedal cord plug and the the AC adaptor. power plug. 6 - 2 Cord holder 6 - 1 6 - 4 TO PEDAL DC IN Insert the DC plug into the DC IN jack. Rotate the adjuster until it presses in firm contact with the floor surface.
-
Page 37: Ydp-S55, Ydp-S35 Assembly
Keyboard Stand Assembly Align the side boards with each end YDP-S55, YDP-S35 Assembly of pedal box, and lightly tighten with flat head screws (6 × 20 mm) for You can watch a video of the assembly. temporary fastening. Scan the QR code at left or access the These screws will be tightened securely later in website below. - Page 38 Keyboard Stand Assembly Re-tighten the screws on the upper side of Set the main unit in place. the back board that were temporarily Be sure to hold the bottom surface 10 cm or more fastened in step 2-1. inside from the edge of the main unit so that you do not pinch your hands.
- Page 39 Keyboard Stand Assembly NOTICE (YDP-S55 only) With the non-felt If it is not plugged in firmly, it may cause the pedals to side of the front board facing the not work. front (pedal side), fix it with thin Wind the cord holder around pedal cord to screws (4 ×...
-
Page 40: Specifications
Panel Language English Key Cover Style Sliding Folding Cabinet Music Rest Music Clips — Tone Generation Piano Sound Yamaha CFX Virtual Resonance Modeling Lite (VRM Lite) Piano Effect Voices Key-off Samples Smooth Release — — Polyphony (max.) Preset Number of Voices... - Page 41 Yamaha * The contents of this manual apply to the latest specifications as of the publishing date. To obtain the latest manual, access the Yamaha website then download the manual file. Since specifications, equipment or separately sold accessories may not be the same in every locale, please check with your Yamaha dealer.
-
Page 42: Index
Index Numerics ......26, 43 ................ 24 50 Classical Music Masterpieces Octave ........ 14 Operation Confirmation Sounds ..............13 AC adaptor ..............8 ........9 Accessories Panel Controls and Terminals ..............33 ................. 17 Assembly Pedals ............30 ................23 Audio Loop Back Pitch ............14 .............. -
Page 43: Song List
Song List 50 Classical Music Masterpieces Lesson Songs Song Title Composer Album Title Title No. /Song Title Composer Arrangements 1-50 Vorschule im 1–106 F. Beyer Klavierspiel op.101 Canon D dur J. Pachelbel 1-50 51-100 Air On the G String J. S. Bach 101-106 Jesus, Joy of Man’s Desiring J. - Page 44 Important Notice: U.S. LIMITED WARRANTY for Customers in the United States For detailed information about this Yamaha product and warranty service, please either visit the following website address (printable file is available at our website) or contact Customer Service at the address or telephone number identified below.
- Page 46 Head Office/Manufacturer: Yamaha Corporation 10-1, Nakazawa-cho, Naka-ku, Hamamatsu, 430-8650, Japan DMI30 Importer (European Union): Yamaha Music Europe GmbH Siemensstrasse 22-34, 25462 Rellingen, Germany Importer (United Kingdom): Yamaha Music Europe GmbH (UK) Sherbourne Drive, Tilbrook, Milton Keynes, MK7 8BL, United Kingdom...
- Page 48 1 step down Default setting 1 step up −1 (Voice 2) 0 (Voice 2) +1 (Voice 2) −1 (Voice 1) 0 (Voice 1) +1 (Voice 1) Soft Medium Hard Fixed Manual Development Group © 2021 Yamaha Corporation Published 12/2021 MWMA-B0 VEH0250...
Need help?
Do you have a question about the ARIUS YDP-165 and is the answer not in the manual?
Questions and answers