Table of Contents
Advertisement
Quick Links
Advertisement
Table of Contents

Related Manuals for Genius ZODIAC 60


Summary of Contents for Genius ZODIAC 60
- Page 1 ZODIAC 60...
- Page 2 Note per la lettura dell’istruzione Leggere completamente questo manuale di installazione prima di iniziare l’installazione del prodotto. Il simbolo evidenzia note importanti per la sicurezza delle persone e l’integrità dell’automazione. Il simbolo richiama l’attenzione su note riguardanti le caratteristiche od il funzionamento del prodotto. Notes on reading the instruction Read this installation manual to the full before you begin installing the product.
-
Page 3: Table Of Contents
Index GENERAL SAFETY INSTRUCTIONS FOR INSTALLATION AND MAINTENANCE ........p. 2 TOOLS AND MATERIALS ........................p. 2 DECLARATION OF CONFORMITY ....................... p. 3 WARNINGS FOR THE INSTALLER ......................p. 3 1. DIMENSIONS ............................p. 4 2. TECHNICAL SPECIFICATIONS ......................p. 4 3. -
Page 4: General Safety Instructions For Installation And Maintenance
�or �ross�hea� an� �ut�hea� s�rews •two �lat wren�hes �or ��� �� he�a�on hea� s�rews two �lat wren�hes �or ��� �� he�a�on hea� s�rews Material require� �or installin� the ZODIAC 60 operator an� the rele�ant a��essories (i� present): •�a�le ��0��� �� �a�le ��0��� ��... -
Page 5: Declaration Of Conformity
�9) Do not in any way �o�i�y the �o�ponents o� the auto�ate� a sour�e o� �an�er� syste�� 6) GENIUS �e�lines all lia�ility �ause� �y i�proper use or use other than �0) The installer shall supply all in�or�ation �on�ernin� �anual operation that �or whi�h the auto�ate� syste� was inten�e��... -
Page 6: Dimensions
AUTOMATED SYSTEM �ODIAC 60 These instru�tions apply to �o�el GENIUS �ODIAC 60� 2 TECHNICAL SPECIFICATIONS The ZODIAC 60 auto�ate� syste�s �ake it possi�le to auto�ate �alan�e� se�tional �oors o� sin�le �ara�es �or resi�ential Model �ODIAC 60 use� Power supply (V ~ � 50 Hz.) ���0... -
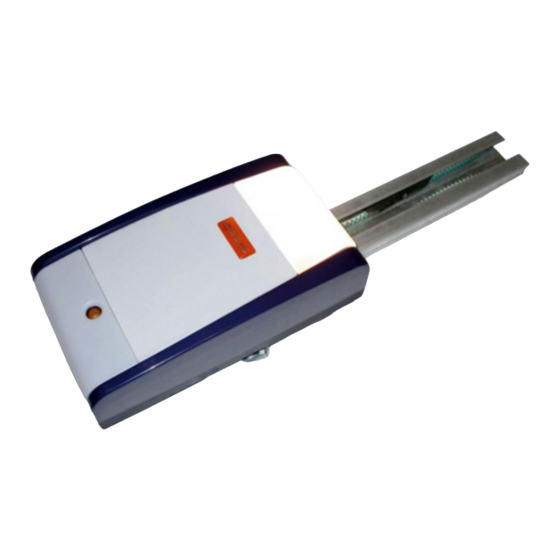
Page 7: Description
Ceilin� la�p Rear �oor Courtesy li�ht Plasti� housin� �or ZODIAC 60 operator Rear �ittin� Sli�in� �ui�e Dri�e �arria�e Release kno� Door �ittin� �ra�ket Trans�ission unit... -
Page 8: Assembly
�) Sli�e the trans�ission unit (Fi��� re�� A) alon� the whole sli�in� 6 ASSEMBLY �ui�e� until it is near the �ront ter�inal� the one opposite the 6.1 Sliding guide �ri�e �ouplin�� I� you use a sli�in� �ui�e in two pie�es� you �ust asse��le it� ��) Asse��le the �ront �ittin�... -
Page 9: External Release (Optional)
6.3 External release (optional) 7.1 Sliding guide I� the e�ternal release syste� has to �e installe�� the �a�le When you ha�e �inishe� the preli�inary asse��ly operations� �ust �e pla�e� in its seat �e�ore �e�innin� to install� you �an �e�in installin� the sli�in� �ui�e� as �ollows: �) Release the �arria�e (see par�... -
Page 10: On-Door Fitting
8) Li�t the sli�in� �ui�e until the rear �ittin� is at the sa�e le�el Position the �ittin� on the �oor so that the throu�h�ele�ent as the �ront �ittin�� or until you rea�h the sa�e in�lination as o� the release �a�le is �a�in� towar� the le�t si�e o� the �oor the �oor’s horizontal rail�... -
Page 11: Operator
7.3 Operator When you ha�e asse��le� the rear �ittin� to the sli�in� �ui�e an� �inishe� installin� the sli�in� �ui�e� you �an install the operator: �) While keepin� the operator in�line� at ���/�0° (Fi�� �0)� insert the �ear�otor sha�t in the �ouplin� on the rear �ittin� o� the sli�in�... -
Page 12: Control Board
8 CONTROL BOARD 8.1 Technical specifications ���0 / ��0 Supply voltage (V ~ � Hz.) �� Power supply to accessories (Vdc) �00 Accessories max. load (mA.) ��0 / +���� Operating ambient temperature (°C) Re�ei�er �o�ule at �����/868 Quick-fit connector MHz an� �attery �o�ule Auto�ati�... -
Page 13: Courtesy Light
�or powerin� the network� si�nals an� a��essories� considers this distance as the new closing contact point � The ZODIAC 60 operator has a �a�le with a two�pole plu� �or and goes into closed status. To restore the correct ���0 Va� power supply�... -
Page 14: Programming
The learnin� �y�le �akes it possi�le to �e�ine the �ollowin�: 11 PROGRAMMING 11.1 Setting the board � the �or�e require� to �o�e the �oor� � the slow��own points� Set the unit with Dip�Swit�h DS� to o�tain the operation you � the openin� an� �losin� stop points� require�... -
Page 15: Pre-Flashing
Durin� these �� se�on�s� in or�er to li�hten the loa� on the �) Gi�e the �st OPEN �o��an�: the operator per�or�s a release syste�� you �an sen� OPEN pulses within a ti�e inter�al �e�eleration �losin� �anoeu�re until it �ete�ts the stop o�... -
Page 16: Memory Storage Of Radio Controls Coding
12 MEMORY STORAGE OF RADIO CONTROLS CODING �) The LED on the �oar� li�hts up on stea�y �ea� �or � se�on� an� then �oes OFF� in�i�atin� that stora�e was e�e�ute�� 8) Release the ra�io �ontrol push��utton� The �ontrol unit has an inte�rate� ���hannel �e�o�in� syste�� 9) Qui�kly press twi�e in su��ession the �e�ory store�... -
Page 17: Radio Controls Deletion Procedure
The User �ust not in any way atte�pt to repair or to take �ire�t that it is �learly �isi�le� near to the �oor or near to the �ontrol a�tion an� �ust solely �onta�t quali�ie� GENIUS personnel or �e�i�e� GENIUS ser�i�e �entres�... -
Page 18: Accessories
17 ACCESSORIES 17.1 Central support The �entral support (Fi�� ���) pro�i�es a �entral se�urin� point also �or the sin�le�pie�e sli�in� �ui�e� Fig. 36 � For the �onne�tions� re�er to the spe�i�i� instru�tions �or the CN60E sa�ety e��e� an� Fi�� �� o� these instru�tions� 17.4 Battery kit Fig. -
Page 19: Troubleshooting
18 TROUBLESHOOTING Trouble Possible causes Solution When the learnin� pro�e�ure is starte�� The STOP an� FSW sa�ety �e�i�es are Che�k the LEDs’ status �ollowin� the the SET UP LED �lashes �ut the auto�ate� ena�le� also �urin� the learnin� sta�e� instru�tions o� the “Inputs status LEDs”� syste�... - Page 20 � At least e�ery si� �onths: arran�e a �he�k �y quali�ie� personnel o� the auto�ate� syste� an� the sa�ety �e�i�es� DESCRIPTION The ZODIAC 60 auto�ate� syste� is i�eal to auto�ate �alan�e� se�tional �oors o� sin�le �ara�es �or resi�ential use� The auto�ate� syste�s �onsist o� an ele�tro��e�hani�al operator� ele�troni� �ontrol unit an� �ourtesy li�ht �uilt into a sin�le unit�...
- Page 22 Les descriptions et les illustrations du présent manuel sont fournies à titre indicatif. GENIUS se réserve le droit d’apporter à tout moment les modifications qu’elle jugera utiles sur ce produit tout en conservant les caractéristiques essentielles, sans devoir pour autant mettre à...
Need help?
Do you have a question about the ZODIAC 60 and is the answer not in the manual?
Questions and answers