Table of Contents
Advertisement
Quick Links
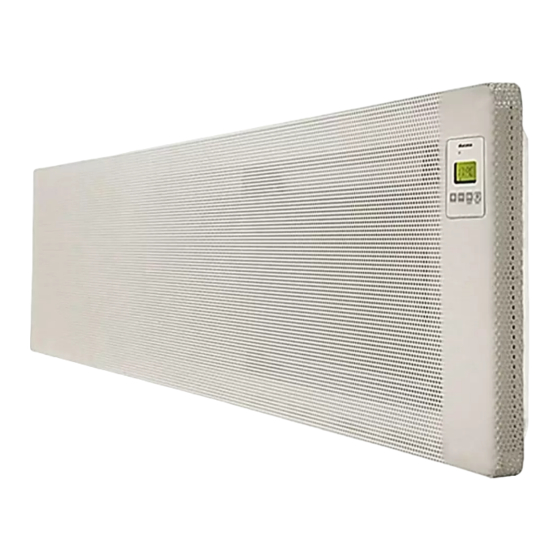
The 'Sunrise Eco-Pro'
SR03D-EP
1250w Programmable Low Level Radiant Panel Heater
Class II Rated Appliance
NOTE:
A qualified electrician must carry out the electrical installation of this product. The electrical
installation must comply with the current UK regulations. Any claim on the warranty could be
invalid if these requirements have not been met.
1
Advertisement
Table of Contents

Related Manuals for Ducasa Sunrise Eco-Pro SR03D-EP


Summary of Contents for Ducasa Sunrise Eco-Pro SR03D-EP
- Page 1 The ‘Sunrise Eco-Pro’ SR03D-EP 1250w Programmable Low Level Radiant Panel Heater Class II Rated Appliance NOTE: A qualified electrician must carry out the electrical installation of this product. The electrical installation must comply with the current UK regulations. Any claim on the warranty could be invalid if these requirements have not been met.
-
Page 2: Table Of Contents
INDEX IMPORTANT SECURITY INFORMATION ............3 INSTALLATION ...................... 5 USING THE HEATER .................... 5 MAIN SWITCH ....................... 6 OPERATING INSTRUCTIONS ................6 STAND-BY FUNCTION ................... 6 MODE SELECTION ..................7 CHARACTERISTICS ..................7 ADJUST PROGRAMMED TEMPERATURES ..........7 SETTING PROGRAMME AND CLOCK............8 KEYPAD LOCKING (ANTI-TAMPER) .............. -
Page 3: Important Security Information
IMPORTANT SECURITY INFORMATION • This appliance can be used by children aged 8 years and above and persons with reduced physical, sensory or mental abilities or lack of experience and knowledge, if they have been given supervision or appropriate training regarding the use of the device in a safe way and they understand the dangers involved. - Page 4 • All repairs where required must be completed by the manufacturing company or by special authorised staff. • If the heater is sold without cable and plug or any other disconnecting method, the installer must incorporate a disconnecting device taking into account the specific regulations that apply.
-
Page 5: Installation
INSTALLATION Select a suitable position on a wall, near to a mains power socket (but not directly below it) making sure there is at least 75mm below and 10mm above the heater of unobstructed space if the window sill protrudes less than 40mm. -
Page 6: Main Switch
MAIN SWITCH Switching ON (Master): Once the heater has been mounted on the wall and correctly connected to the main electricity power supply, press the main On-Off switch on the right hand side of the heater so that it’s in the “on”... -
Page 7: Mode Selection
MODE SELECTION The following screens show MANUAL, AUTO and OFF modes. To choose different modes press MODE/ OK button. When the heater is in AUTO mode the temperature can be changed by pressing the +/- buttons. This change will remain active until the next programme change or until midnight when the temperature will revert to the preset value. -
Page 8: Setting Programme And Clock
SETTING PROGRAMME AND CLOCK To start programming press and hold CONFIG/PROG button for 3 seconds and the following screen will appear: Programming starts on Monday at 00:00 and is set by choosing the required Mode for each hour of the week. -
Page 9: Degrees Fahrenheit Or Celsius (C1)
Degrees Fahrenheit or Celsius (C1) Select ºC or ºF with the +/- buttons and confirm with OK button. Type of Control (C2) This advanced setting shows the type of control currently used. There are 5 types of control: PID, hysteresis of 0.25ºC, hysteresis of 0.35ºC, hysteresis of 0.50ºC and hysteresis of 0.75ºC. -
Page 10: Open Window Detection (C5)
Open Window detection (C5) In order to save energy, if a window opens and causes a sudden drop in temperature the heater will stop heating. By default this function is deactivated. To change the status of the function, press the +/- button and then press the OK button to confirm. -
Page 11: Default Values
Default Values • Working Mode: OFF • Comfort Temp : 19ºC • Economy Temp : 17ºC • Frost Protection Temp : 5ºC • Manual Mode Temp: 19ºC emperature Compensation: 0ºC • • Temperature Units ºC • Control Type: PID • Default Programme: All Economy •... -
Page 12: Ecodesign Table
ECODESIGN TABLE Models Sunrise SR03D-EP Heat output Nominal heat output (P 1.25kW Maximum continuous heat output 1.25kW max,c Auxiliary electricity consumption At nominal heat output (el 0.00037 kW At minimum heat output (el 0.00037 kW In standby mode (el 0.00037 kW Type heat output/room... -
Page 13: Quick Guide To Manual Programming
QUICK GUIDE TO MANUAL PROGRAMMING... - Page 14 Installation Notes:...
- Page 15 Installation Notes:...
- Page 16 MAINTENANCE AND CARE Ducasa heaters require very little maintenance. The surfaces of the heater must not be cleaned with an abrasive product or those containing granular substances. We recommend regular cleaning with PH neutral products. In order to clean the heater, it is recommended that the electric power is switched off.
Need help?
Do you have a question about the Sunrise Eco-Pro SR03D-EP and is the answer not in the manual?
Questions and answers