Advertisement
Quick Links
Advertisement

Related Manuals for ring Door View Cam


Summary of Contents for ring Door View Cam
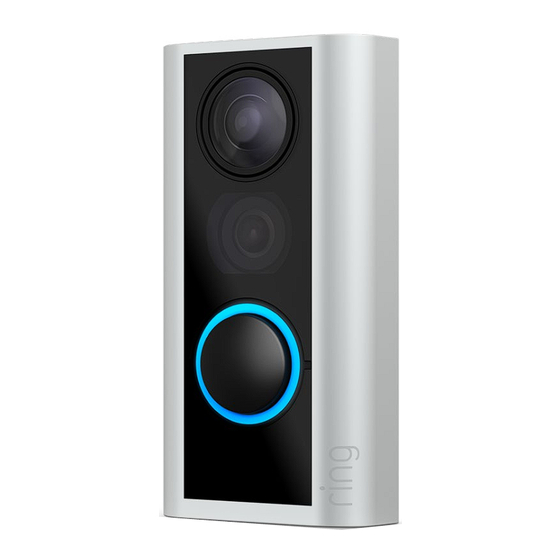
- Page 1 Door View Cam Model: G63R9A...
- Page 2 Search for “Ring” in one of these app stores, Download from Windows Store or visit: ring.com/app. Grab your Wi-Fi password. Indoor Side Outdoor Side You’ll need it later to set up your Door View Cam. Write it down below so it’s handy when you need it:...
- Page 3 Remove the indoor half. Remove the outdoor half. On the indoor side, place the flat With the indoor side removed, edge of the Door View Key into the the outdoor portion should slots on your peephole and rotate slide right out. counter-clockwise to unscrew it.
- Page 4 Check the edges of the hole. Smooth the edges. After you’ve removed your peephole, inspect both sides of the hole If the hole in your door is smooth, skip ahead. (indoors and outdoors) for sharp or jagged edges. If there are sharp or jagged edges, use the Door View Key to smooth the opening.
- Page 5 On the indoor side, remove and the tube through the hole until your discard the protective orange cap Door View Cam is flush with the door. from the end of the tube. Now head inside... We’ll continue setup from this side of...
-
Page 6: Remove The Rear Cover
You might need the included adapter. Remove the rear cover. It’s used to support larger door view holes. Let’s find out if it’ll fit yours... Grasp the thin edge of the indoor assembly body, and pinch the cover at the indentations. Remove the adapter from the Door View Kit tray. - Page 7 Using either your fingers or the Door View Key, twist clockwise and tighten firmly to make sure your Door View Cam doesn’t rotate freely. Once again, you may have to hold the Once secure, check the outdoor assembly. It may shift slightly while outdoor assembly in place to keep it from tightening, so make sure it’s level.
- Page 8 Gently pull the cable taut, then Slide the charged battery into the bottom of firmly press the connector into your Door View Cam until it clicks into place the port on the indoor assembly, (don’t put the cover back on just yet).
- Page 9 SG 001 800 8700 9781 MY +60 1-800-81-8772 Worldwide +1 310 929 7085 For a list of all our customer support numbers, visit: ring.com/callus © 2019 Ring LLC or its affiliates. Ring and all related logos are trademarks of Ring LLC or its affiliates.
Need help?
Do you have a question about the Door View Cam and is the answer not in the manual?
Questions and answers