Table of Contents
Advertisement
Quick Links
Advertisement
Table of Contents

Summary of Contents for Heltun HE-TPS01
- Page 1 TOUCH PANEL SWITCH SOLO HE-TPS01 USER MANUAL for Hardware v.60 & Firmware v.2.2...
-
Page 2: Table Of Contents
Table of Contents Overview ................................... 3 Technical Specifications ..............................3 Functions & Features ................................ 4 Installation ..................................5 Disassembly ..................................6 Factory Reset ..................................6 Z-Wave Network................................6 Adding to Z-Wave network ............................6 Removing from Z-Wave network ..........................6 Security .................................. -
Page 3: Overview
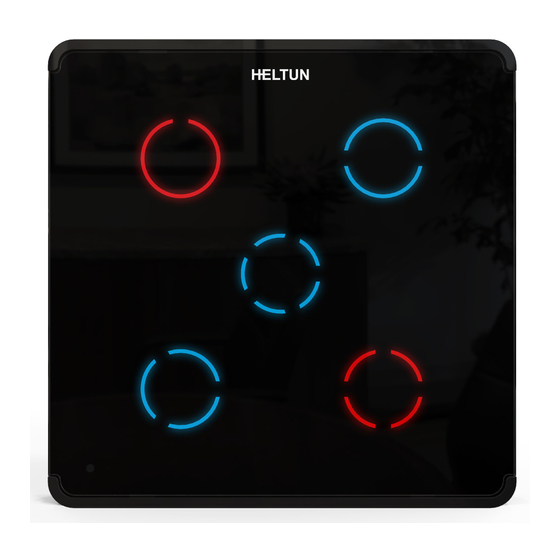
Overview This is the user manual for the HELTUN HE-TPS01 Advanced Programmable Touch Panel Switch. The HE-TPS01 brings ‘Impossibly Smart’ capabilities to your home lighting, electric outlets, door locks, gates, and valves. It replaces an existing in-wall switch and brings over-the-Internet monitoring, control, and advanced programmability to one connected device. -
Page 4: Functions & Features
Accuracy: ±0.5°C • Internal humidity sensor Measurement range: 0% to 80%RH Accuracy: ±3.0%RH • IP class: IP21 • Z-Wave Plus V2 SDK: V7.11 • Z-Wave module: ZGM130S • Requires mounting to flush electrical junction box: round or square type – min. depth 40mm Functions &... -
Page 5: Installation
WARNING: Electrical power must be switched off during installation. 1. Placement of the HE-TPS01 is of utmost importance for proper operation and must be away from sunlight and sources of direct heat. We recommend installing the HE-TPS01 approximately 1.5 meters above the floor. -
Page 6: Disassembly
Factory Reset To reset the HE-TPS01 to factory defaults, simultaneously press the two bottom hidden touch buttons and hold for 6 seconds. If successful, the central button will turn OFF then the device will reboot. -
Page 7: Smartstart
3. Wait for the inclusion process to complete. 4. Successful adding” will be confirmed by a message on the Z-Wave controller. Note: The device DSK and QR code are printed on the HE-TPS01 back panel plus on the Security Card included in the HE-TPS01 packaging. -
Page 8: Associations
Associations Association enables the HE-TPS01 to control other Z-Wave devices over the network. The HE-TPS01 has 3 Endpoints and 5 Association Groups. Each Association Group (except group 1) may include one other device from different brands and/or manufacturers. EndPoint 0 Groups: The Root Device (EndPoint 0) of HE-TPS01 has 5 association groups Group 1 –... -
Page 9: Settings (Available Through Z-Wave Network)
(see Parameter 30 settings). If the HE-TPS01 is included to the Z-Wave gateway, the scene controller, light, temperature & humidity sensors info, and two binary switches will appear. The scene controller indicates if the button was pressed, held, or released and allows the running of scenes on the Z-Wave gateway. - Page 10 1 byte Week Day 1, 2, 3, 4, 5, 6, 7 0 … 2359 2 bytes Time: Hour and Minutes 23-29 Reserved by the manufacturer 1 byte Active state backlight color 0, 1 1 byte Backlight control source 0, 1, 2 32-40 Reserved by the manufacturer 1 byte...
-
Page 11: Z-Wave Frequency
Button Backlight Brightness The HE-TPS01 has two brightness levels for its button backlight: 1) Active Level – when the button is touched, its backlight becomes brighter, and 2) Inactive Level – after one second of inactivity, its backlight dims. The actual... -
Page 12: Touch Sensitivity
Parameter 19 – Time Correction by Main Controller If this Parameter value = 1 and the HE-TPS01 is connected to a Z-Wave gateway, the HE-TPS01 time and day will be periodically polled and corrected from the gateway. To switch off auto-correction set the Parameter value to 0. The factory default value is 1. -
Page 13: Button Mode
Scenarios can be created that allow connected devices to be triggered by a sensor or onboard Real Time Clock (RTC). The HE-TPS01 has built-in temperature, humidity, and ambient temperature sensors and includes a very flexible, user- friendly interface for customizing scenarios. In addition to the physical sensors, time may be used as a control source. -
Page 14: Sensors Report Interval
EFGH: Condition Value “Sensor Value” for Control modes 0, 1, and 2, or “Time” for Control mode 3. If Temperature sensor has been chosen as a source in the control mode, the value should be x10, e.g. for 24.5°C use the value 0245. If Time control has been chosen as a source in the control mode, the device logic will process values EFGH from 0 to 23:59 (in time measure), all other values will be ignored. -
Page 15: Association Commands Configuration
Parameter 146 – Light Sensor Report Threshold This Parameter determines the change in the ambient environment illuminance level resulting in a light sensors report being sent to the gateway. From 10% to 99% can be selected. Use the value 0 if there is a need to stop sending the reports. -
Page 16: Limited Warranty
HELTUN, at HELTUN's option, shall either repair or replace the defective product. If the product is defective, (i) return it with dated proof of purchase to the place it was purchased; or (ii) contact HELTUN Customer Care by email at support@heltun.com.


Need help?
Do you have a question about the HE-TPS01 and is the answer not in the manual?
Questions and answers