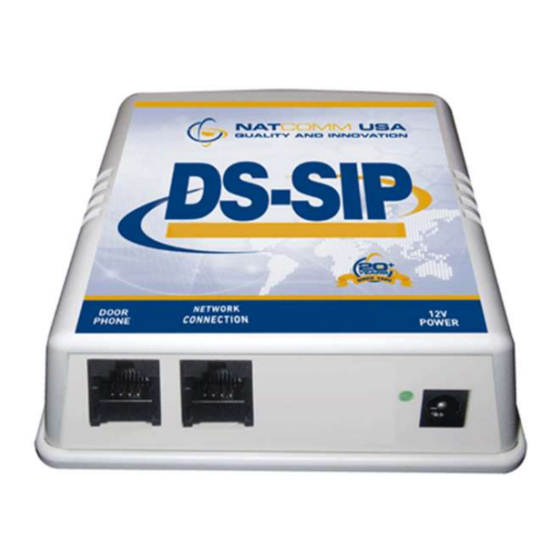
Summary of Contents for NatComm DS-SIP
- Page 1 DS-SIP USER GUIDE For Technical Assistance Please Ph: 07 5596 5128 or Email : info@natcomm.com.au...
- Page 2 You will be emailed an FTP Link to download the DS-SIP setup program : Natcomm_IP_Controller.exe DS-SIP is supplied as a complete kit, ready for quick and easy installation by a technician or an end user with some IT experience. A connection box and a short CAT5 cable is supplied to connect DS-SIP to the...
- Page 3 DOOR PHONE RANGE A choice of Four Door Phones is provided for use with our range of Door Station Controller units: Model DP1 - SURFACE MOUNT Molded plastic unit, designed for easy surface mounting direct onto your wall surface. ...
- Page 4 DOOR PHONE COVERS If your Door Phone is not under cover, a Strong Transparent DOOR PHONE COVER is highly recommended to prevent water from gradually permeating through to the electronics of the Door Phone. RRP is just $39.00. Model DPC1 for DP1 Door Phone ...
-
Page 5: Operation
OPERATION DS-SIP is designed for use with ANY IP or Cloud PBX System. It can connect to ANY Network Point. The IP Address of DS-SIP is then set up as an Extension and it can be called if required from Any Handset on the same PBX system. - Page 6 SIP INSTALLATION A Windows based program (called Natcomm SIP Controller) is supplied for your DS-SIP unit. This program is designed for use on PC running Windows 7 or later (on your same network). Install the program by double clicking the supplied Program file.
-
Page 7: Connecting The Door Phone
Connection to ANY Natcomm Controller. A 4 Pin Phoenix Plug is supplied with all Door Phones which allows 4 wires from the Door Phone to connect to the DS-SIP Controller. A solid core cable should be used to interconnect the devices. Cat5 cable is ideal and will allow the units to be up to 300m apart without any loss of performance. -
Page 8: Lock Control
Recorder or Light. Relay Specification - Dry Relay Contacts rated at 12V/1Amp. Do not use the supplied DS-SIP Controller 12V plug pack to also provide 12V power for the lock, as this may cause damage to DS-SIP. You must use a separate 12V source, with a maximum rating of 12V/1A. -
Page 9: Lock Installation
Lock 2 or Device 2 should connect to the Blue and White terminals. NOTE- Do not use the supplied DS-SIP Controller 12V plug pack to also provide 12V power for the lock, as this may cause damage to DS-SIP. You must use a separate 12V source, with a maximum rating of 12V/1A. -
Page 10: Important Notes
3) DO NOT use a telephone in close proximity to the door phone, as feedback interference will affect the Balance Pot settings. NOTE : The Balance POT does not increase volume. Moving it when unnecessary may cause deterioration in audio quality or a loss of audio in one direction. Page 10 Natcomm... - Page 11 These are back-ups in case any of the above methods fails to take place. DS-SIP Hang Up tone detection is very reliable and you are very unlikely to need either above option. They are provided in case DS-SIP is exposed to significant EMI Interference which could possibly affect Hang Up tone detection.
-
Page 12: Programming Options
PROGRAMMING OPTIONS DS-SIP Switch provides for Three User Programmable settings. Relay 1 Closure Time Allowable Range 01 to 99 Default Setting is 15 seconds To Change from the Default Setting, in programming Mode, Press : #1xx Where xx = number of seconds and can be 01-99... -
Page 13: Programming Procedure
PROGRAMMING PROCEDURE You can program 1 or more parameters, in any order, during the same programming call. Should you need to program DS-SIP, please follow the procedure below : 1) Call the Extension Number to which DS-SIP switch is connected. - Page 14 Enter Phone 1 Then Enter Your Extension Number User Name Password Set to Hot Line and enter Number Then Scroll Down to the Bottom of the Page Then You MUST Click Save When complete You MUST Click Reload Above Page 14 Natcomm...
- Page 15 Make sure the Send Registration Request with Expire Time Is ticked. It should only be unticked for a direct peer to peer IP connection. Then Scroll Down to the Bottom of the Page You MUST Click Save SIP Settings Natcomm Page 15...
- Page 16 Changing from DHCP to Static IP Go into the Settings Menu Enter Settings Menu Deselect DHCP Here Enter Static IP Settings Here or Here Scroll Down to the Bottom of the Page You MUST Then Click Save and Reload Page 16 Natcomm...
- Page 17 Then Scroll Down to the Bottom of the Page You MUST then Click save If you do not need to make any further changes, go to Section G and Reload. Otherwise your changes will not be effected. Natcomm Page 17...
- Page 18 There will be a short delay while the ATA resets itself Downloading the ATA User Guide Go into the Users Guide Menu Select the Users Guide Menu A PDF User Guide will then download to your PC Page 18 Natcomm...
- Page 19 NOTES Natcomm Page 19...
-
Page 20: Specifications
Damage caused to this device or attached equipment by lightning strikes, over voltage surge or excessive water is not covered under this warranty. THE CASE IS SEALED AT THE FACTORY. OPENING THE CASE WILL VOID THE WARRANTY. Page 20 Natcomm...


Need help?
Do you have a question about the DS-SIP and is the answer not in the manual?
Questions and answers